Double Exposure is two or more combinations in one image to create some overlapping effects. This tutorial will show you how to create double exposure with two images and blending them using masking and layer adjustment in GIMP easily.
What you will learn
- Moving, Scaling Object
- Deselect object
- Adjusting Curves
- Adjusting Levels
- Create a Layer Mask
- Duplicate a Layer
- Creating new Layer
- The technique to cut out images
Tutorial Steps
Step 1
Create a new landscape document size 1920 x 1080px in File > New.

Step 2
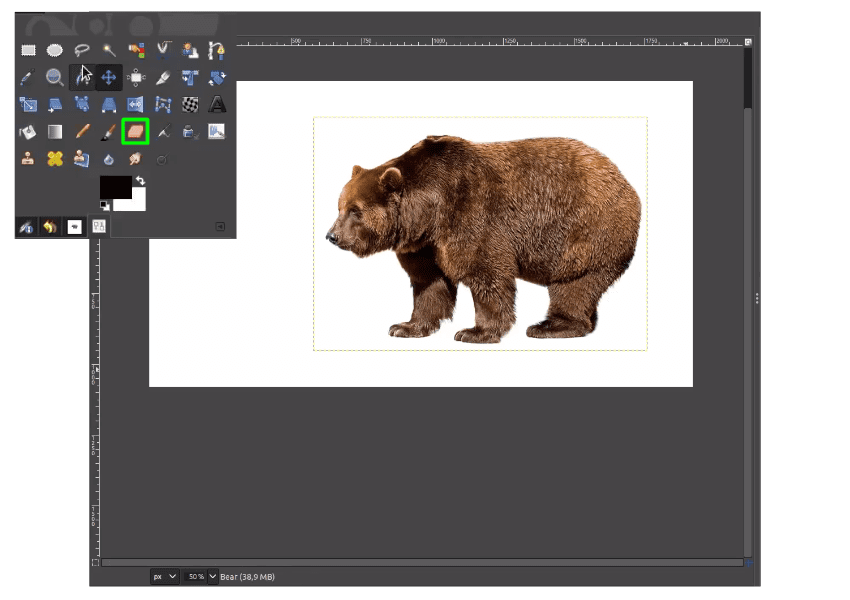
Import the bear png in File > Open as Layers and Eraser Tool (Shift+E) to erase the Squirrel.
Step 3
Open the Trees image in File > Open then duplicate the layer.

Make it become black and white color in Colors > Desaturate > Desaturate.

Step 4
Make it darker with Curves in Colors > Curves, then drag it down.

Step 5
Then invert the colors in Colors > Invert.

Step 6
Make it become really black color because in masking black color for hiding some part and white for a reveal. With curves again in Colors > Curves.

Paint some part to black color outside the trees to refine the selection, with Paintbrush Tool (P).
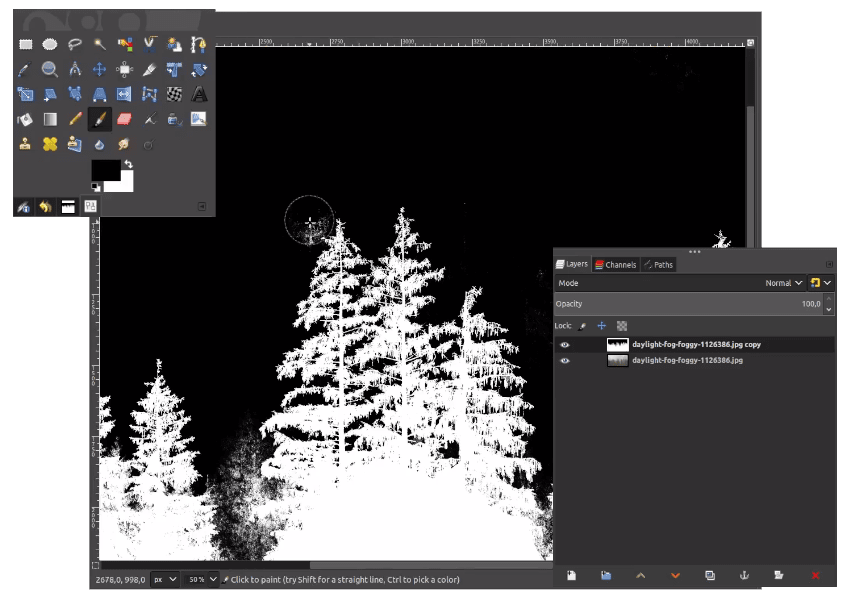
Result :

Step 7
Add a layer mask by Right-click on the layer > Add Layer Mask > White (full opacity)

Next, copy the layer into the Mask Layer by pressing Ctrl+C to copy Ctrl+V to paste then click the Anchor button to apply in the layer mask.

Apply the layer mask with Right Click > Apply Layer Mask.
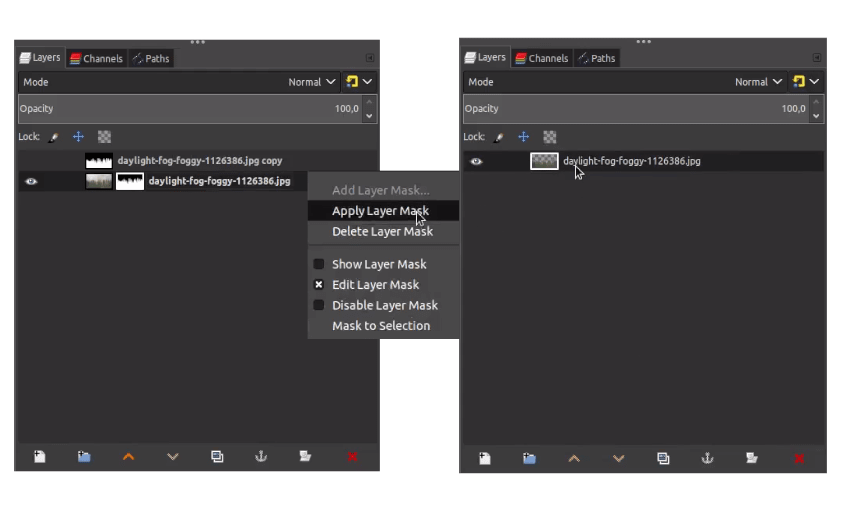
Drag the layer into the bear canvas.

Step 8
Reduce the trees’ opacity to find the best placement. Press Shift+S to scale it down hold Ctrl+Shift while scaling to make a proportional scale.

Step 9
If you have found the best placement, turn up the opacity again and place the layer below the bear.

Step 10
Make a selection to the bear, hold Ctrl then Click the bear layer (or it’s the same with right-click > alpha to selection to the bear layer) While in the selection, Add layer mask in the trees layer by Right Click > Add Layer Mask > Selection.
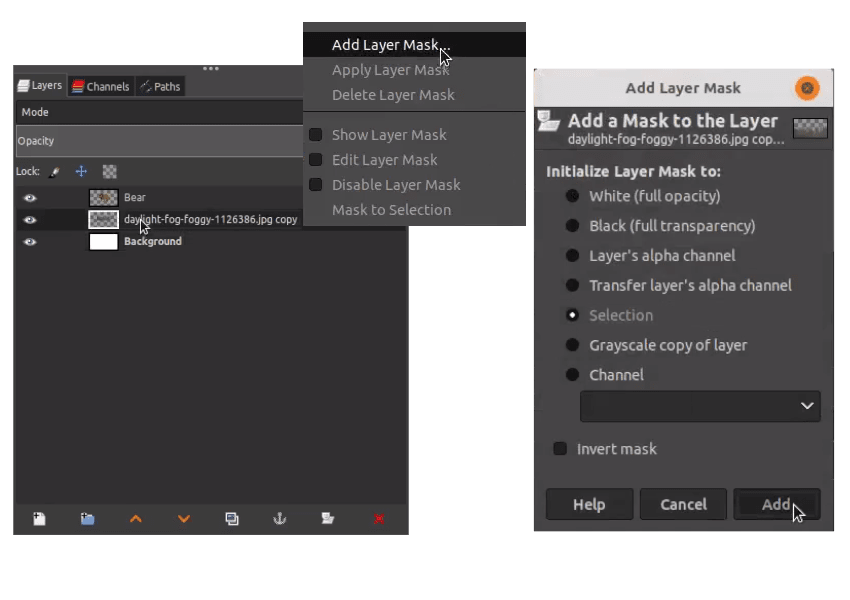
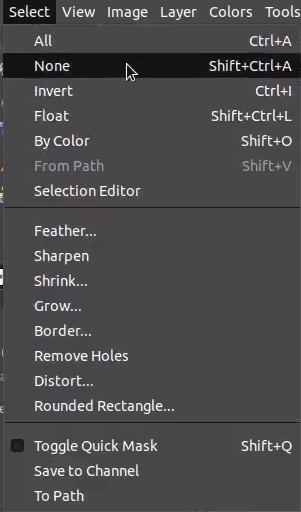
Deselect the selection in Select > None (Ctrl+Shift+A).
Step 11
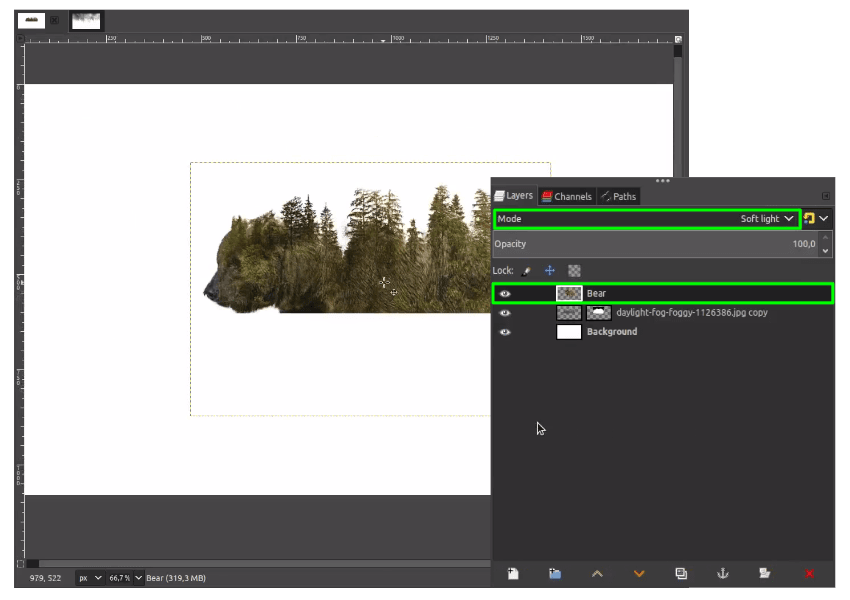
Change the bear layer into Soft Light.
Step 12
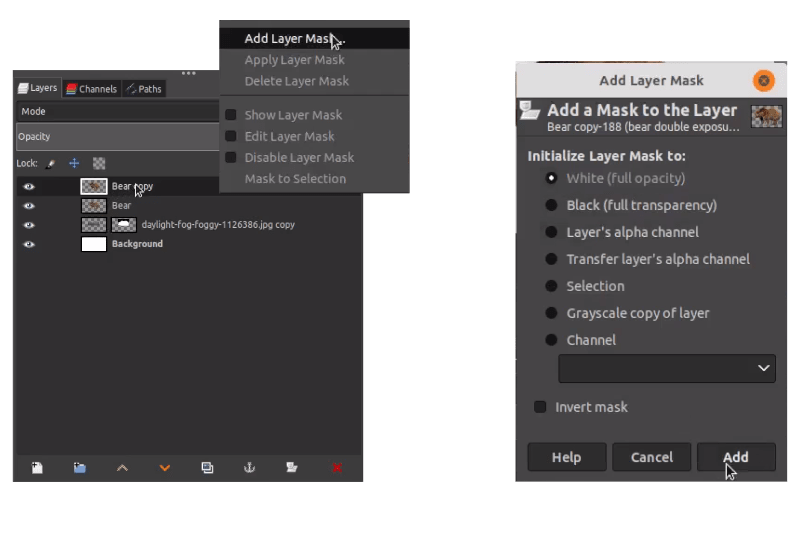
Duplicate the bear layer and change the layer mode into Normal.

Add layer mask in Bear copy layer Right Click > Add Layer Mask > White (full opacity).
Step 13
Brush the bear with black color, Paintbrush Tool (P) to hide the bear part in bear copy layer.

Step 14
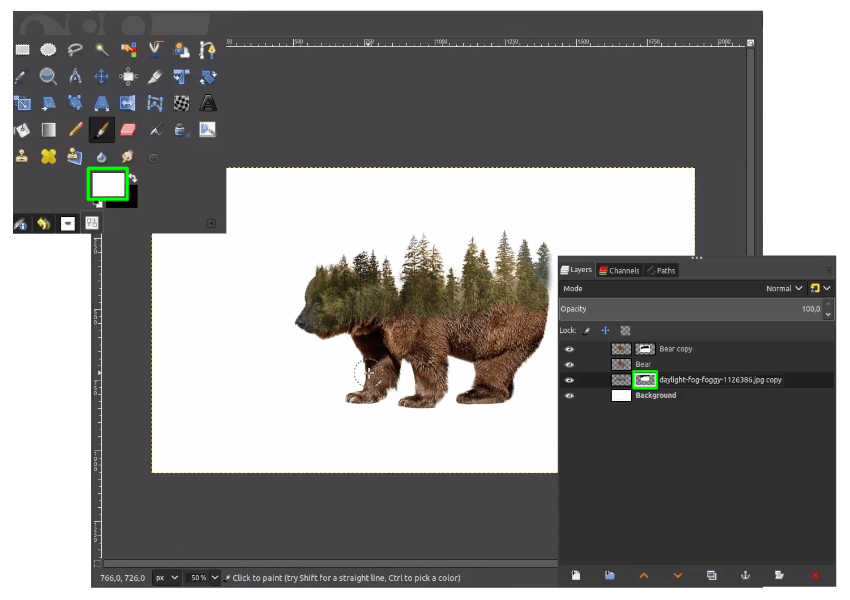
Reveal the trees with White color, Click Paintbrush Tool (P) brush in the trees layer mask.
Step 15
Change the color of the trees in Colors > Hue-Saturations make it match with the bear color.

Step 16
Add the texture in File > Open as Layers and choose the texture. Place it one step above the Background Layer.

Step 17
Hide some part by adding layer mask in the bear layer with Soft Light layer mode.
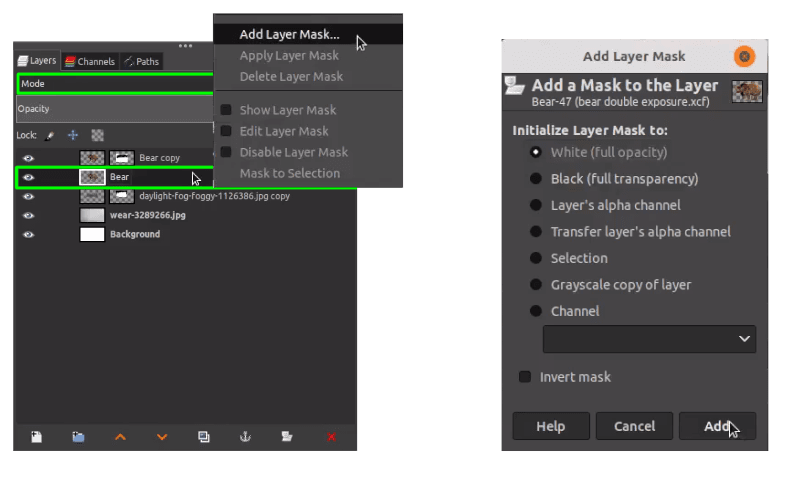
Brush with Paintbrush Tool (P) in black color.


Step 18
Create a new layer for the shadow, and with Paintbrush Tool (P) in black color, you can increase the aspect ratio to make it become ellipse.

Step 19
Add the flock of bird png in File > Open as Layers.

Step 20
Desaturate three layers as shown below in Colors > Desaturate > Desaturate.
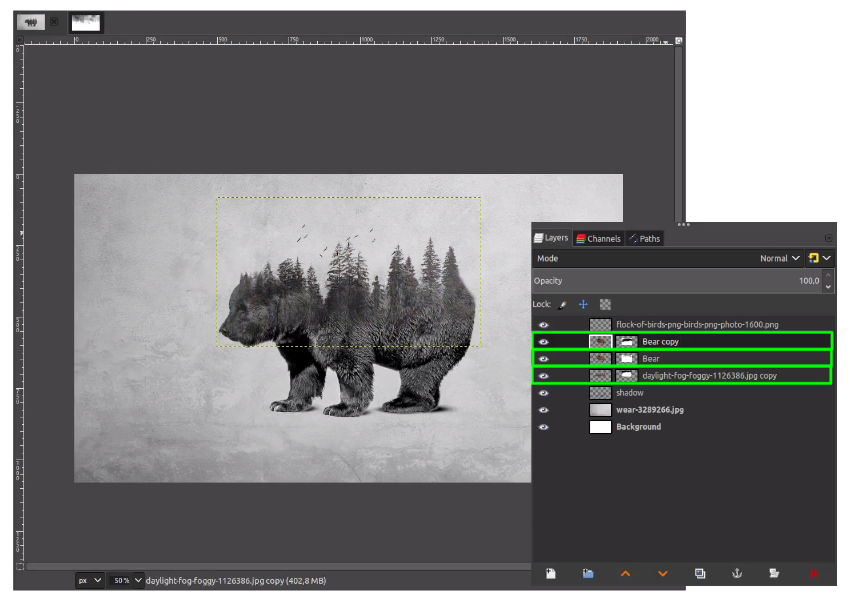
And adjust the levels to make it more contrast in Colors > Levels.

It’s Done!
I hope you learn how to create this double exposure effect using GIMP and selecting the difficult object with some cut-out technique to blend the images.


