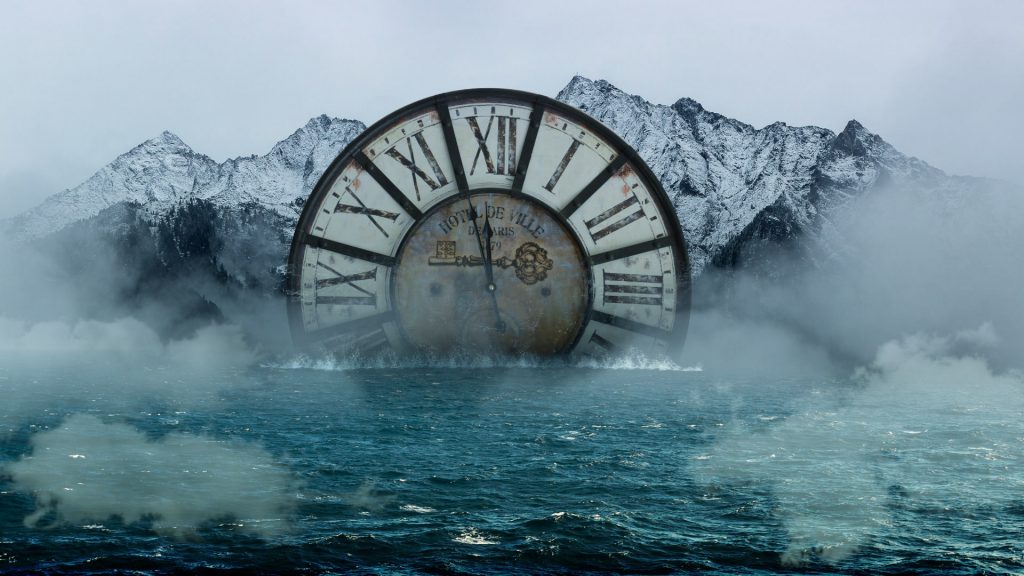
In this tutorial, you will learn a technique for how to create simple photo manipulation in GIMP. You will learn how to match the color, adding elements like fog and the mountain then blend them with layer adjustment and masking.
What you will learn
- How to add layer mask
- How to make brush
- How to use warp tool
Tutorial Steps
Step 1
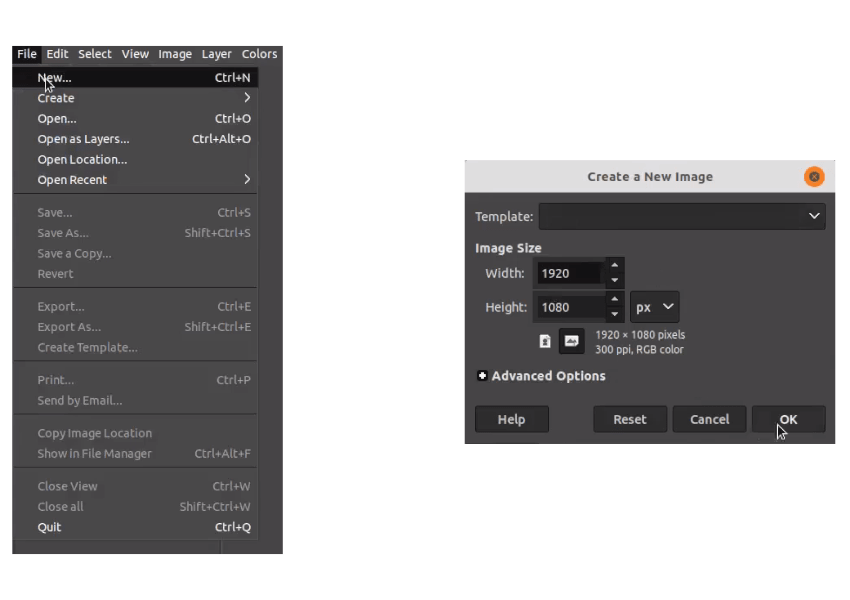
Create a new document in File > New and set the size to 1920 x 1080px.
Step 2
Open the sea images in File > Open as Layer and choose the Sea Images.
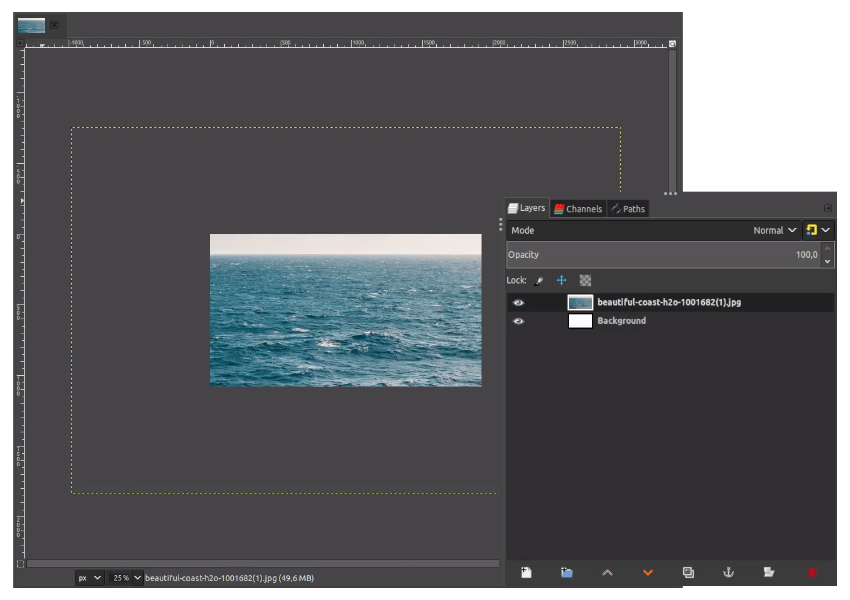
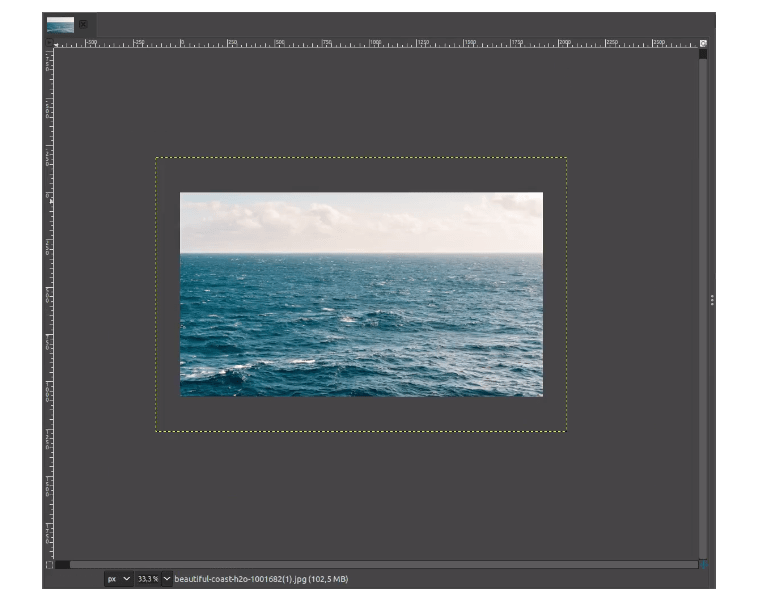
Scale it down a little bit by pressing Shift+S to scale then press enter.
Step 3
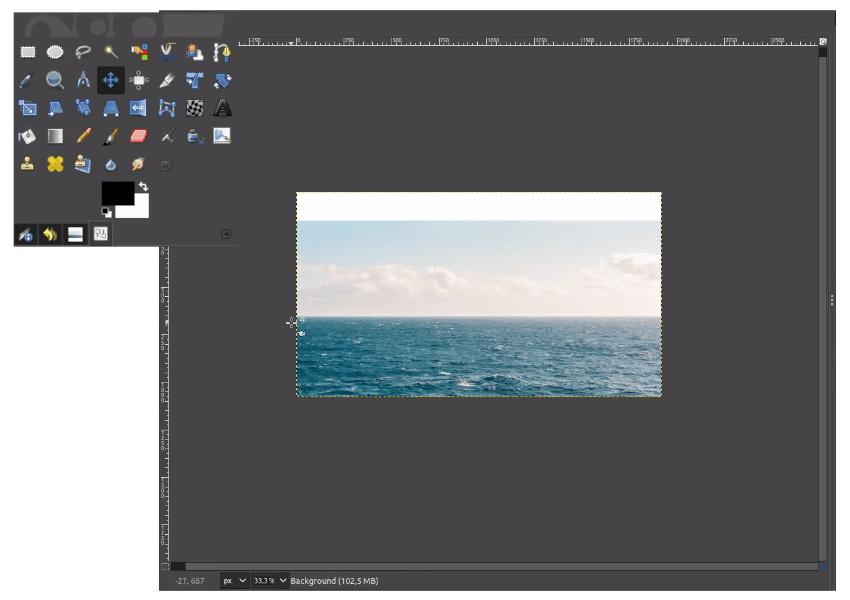
Move down a little with the Move tool (M) and drag it down.
Step 4
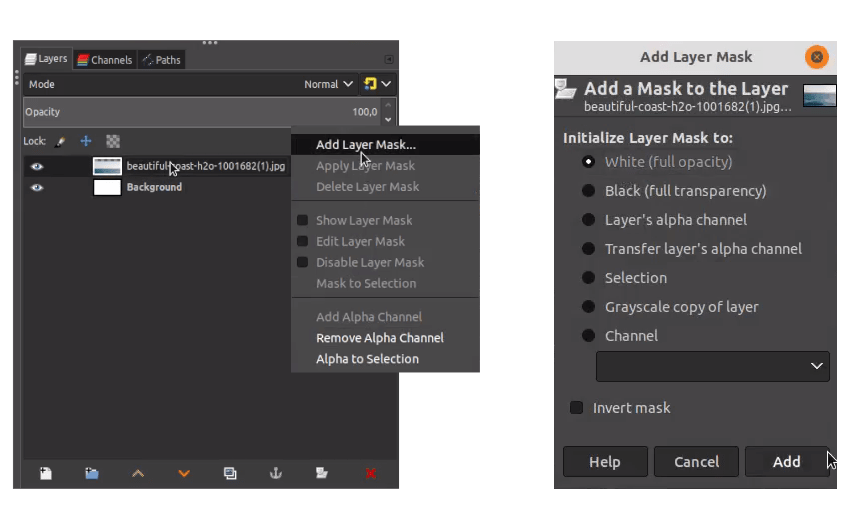
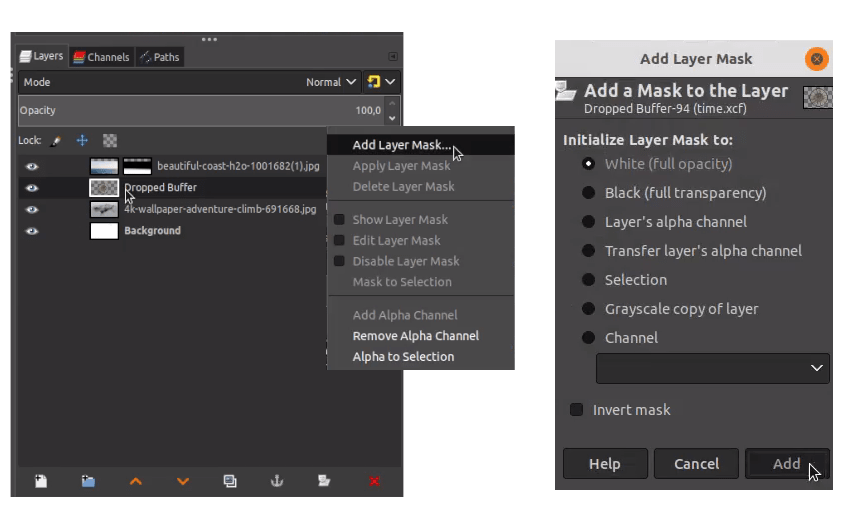
Add a layer mask to the sea layer, Right-click > Add Layer Mask > White (full opacity) > click Add.
Step 5
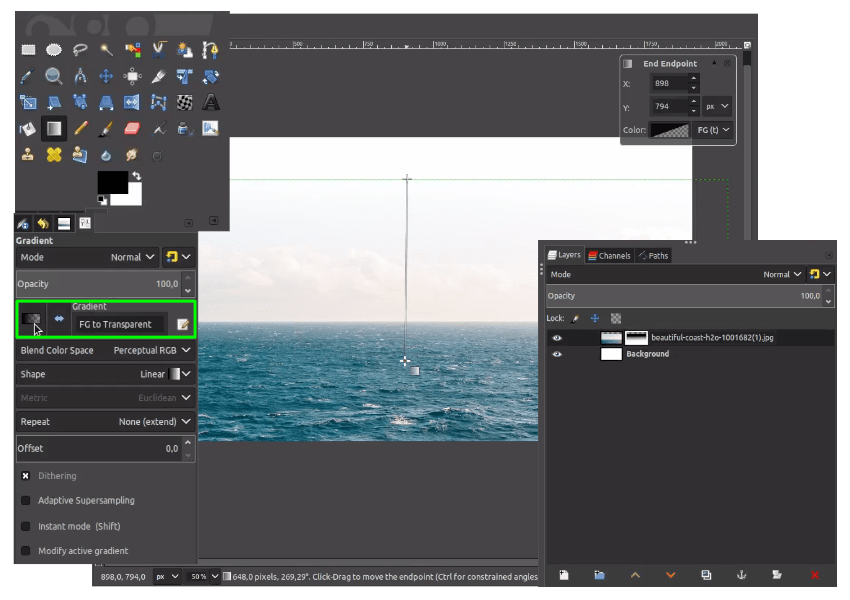
With Gradient Tool (G) change the gradient mode into FG to Transparent then just drag it down to the sea layer mask.
Step 6
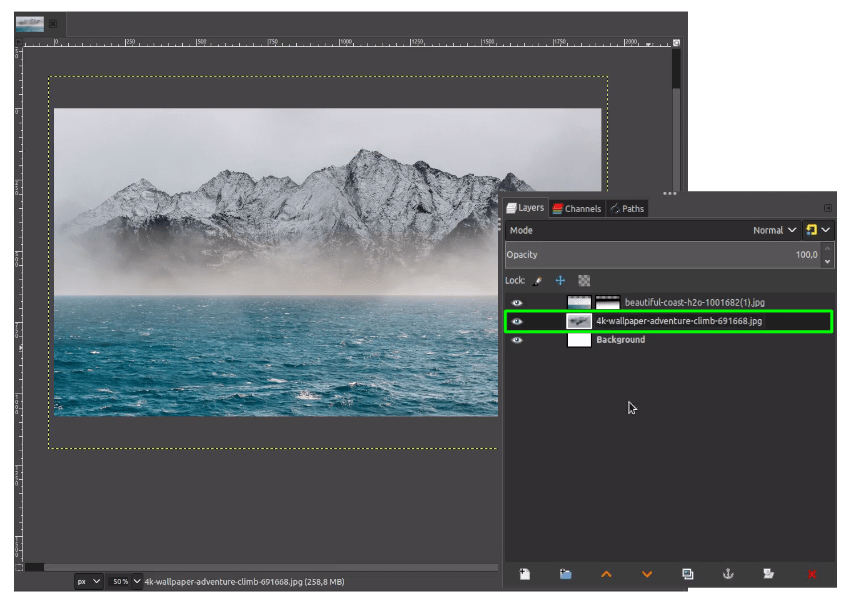
Add the mountain images in File > Open as Layers, Place the mountain layer below the sea layer.
Step 7
Open the Clock images in File > Open it will create a new tab for the clock images only. Then select the clock with Ellipse Select (E). After that, press Enter.
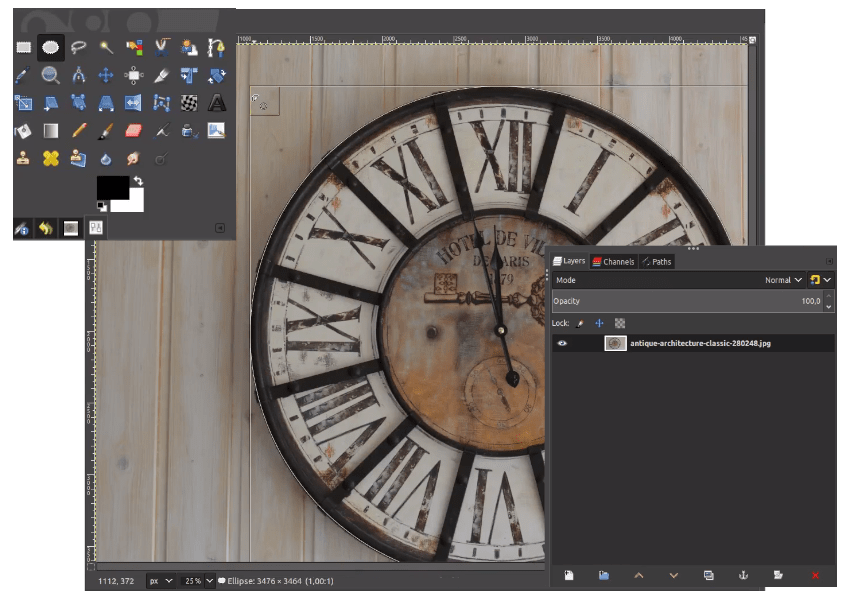
Step 8
While in the selection, press Ctrl+C to copy then Ctrl+V to paste. The floating selection will appear and click create new layer button.
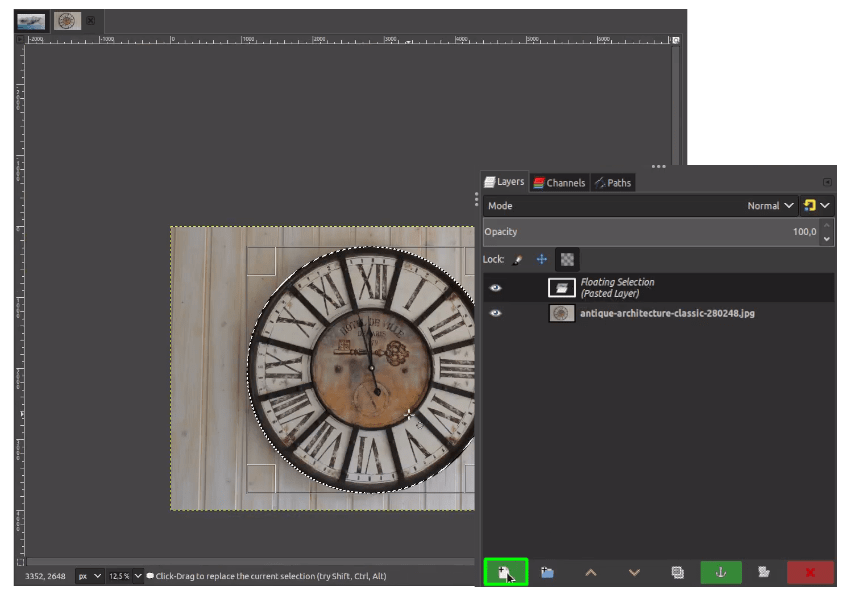
It will create a clock with no background.
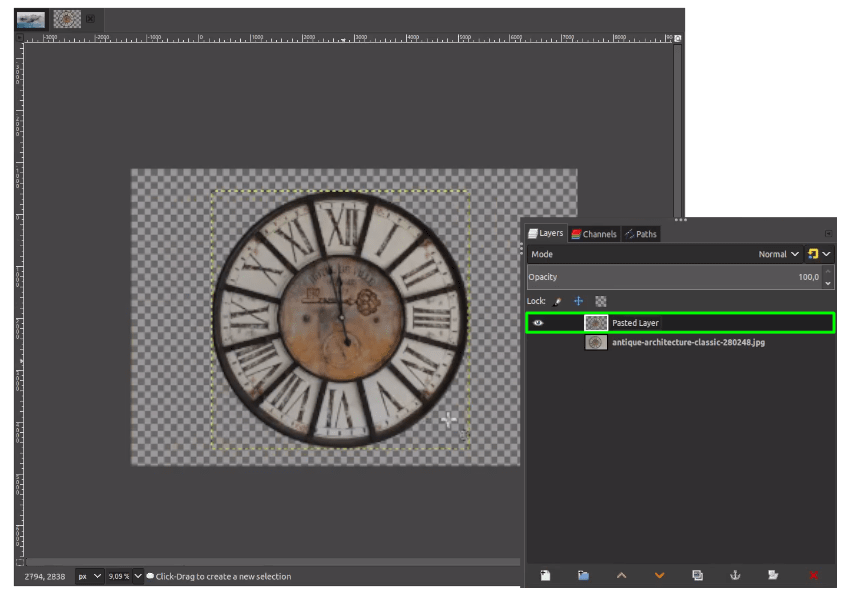
Step 9
Drag the clock layer to the previous file then place the clock below the sea layer.
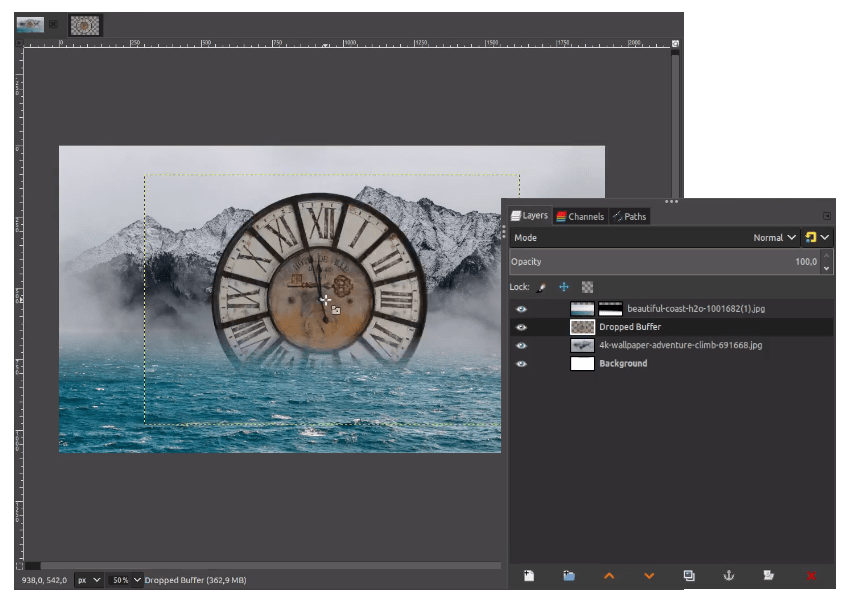
Step 10
Add a layer mask to the Clock layer by right click > add layer mask > White (full opacity) > click Add.
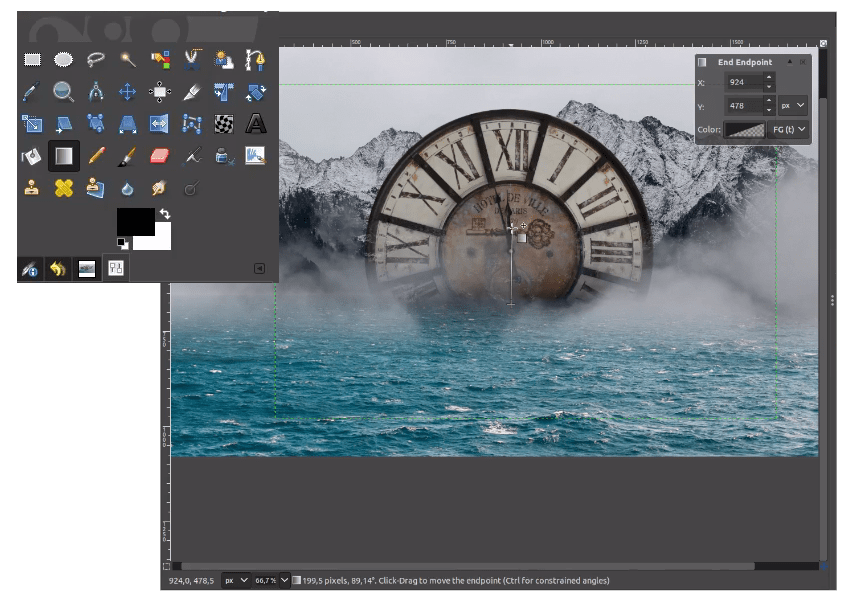
With black color activated, click Gradient Tool (G) then just drag it.
Step 11
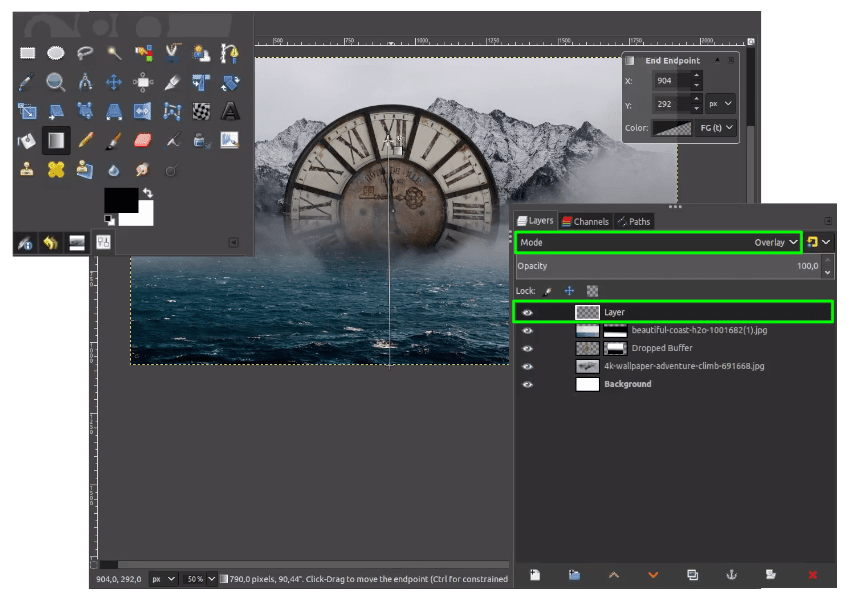
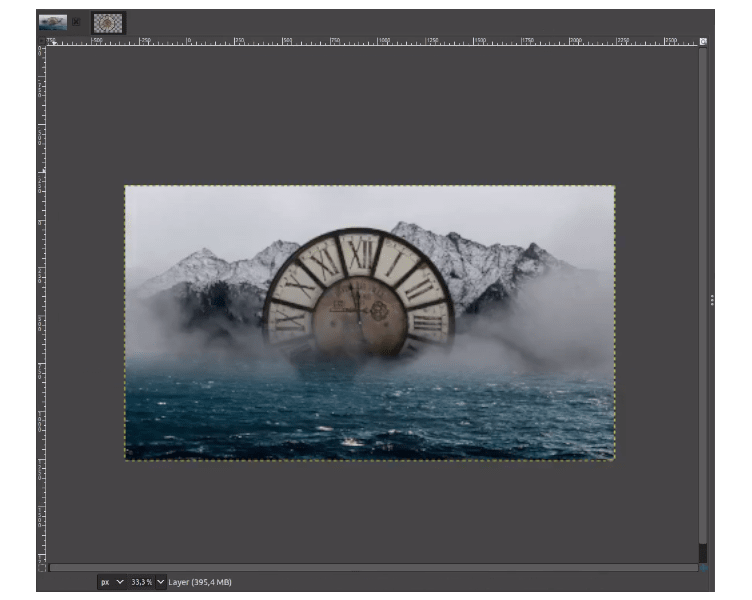
Make the sea more contrast by creating a new layer then with Gradient Tool (G) drag down until you see the black color, then change the layer mode to Overlay.
Result:
Step 12
Add the fog in File > Open as Layers choose the clouds png then reduce the opacity.
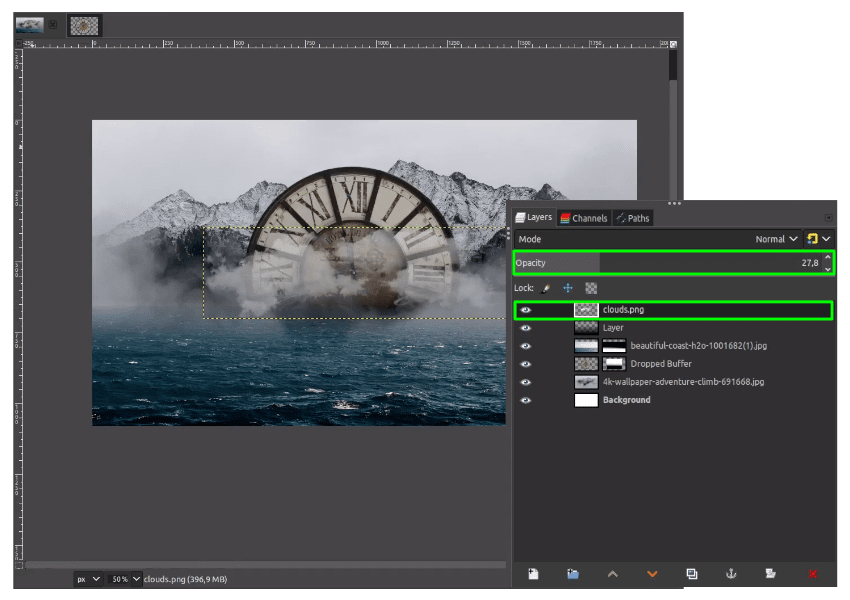
Add more fogs by duplicating the clouds png layer.
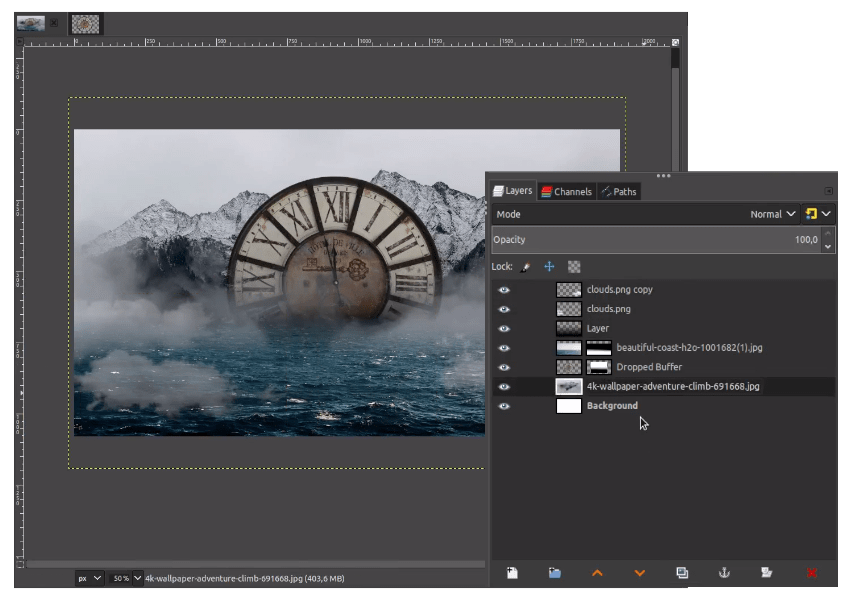
Step 13
Open splash png in File > Open as Layers.
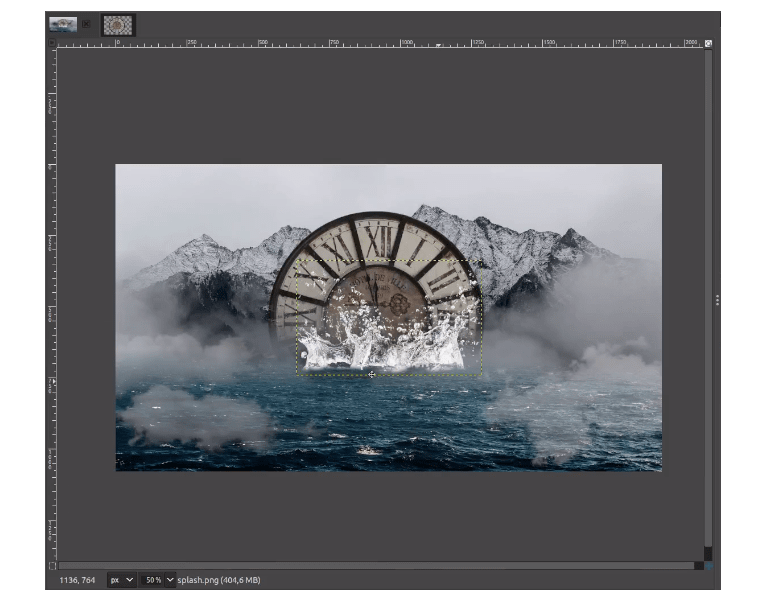
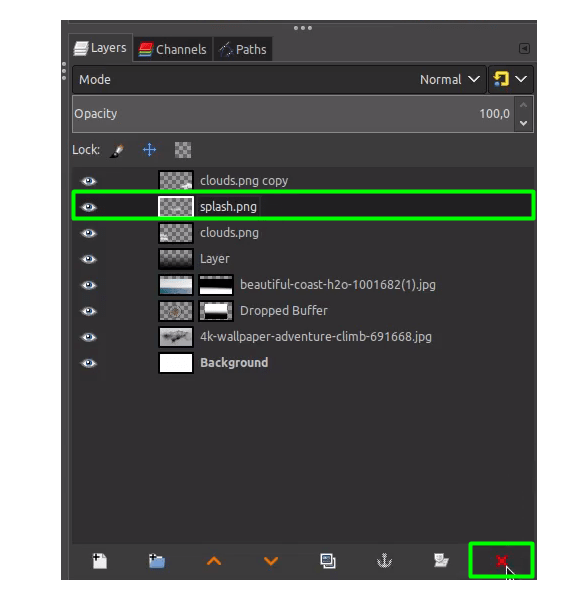
Now, we are going to create a brush from clipboard images. Click the splash layer then go to Edit > Copy.
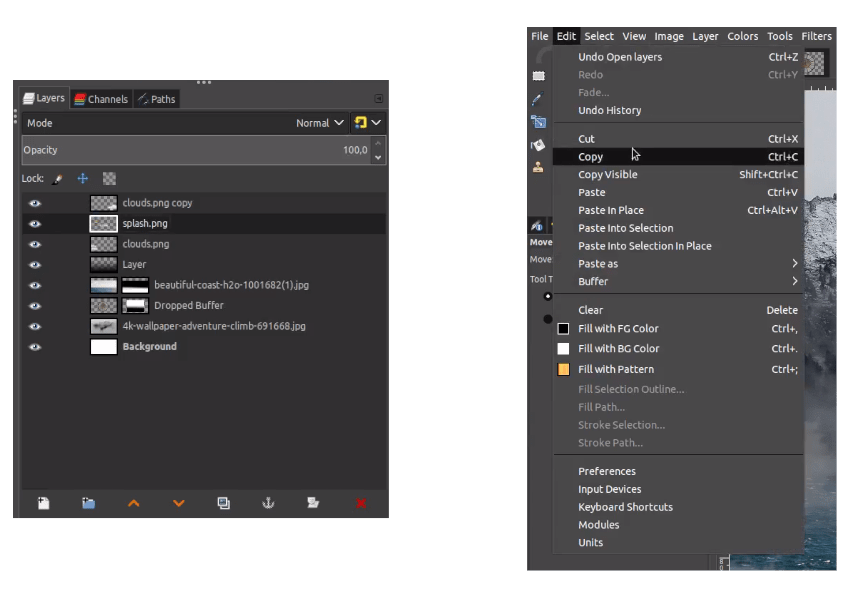
Delete the layer splash layer. Because we have the clipboard images in the brush.
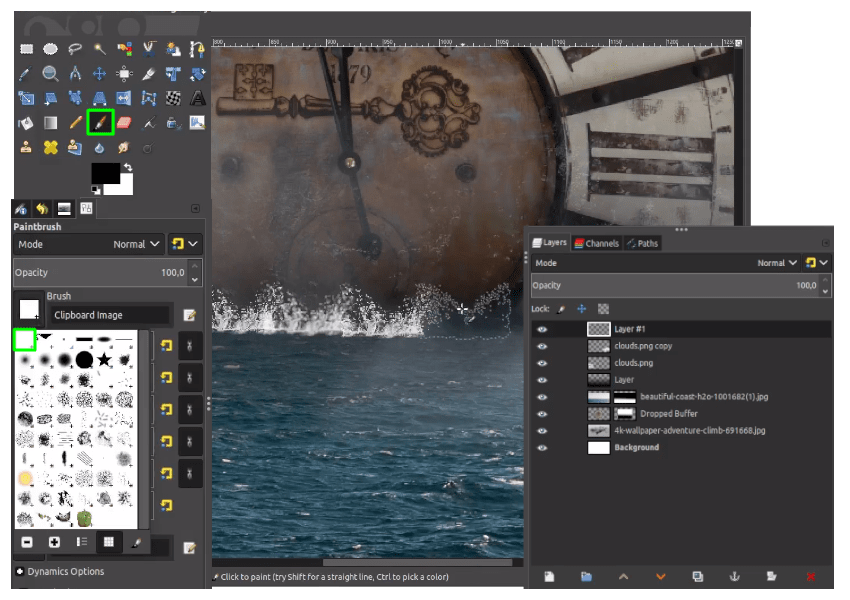
Create a new layer for the splash. Choose Paintbrush Tool (P) and click on the clipboard image it is the splash that you copy.
Step 14
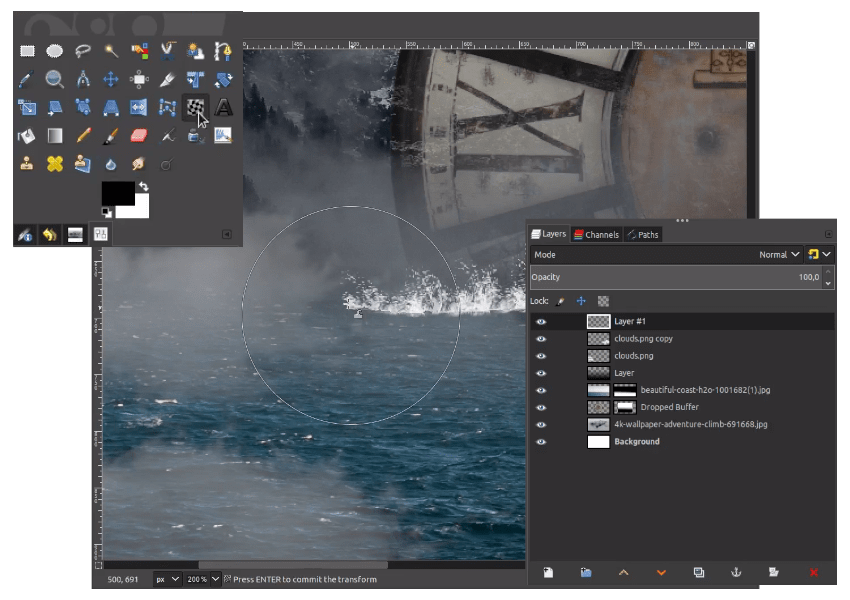
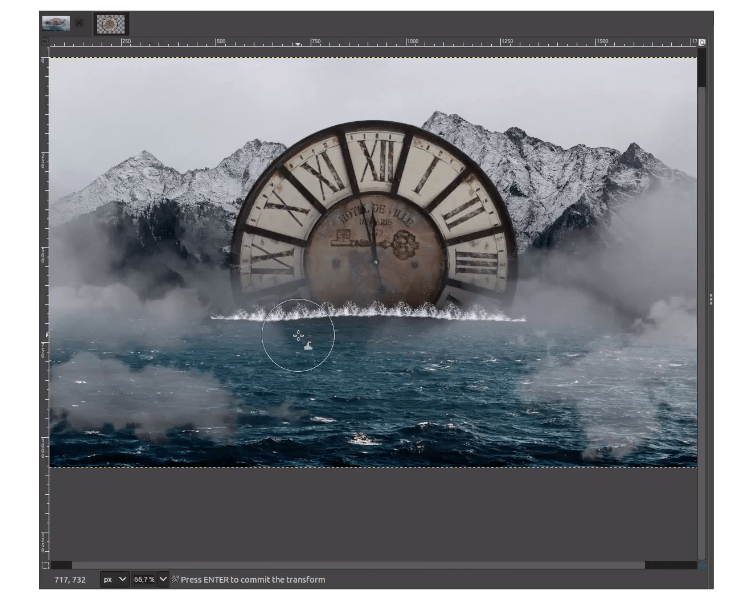
Make it Warp a little with Warp Tool (W) then drag to the splash.
Step 15
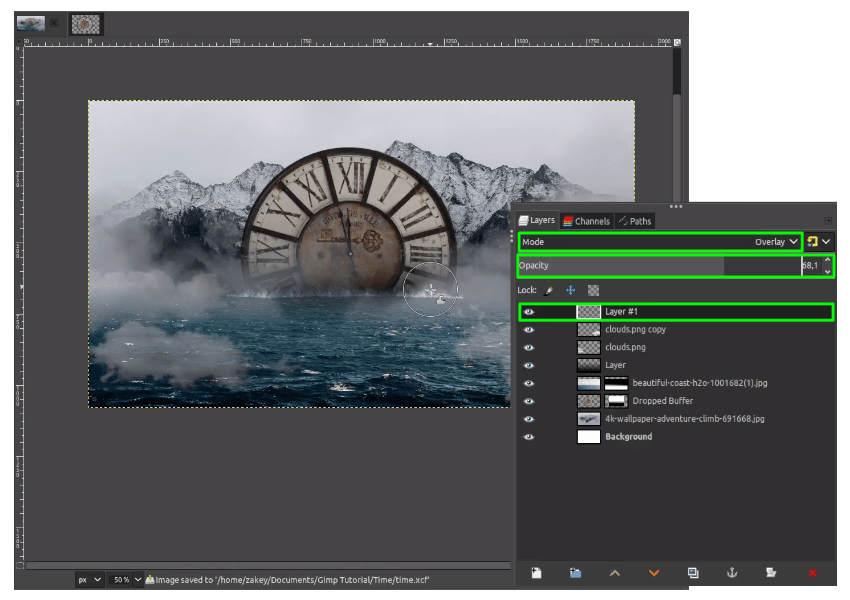
Change the splash layer mode into Overlay and reduce the opacity.
Step 16
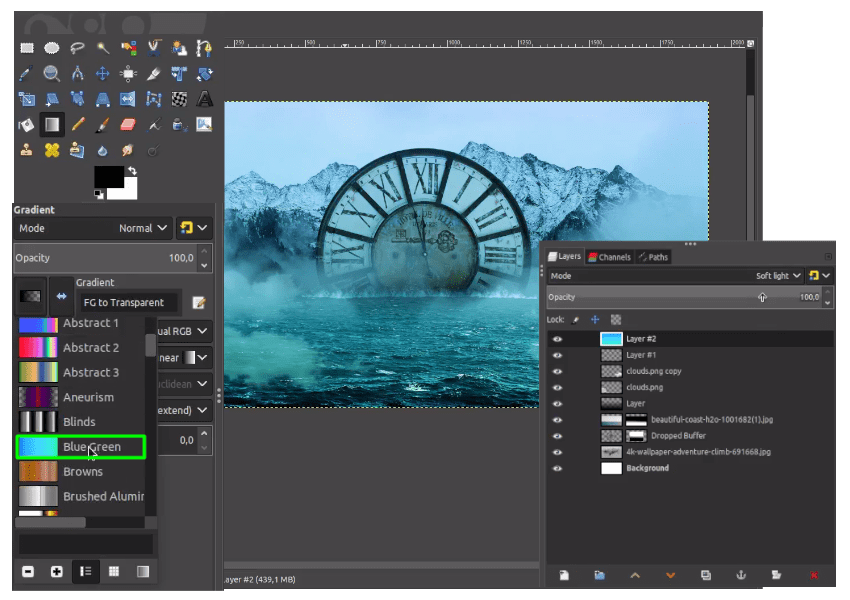
And the last, we are going to create a blue effect, create a new layer then change the layer mode to Soft Light. then with Gradient Tool (G) change the gradient mode to Blue Green and just drag it down.
Reduce the layer opacity.
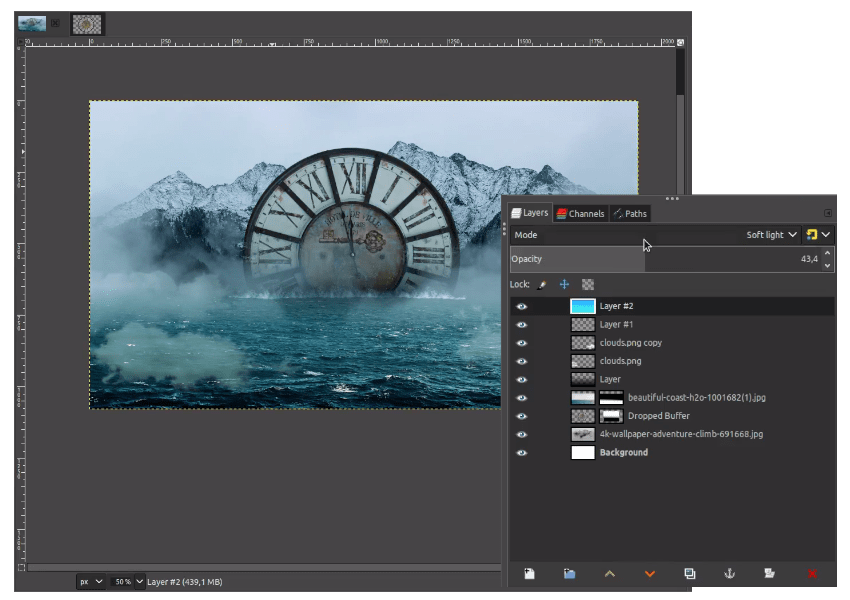
Your design is Ready!
I hope you learn something new about how to create this simple photo manipulation. Little creepy, but it’s amazing!
