Hi everyone! in today’s tutorial, we will create a coffee poster design in GIMP. Using the perspective tool to create the wooden floor looks and floral texture for the background. You will also learn how to create a gradient text in GIMP.
What you will learn
- Moving, Scaling, Flipping, and Rotating Object
- Adding drop shadow Filter
- Changing Texture color with the layer mode
- Make text Shear
- Adding Gradient to Text
- Create a Perspective
- Create a Grain Effect
Tutorial Steps
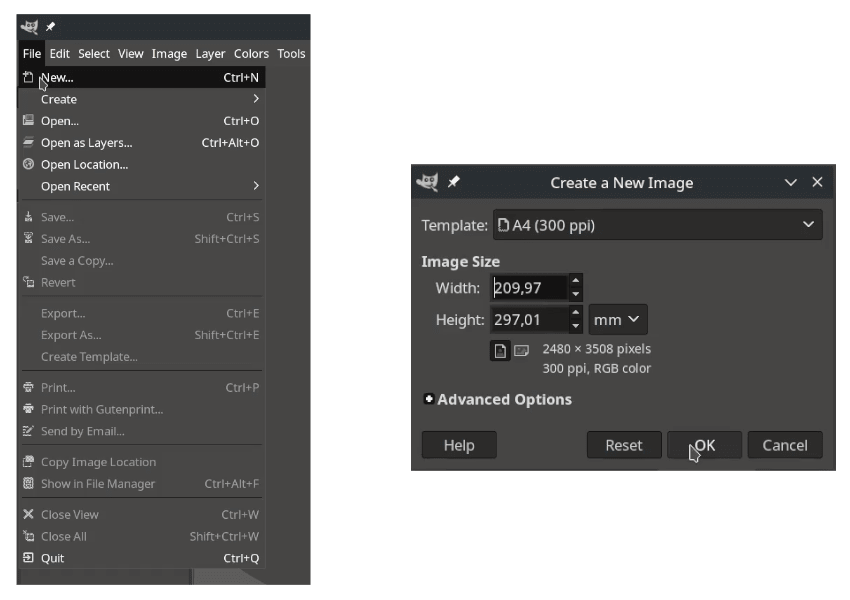
Step 1
Create a document size for standard poster size by going to File > New > Choose A4 Template, then hit OK.
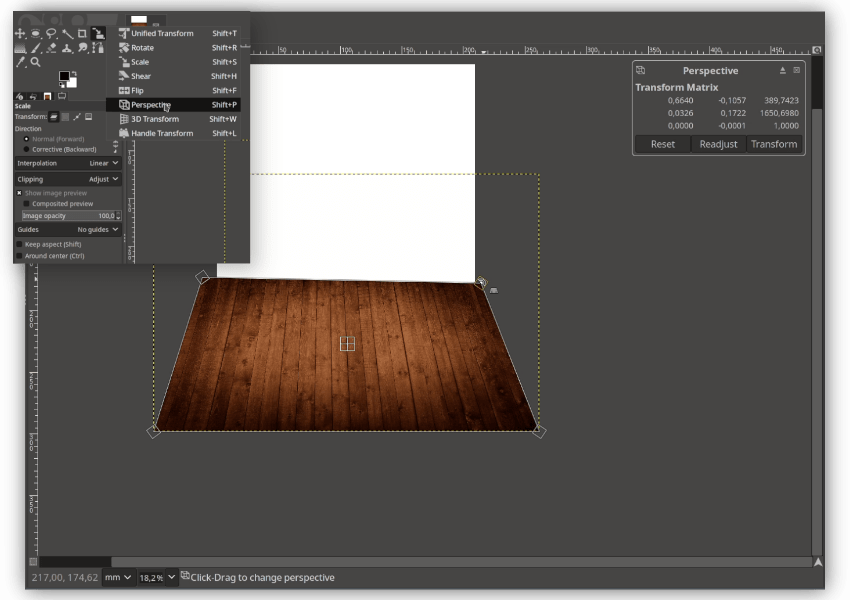
Step 2
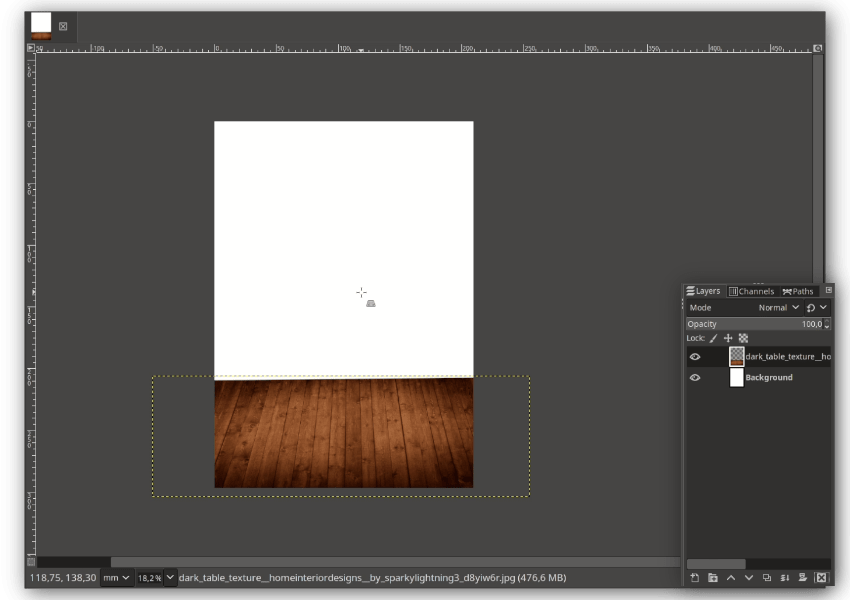
Open the Dark Table texture File > Open as Layers choose the texture And make it Perspective (Shift+P). You can click and drag the handle to change the perspective to make it become floor like then press Enter.
Step 3
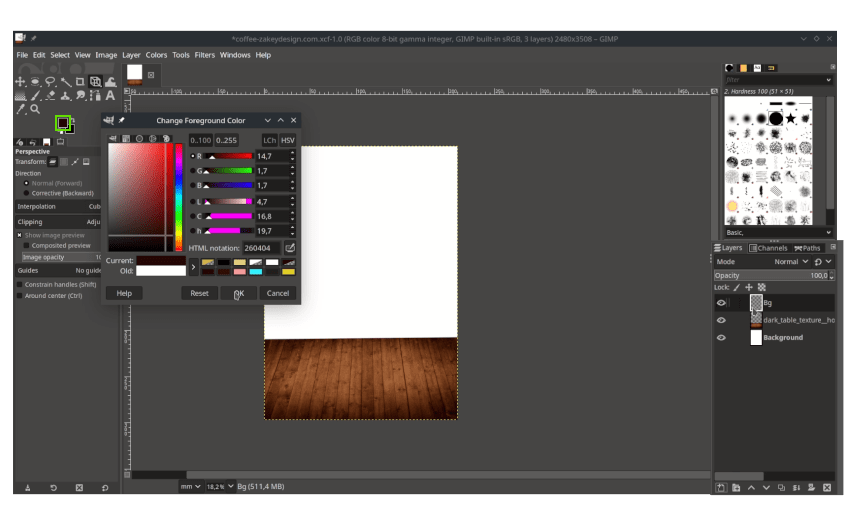
Change the foreground color to some chocolate color by clicking the swatches, make it become #260404.
Step 4
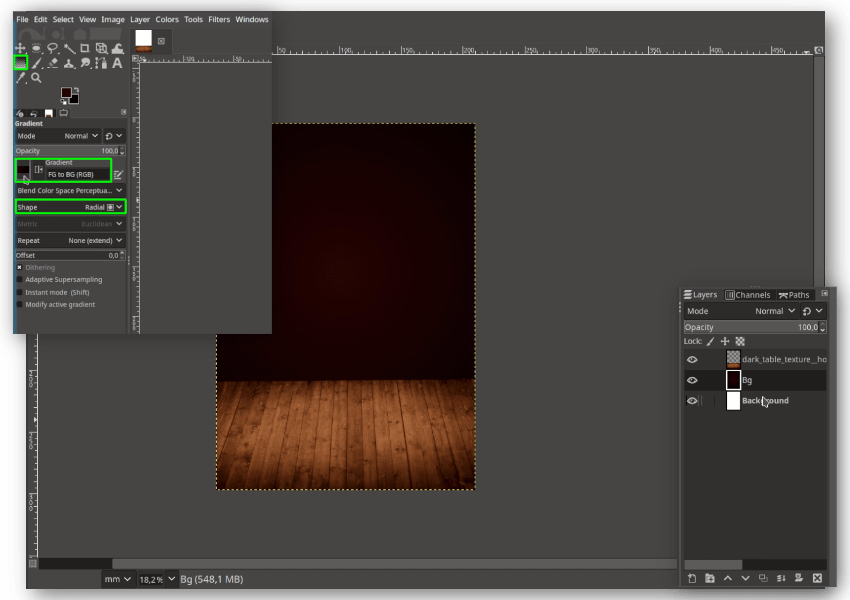
Now we are going to create the gradient. Create new layer first, and name it “Bg”, place the layer below the dark table texture, With Gradient Tool (G), Change the gradient setting for FG to BG (RGB) (make sure the color Chocolate and Black) and the shape to Radial.
Step 5
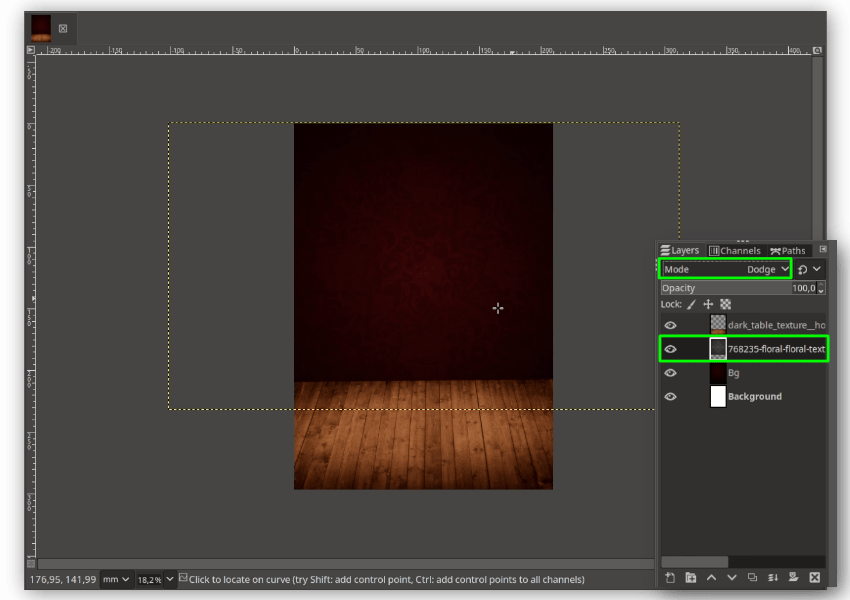
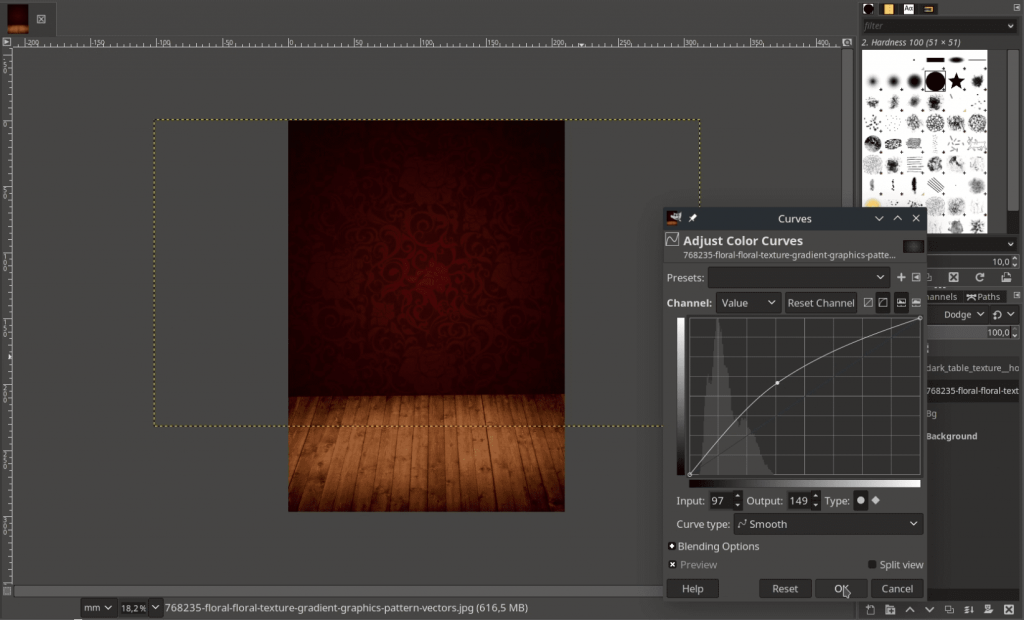
Add the Floral texture by going to File > Open as Layers and choose the Floral texture. Place the layer above the Bg Layer and change the layer mode to Dodge. Add curves to make it more Contrast in Colors > Curves, make it up.
Step 6
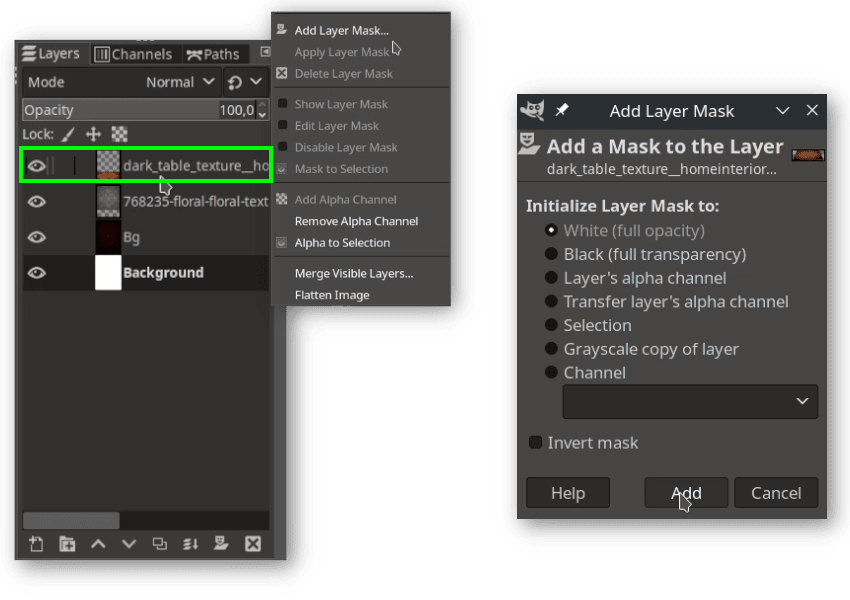
Next, add a layer mask on the dark table texture, Right-click > Add Layer Mask > White (Full Opacity), then click Add.
Step 7
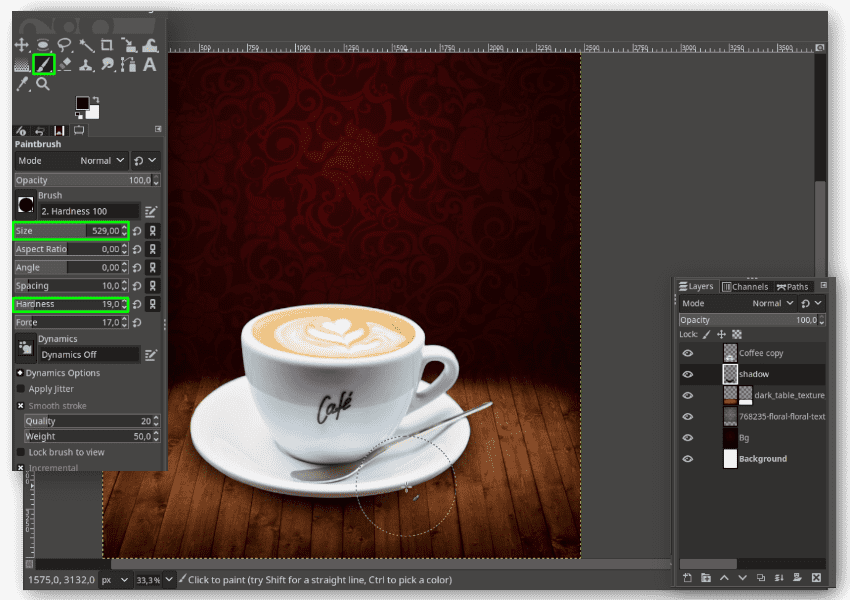
In the dark table texture, Click the Paintbrush Tool (P), and Click the Swatches Arrow to make it default the black and white color. Brush the Dark table texture to give some transparency effect like this:
Note : make sure the black color in foreground.

Step 8
Add the Coffee Images by going to File > Open as Layer and choose the Coffee. You can scale it down by pressing Shift +S. Create a new layer for the shadow, place it below the Coffee, and with the Paintbrush tool (P) again, you can change the brushes’ size and the hardness. Then just brush it.
Step 9
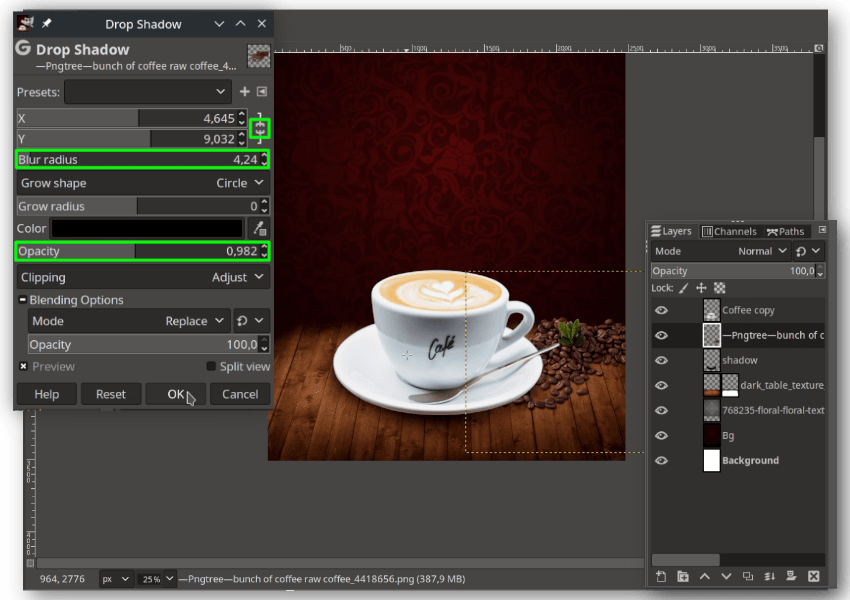
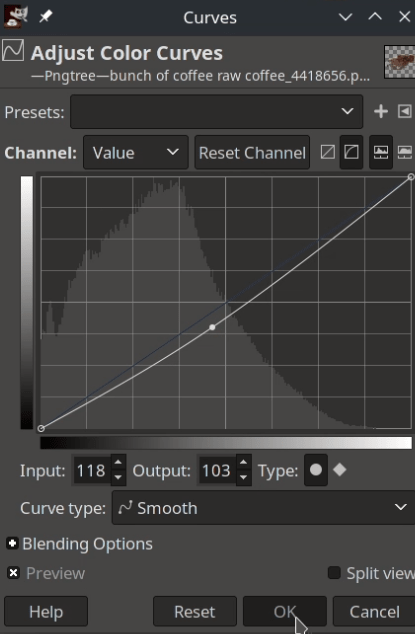
The next thing to add the Coffee beans in File > Open as Layers and choose the Coffee beans png. Give some drop shadow effect in Filter > Light and Shadow > Drop Shadow. Click the Chain Icon to unlink the X & Y, so you are free to place the shadow; adjust the Blur Radius, and Opacity. Add Curves to make it more contrast.
Step 10
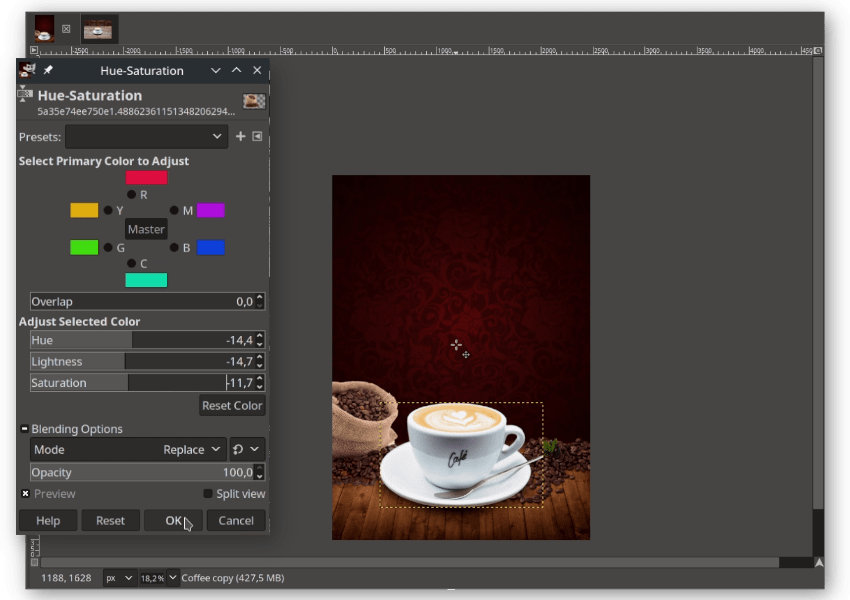
Add the Sack of Coffee Beans in File > Open as Layers and Choose the Sack of Coffee Beans png. Press Shift+F to flip the images and give the Drop Shadow and Curves to make it more contrast. Now, here’s the important thing to match all the colors with entire images with Colors > Hue and Saturation and adjust the setting until it looking the same tone color.
Note: Try to adjust the color setting in Colors Menu, the Color Balance, Color Temperature, and Shadow-Highlights to match the color (Color Grading). It’s a Really Important thing when you do Photo Manipulations.
Step 11
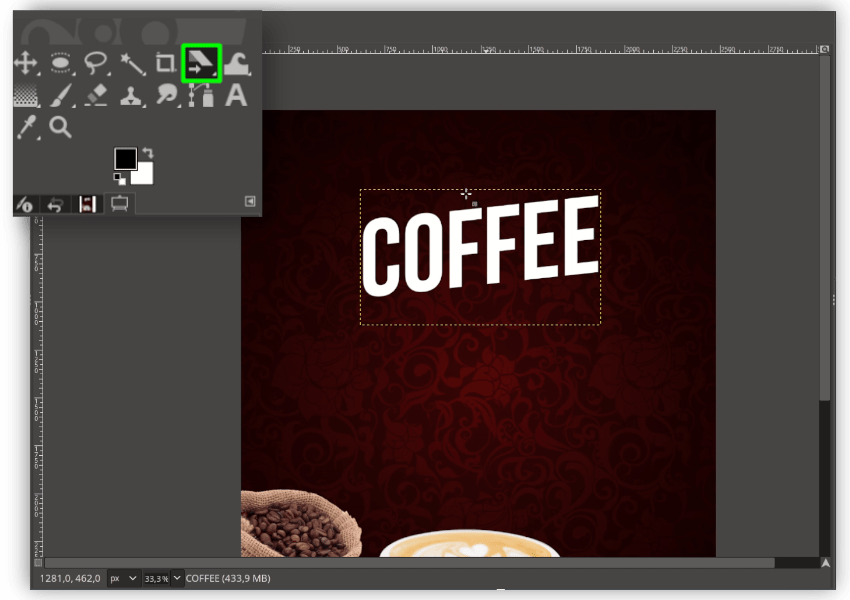
Add some text by clicking Text Tool (T) I’m using Bebas Neue font you can download in the Tutorial Assets section. And make it Shear with Shear Tool (Shift+H).
Step 12
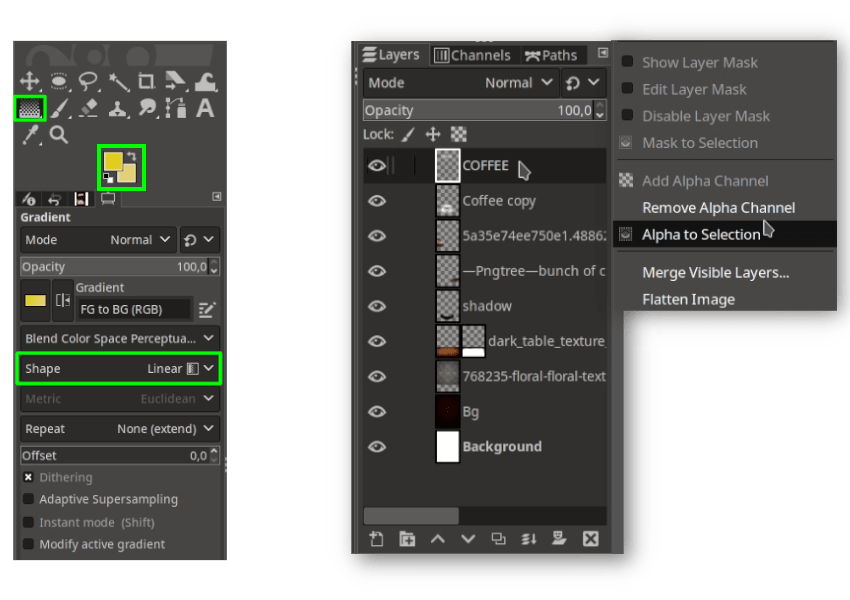
Create a gradient text effect with Gradient Tool (G) again; change the shape to Linear and the Color to #e6ce78 for the foreground, #e0ce20 for the background. Right-click on the Coffee text Layer > Alpha to select drag the Gradient to the text. After that, deselect it in Select > None. Add more text and o the same thing.

Step 13
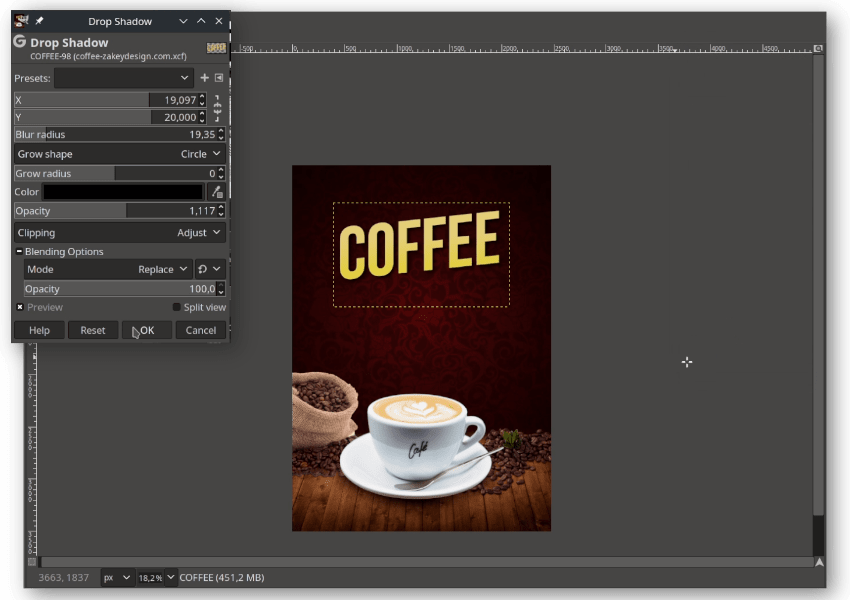
Add more drop shadow for the text in Filter > Light and Shadow > Drop Shadow to give more Realism.
Step 14
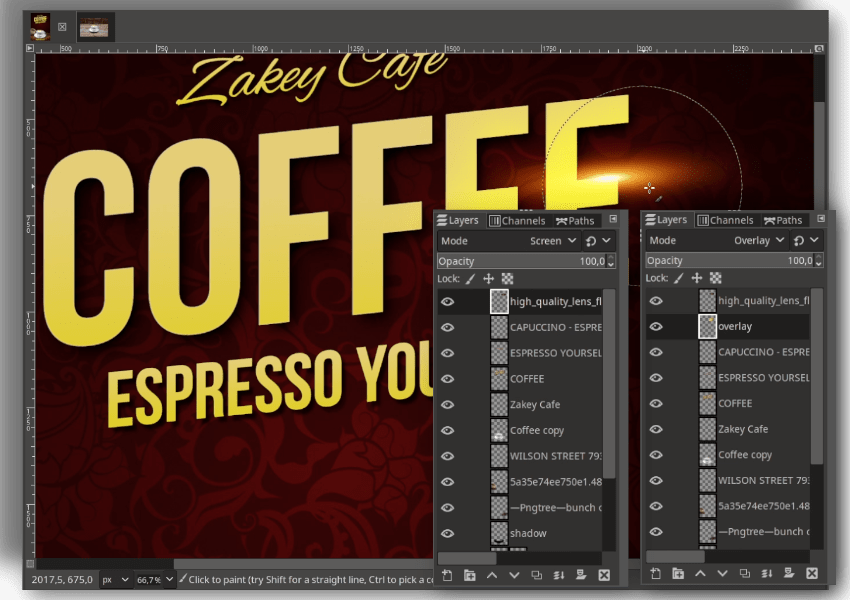
Add the Lens Flare effect File > Open as Layer and choose Lens Flare png. Press Shift+S to scale and Shift+R to rotate a little and change the Layer Mode to Screen. Create a new layer and name it “Overlay“. Then change the layer mode to Overlay. Then brush it with a Paintbrush (P) tool with some yellow color.
Step 15
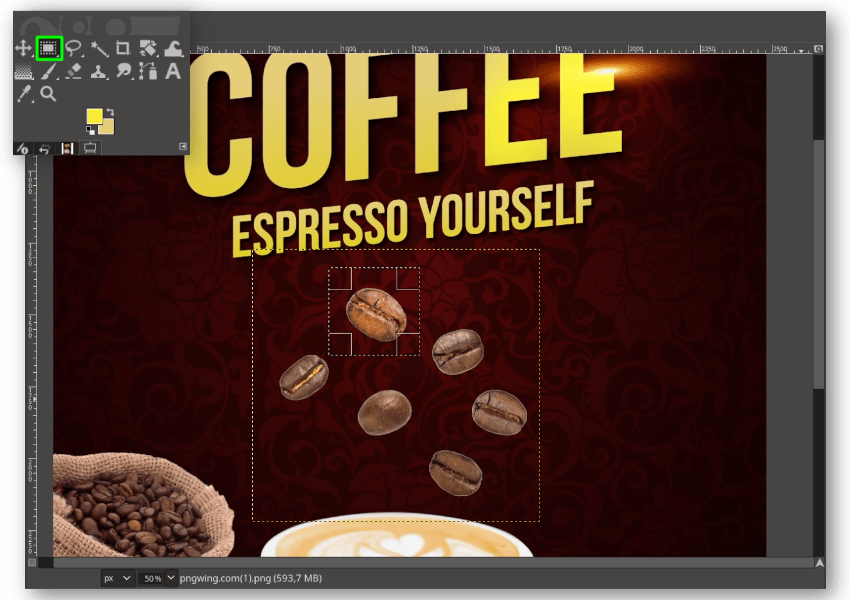
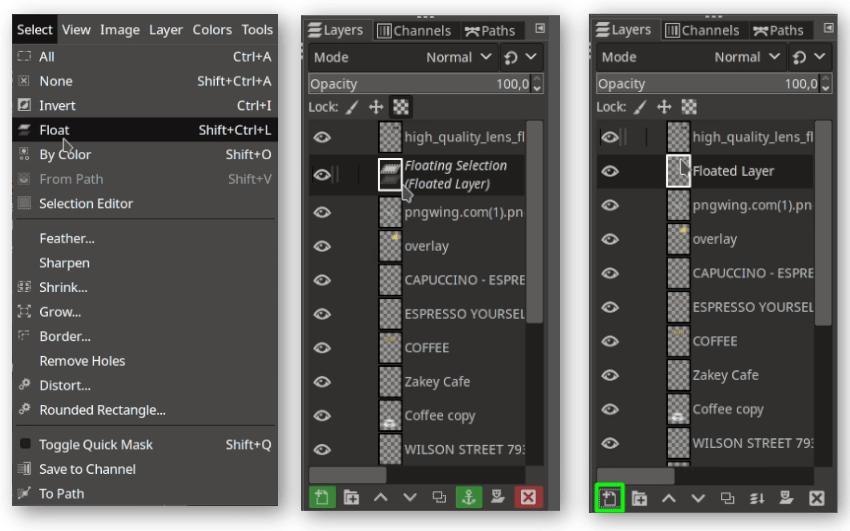
For the Coffee bean particles png, open it with File > Open as Layers and select one Coffee Bean with the rectangle tool, make it separate with Float in Select > Float. It will create a Floating Selection, then click the Create new layer icon to apply. Repeat this method to make all Coffee Bean particles have their own layers so you can move them freely.
Step 16
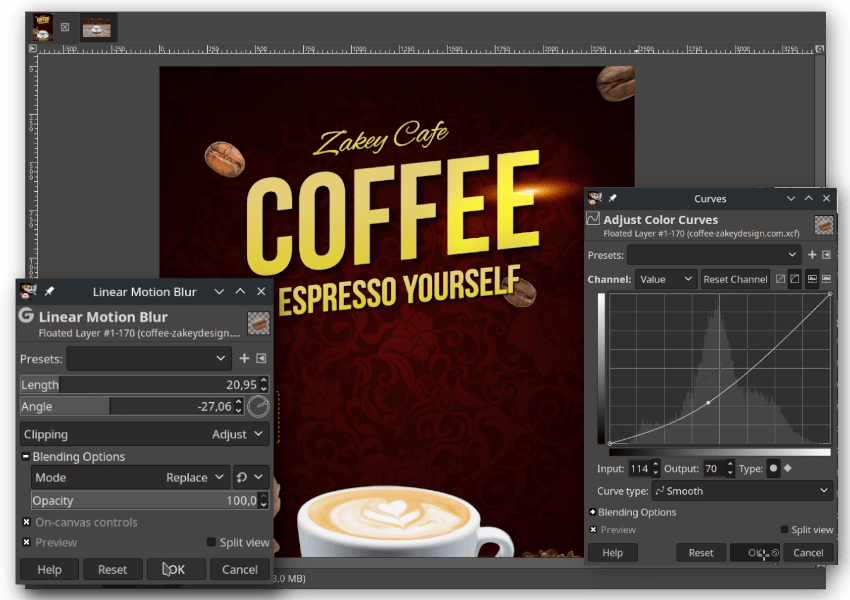
Give Linear motion blur effect for each Coffee Bean particle in Filter > Blur > Linear Motion Blur. Adjust the Curves too to make it more contrast.
Step 17
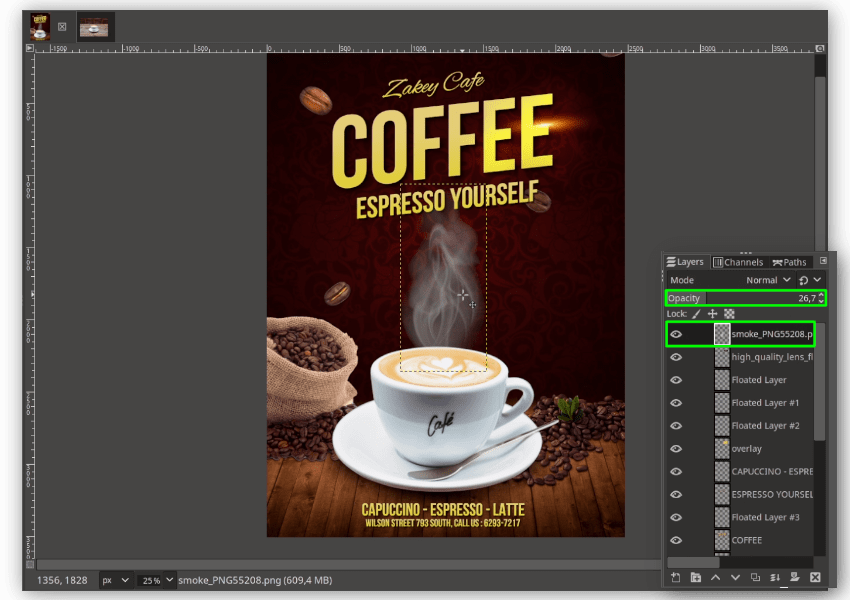
The last thing, add the Smoke to give an emotional effect to the viewer with File > Open as Layers and choose the smoke png then turn down the opacity.
Your Design is Ready!
Easy, Right? I hope you can learn how to create this design with the Layer mask effect, Layer Mode, and the Object to match the color in GIMP. It’s Really Important to match the color of images to the canvas when you do Photo Manipulation.

Tutorial Assets
- Smoke
- Floral Texture
- Dark Table Texture
- Coffee
- Coffee Bean
- Sack of Coffee Bean
- Flare
- Coffee Bean Particles
- Bebas Neue Fonts
- Alex Brush Fonts
Credits
- Inspired by Tarommir – Coffee Poster Design
- Coffee Slogans