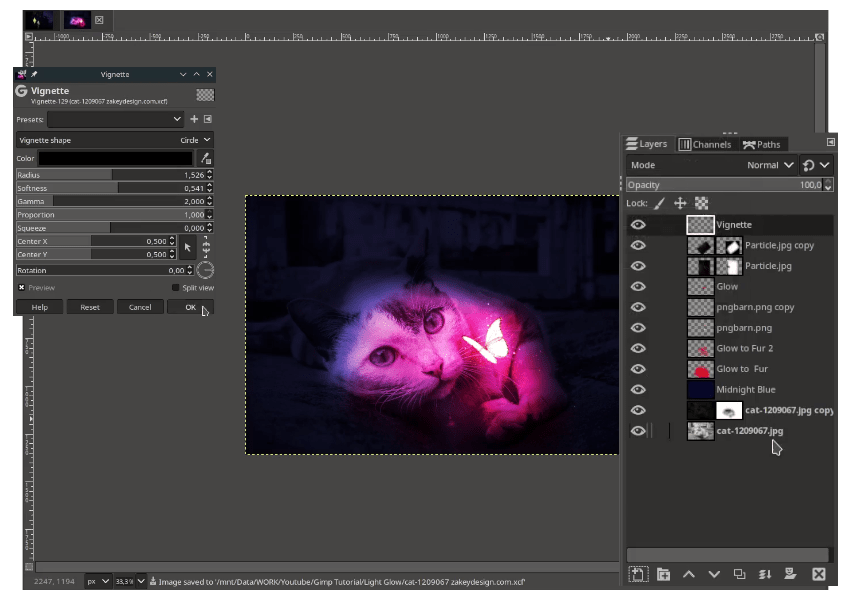
The glow effect is an important thing when you do photo manipulation to bring your photos big different from the original. As always, I’ll show you step by step process of how to add glow effect in GIMP easily.
What You Will Learn
- Scaling and Rotating Object
- Adding Layer Mask
- Making Glow Effect with Layer Mode
- Making Night Atmosphere effect
Tutorial Steps Part 1
Step 1
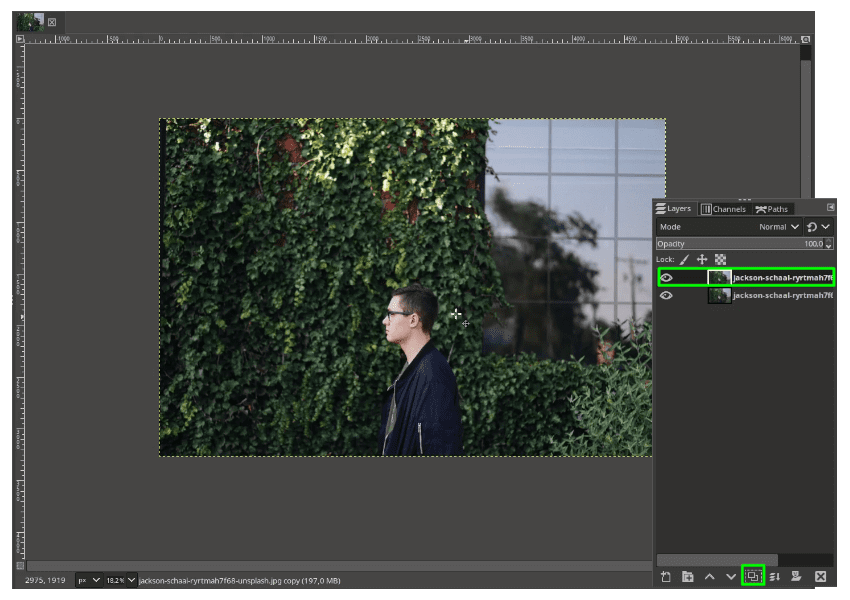
Open the image file in File > Open then duplicate the layer by clicking duplicate icon.
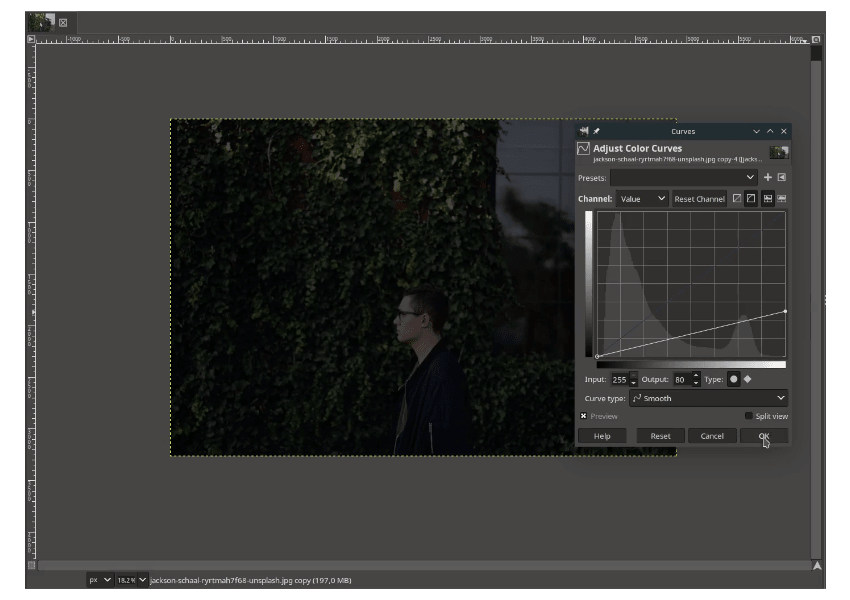
Turn down the Contrast in Colors > Curves.
Step 2
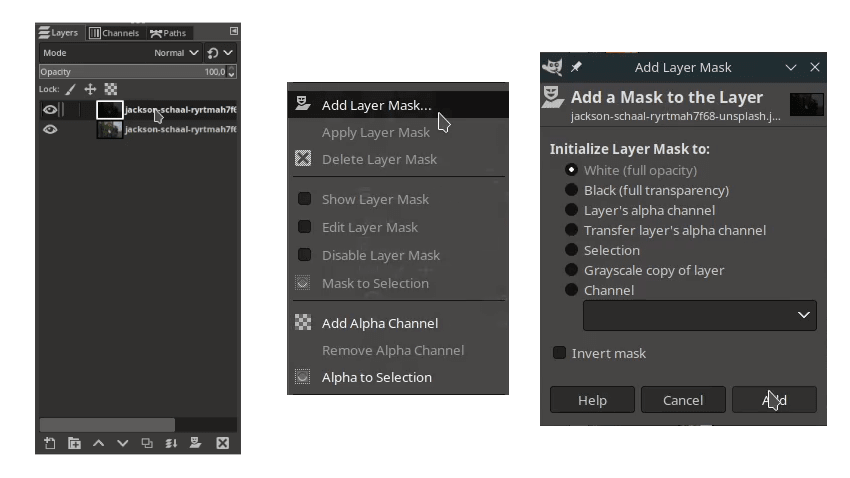
Add layer mask in the duplicated layer by Right click > Add Layer Mask > White (full opacity).
Step 3
Open up The Sims Diamond png in File > Open as Layers then duplicate the layer and change the layer mode to Addition. You can reduce the opacity too.


Step 4
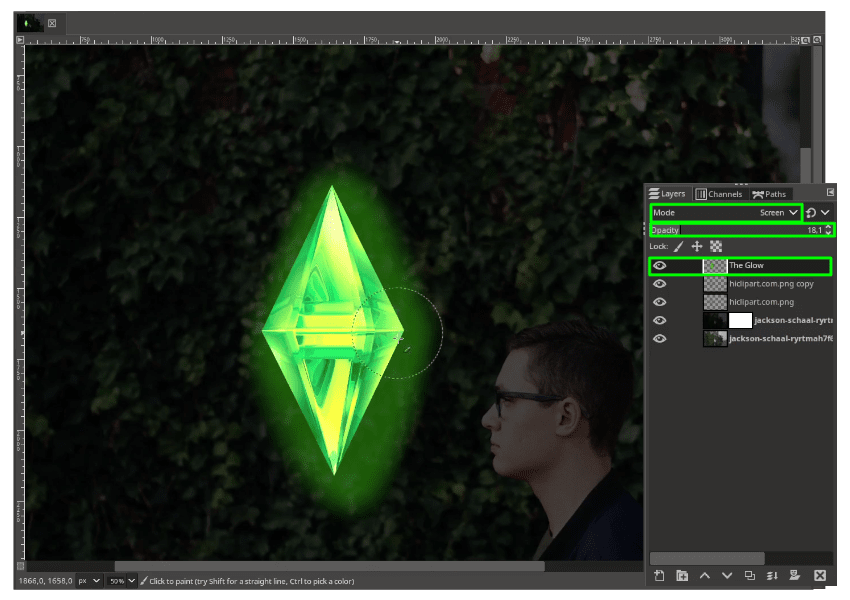
Create new layer for the Glow then brush with Paintbrush Tool (P) change the color to green (#42c307).
Note: When brushing for the glow, make sure in Paintbrush option the hardness in 0,0 for best result.

Change The Glow Layer mode to Screen then reduce the opacity.
Step 5
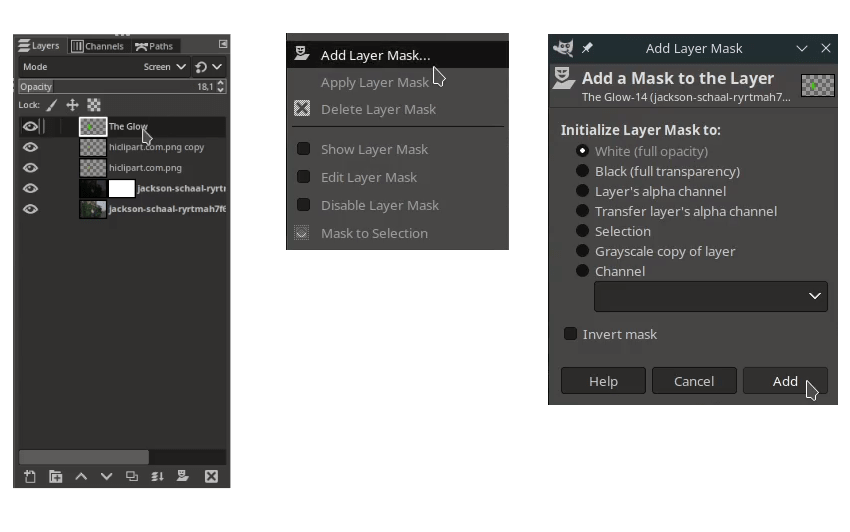
Add layer mask in the glow layer by right click > Add Layer Mask > White (full opacity).
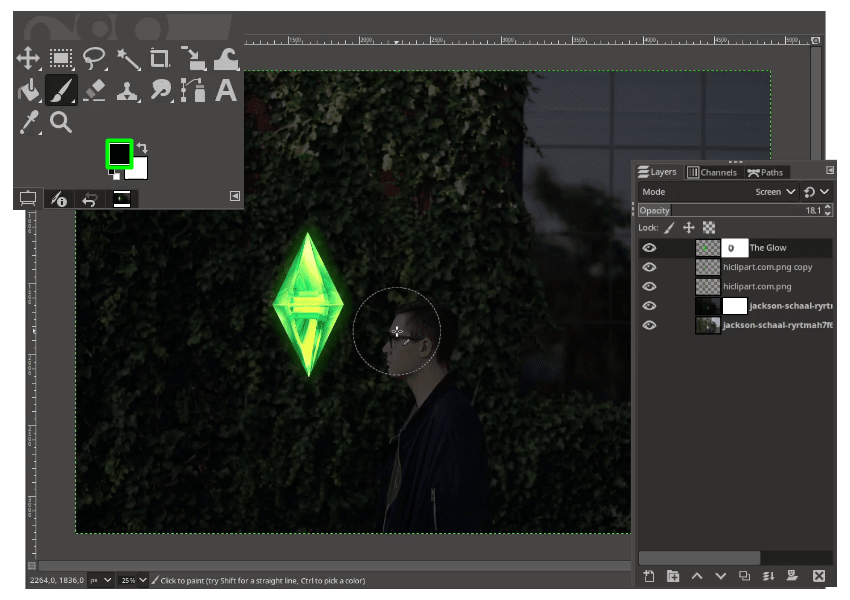
With Paintbrush Tool (P) change to black color for hiding the uncertain part in the glow layer.
Step 6
Add layer mask again in the duplicated background then brush with Paintbrush Tool (P) to reveal the area where the light comes in.

The result :

Step 7
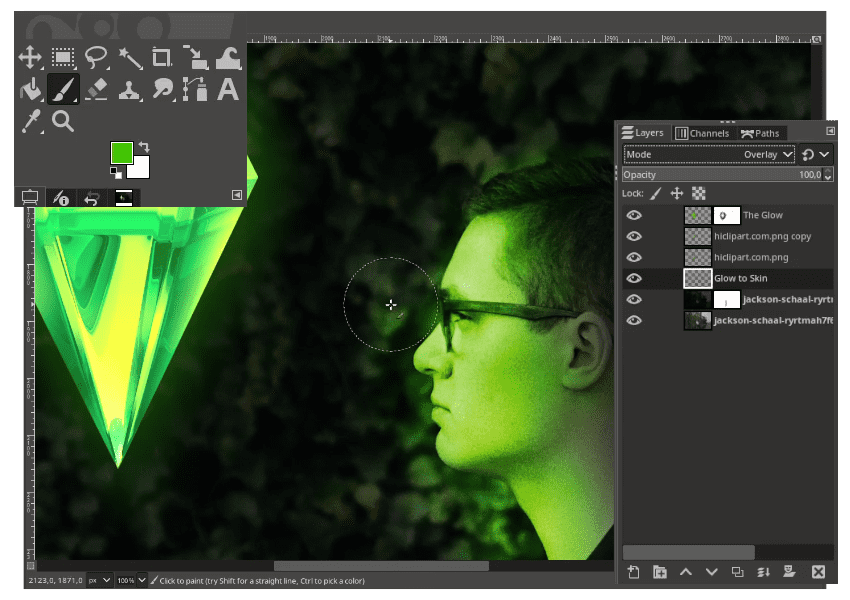
Create new layer and brush with Paintbrush Tool (P) with green color then change the layer mode to overlay.
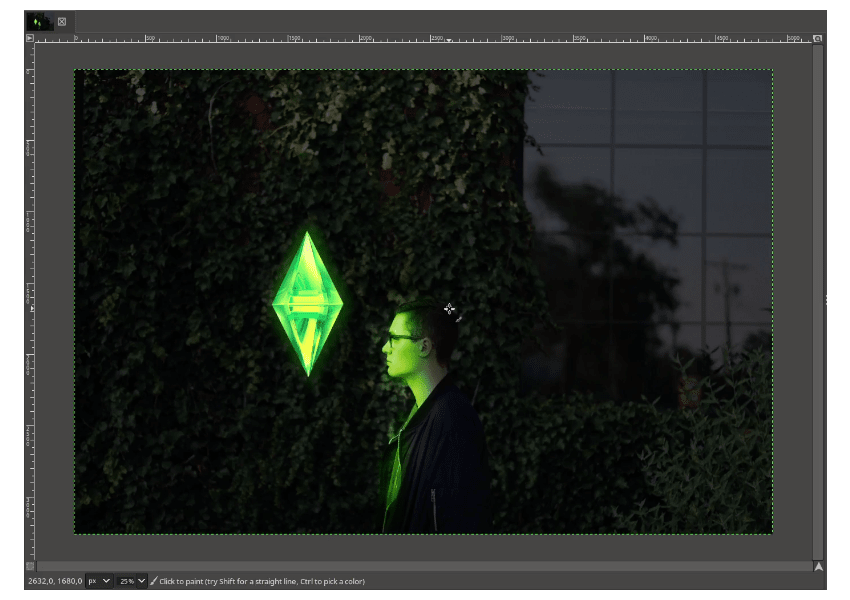
Step 8
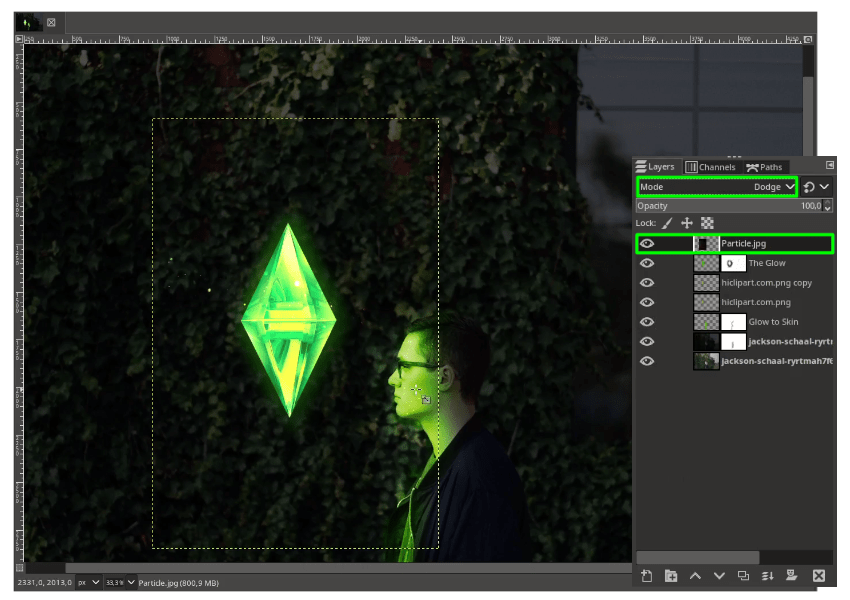
Add particles png in File > Open as Layers then change the Layer mode into Dodge.
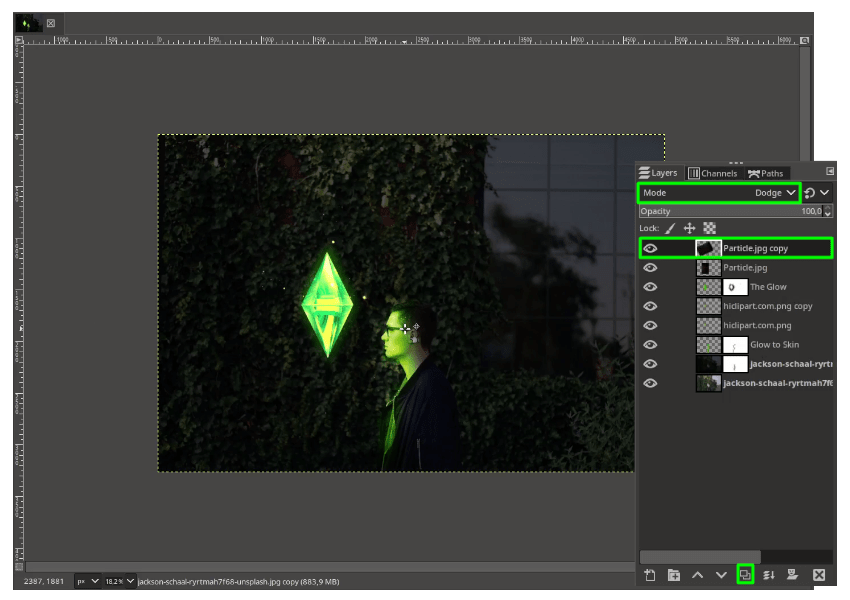
Duplicate particle layer again, you can rotate by pressing Shift+R.
Step 9
Next create new layer for the Midnight color effect with Bucket Fill Tool (Shift+B) change the color to blue (#050a29)

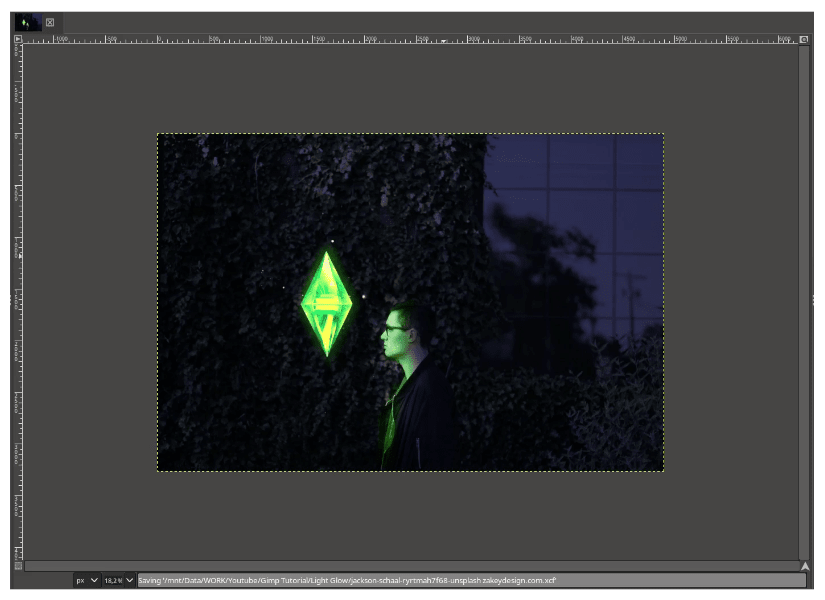
Step 10
The last, create new layer for Vignette then activate it in Filters > Light and Shadow > Vignette.
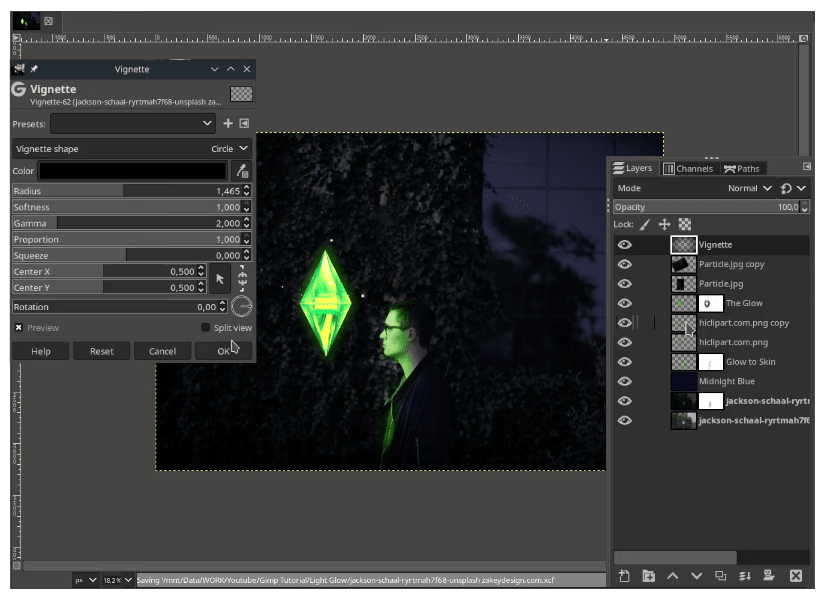
Tutorial Steps Part 2
Step 1
Open the cat picture in File > Open then duplicate the layer.
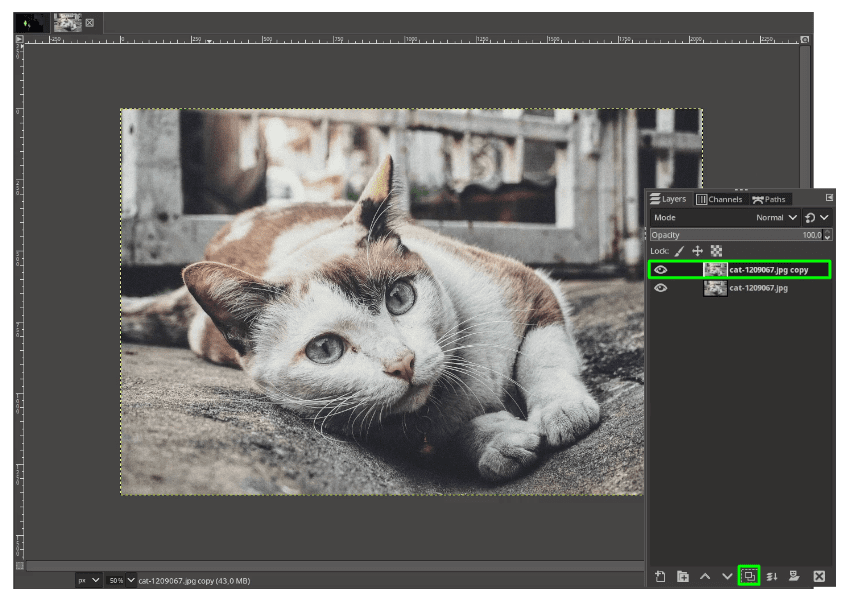
Turn down the curves to make it darker in Colors > Curves.

Step 2
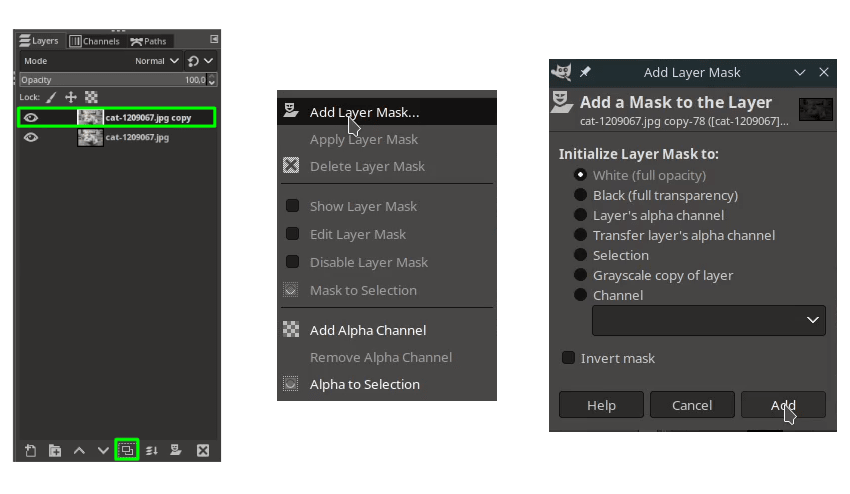
Add layer mask in duplicated layer by Right Click > Add Layer Mask > White (full opacity).
Step 3
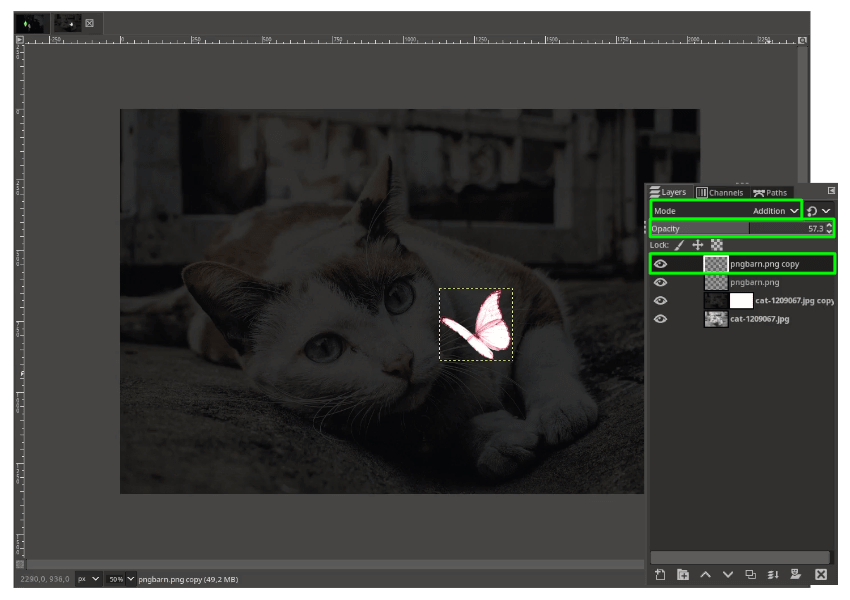
Open the butterfly png in File > Open as Layers then duplicate the butterfly layer and change the layer mode to Addition. Reduce the opacity too.
Step 4
Create new layer for the glow and change the layer mode to Screen. Active Paintbrush Tool (P) change the color to red (#e1031b).

Step 5
Add the layer mask in the duplicated cat layer and with Paintbrush Tool (P) change the color to black.
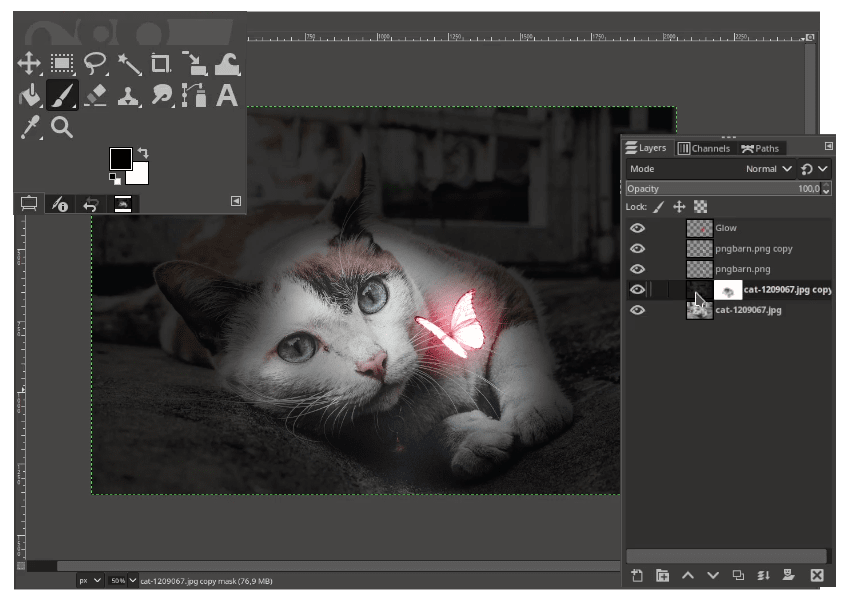
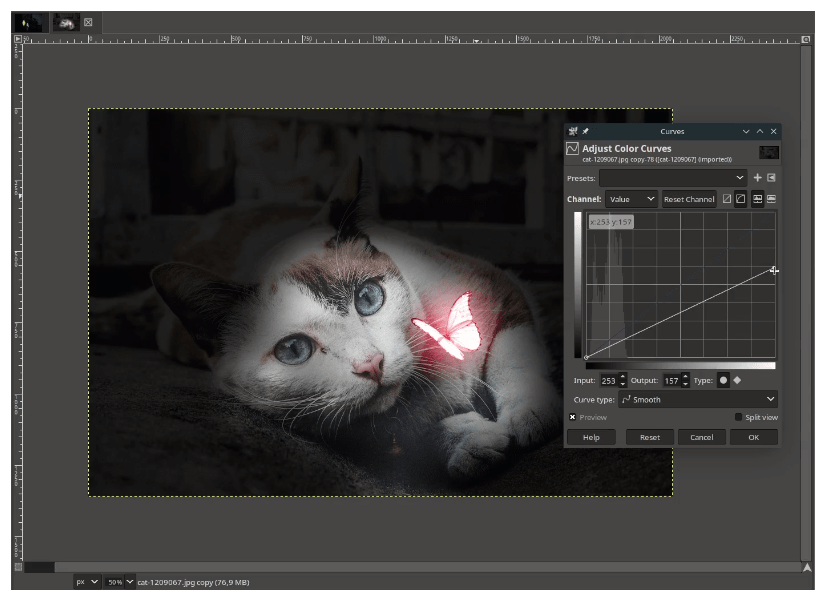
Turn down the curves to make it darker in Colors > Curves.
Step 6
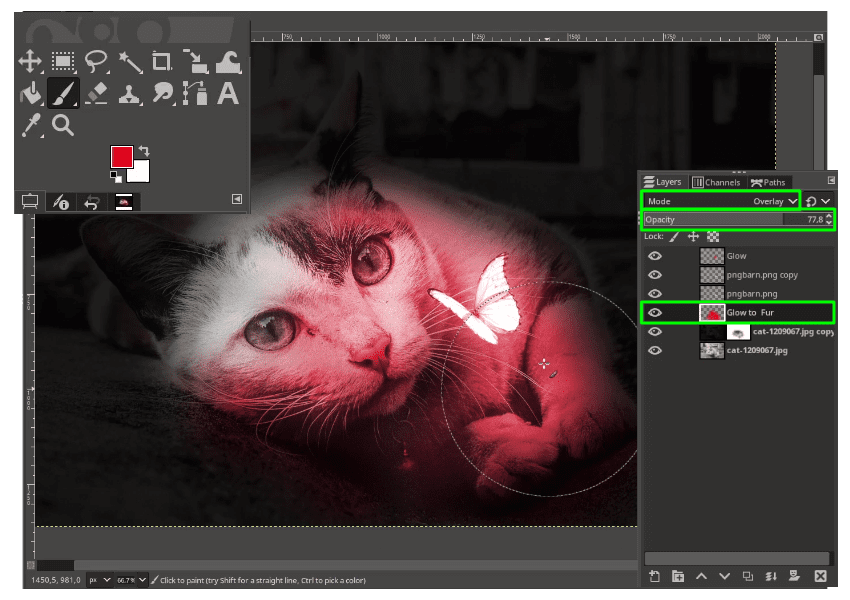
Create new layer again for Glow to fur, change the layer mode to Overlay and reduce the opacity. With Paintbrush Tool (P) just brush over the cat.
Step 7
Add new particle in File > Open as Layers and change the layer mode to Dodge.
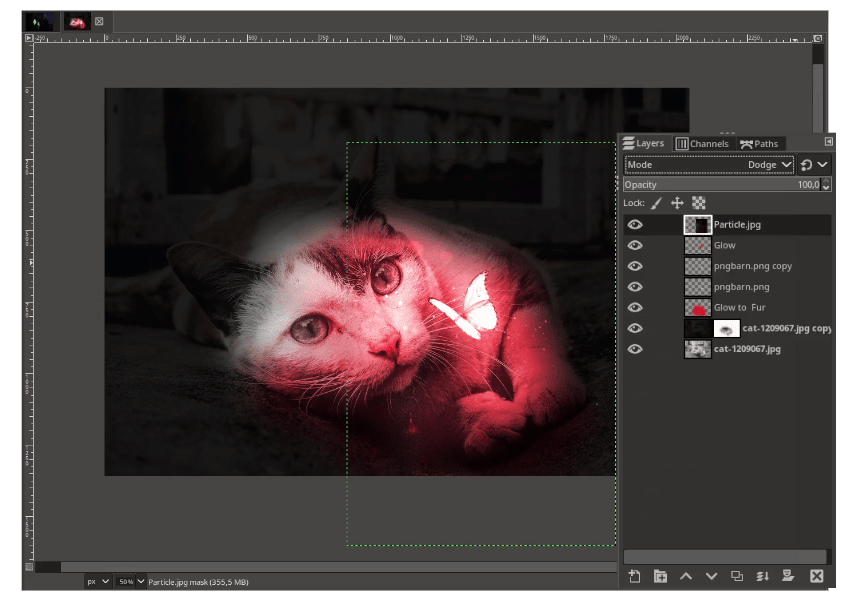
Fix this gap in Particle layer by adding layer mask.
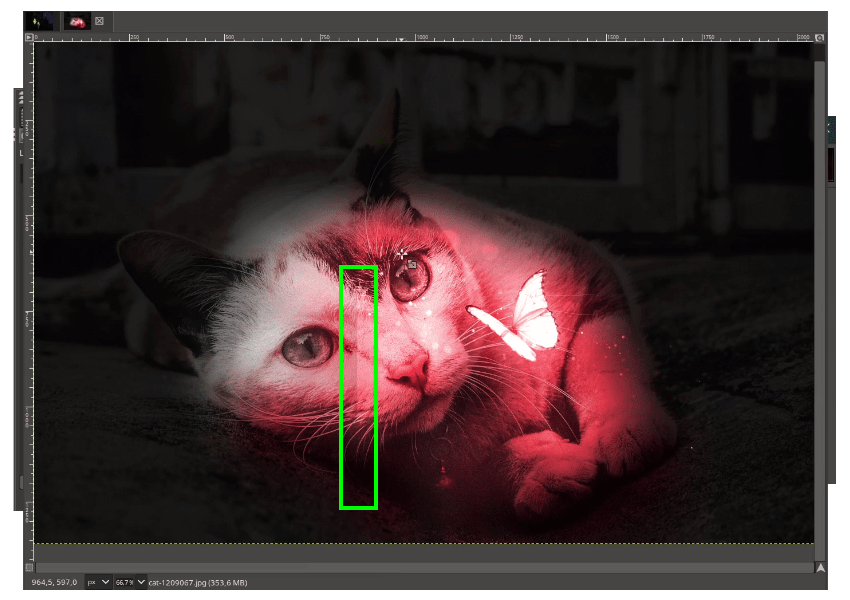

Step 8
Duplicate the particle layer again, then rotate it by pressing Shift+R.
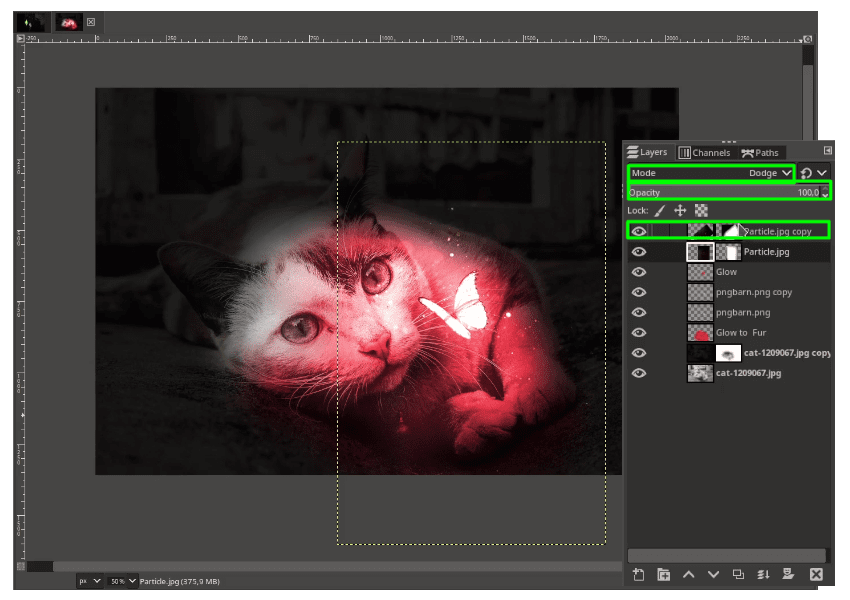
Step 9
Duplicate Glow to fur layer to make it more contrast then change the layer mode to Overlay.
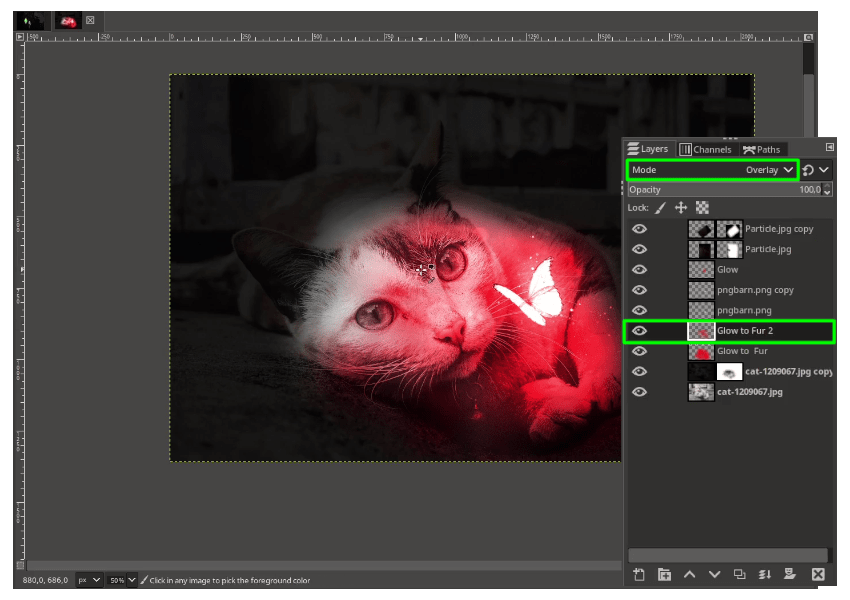
Step 10
Create new layer for the blue color (#050a29) change the Layer Mode to HSL Color then reduce the Opacity. And fill with Bucket Fill Tool (Shift+B.

Step 11
The last, create new layer for Vignette then activate it in Filters > Light and Shadow > Vignette.
