In today’s tutorial, we are going to create Modern Bold Typographic Posters in GIMP inspired by Nike Poster Ideas. It gives you a bold, strong, and contrast Typography effect to make the poster look sporty and professional.
What you will learn
- Moving and Scaling Object
- Create Text with stroke
- Convert photo into grayscale
- Adjusting color balance
- Create texture effect
Tutorial Steps
Step 1
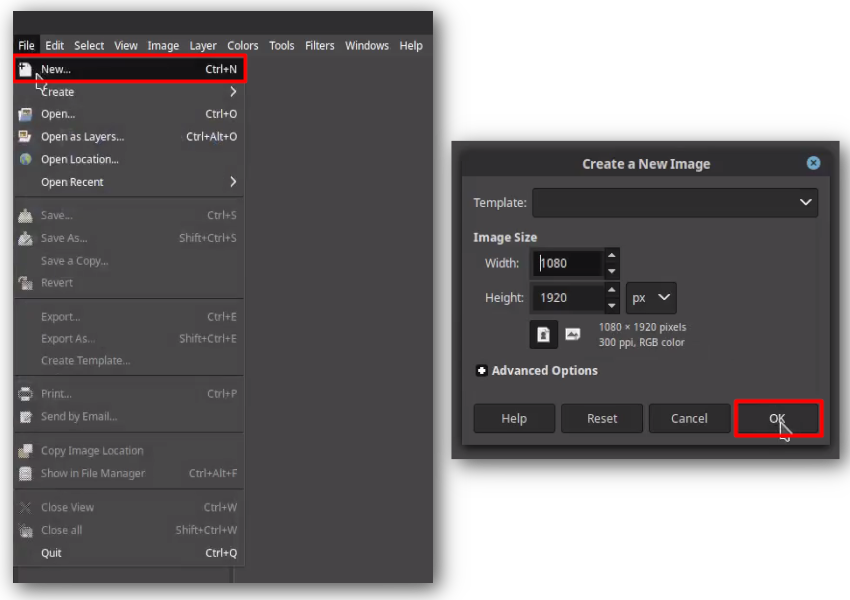
Go to File > New and Create a new document 1080 x 1920px. This size is for Instagram stories.
Step 2
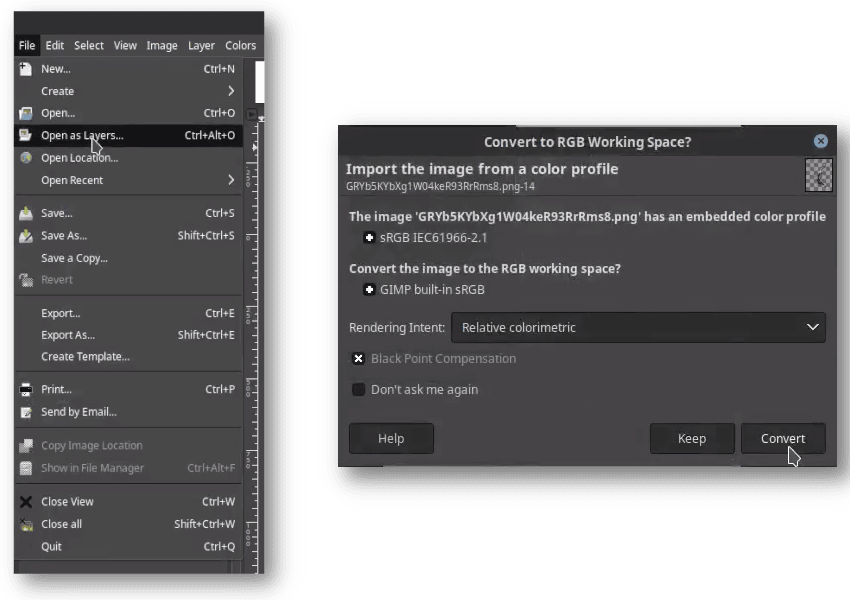
Next, open the picture by going to File > Open as Layers and choose the picture. If the Convert dialogue box appears, just hit Convert. You can rename the layer by double-clicking the layer.
Step 3
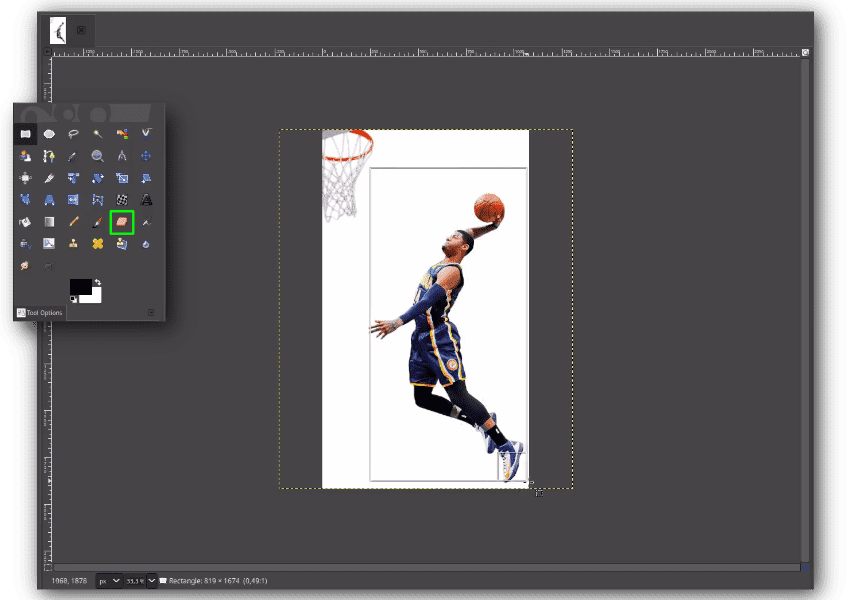
Erase unwanted object with the Eraser Tool (Shift+E), in this case, is the basketball ring.
Step 4
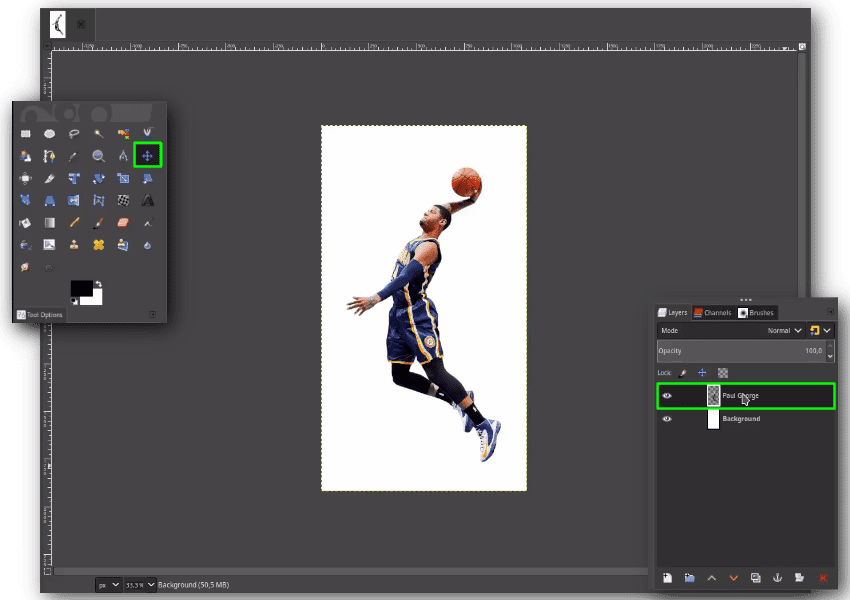
In the Paul George layer, Move it to the centre of the canvas with Move Tool (M).
Step 5
Now, we are going to give some background color. Click the Foreground Color and change the color to #f93e4f. Or you can simply pick a color that you like.

Step 6
Make sure the Background layer in selected then Click Bucket Fill Tool (Shift+B) on the Canvas fills with the pink color.

Step 7
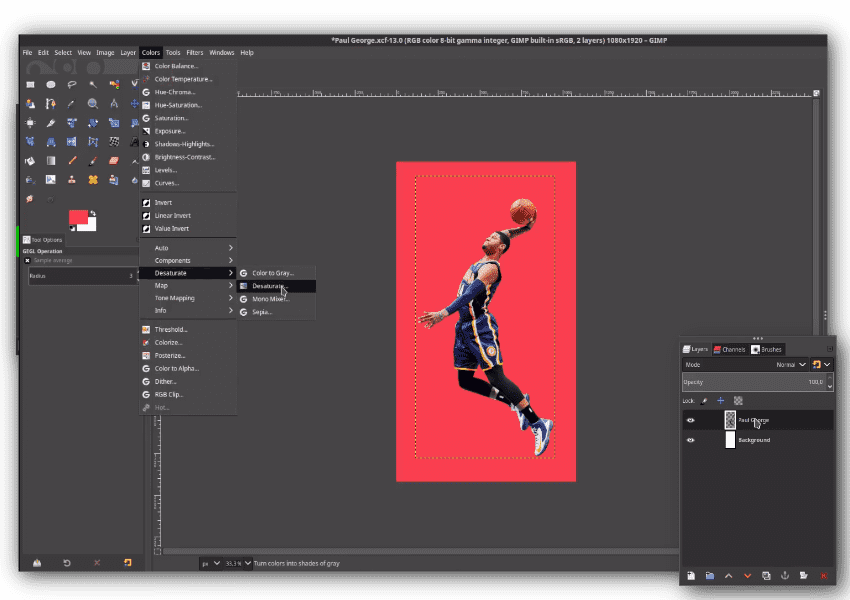
Next thing to do, we are going to create black and color. Click on Paul George layer, and go to Colors > Desaturate > Desaturate. Then just hit OK button.

Step 8
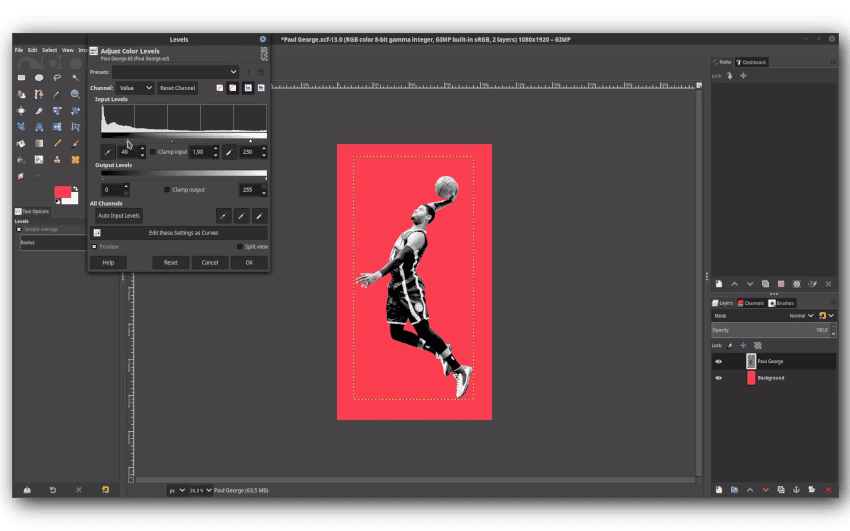
Let’s give it Levels by going to Color > Levels and adjust it to make it more contrast.
Step 9
Adjust tonal range in Color balance by going to Color > Color Balance. You can adjust the shadow, midtones and the highlights. It should give the Vibrant Color effect to our object.

Step 10
Add some text by going to the Text tool (T) and type some words. I am using League Spartan fonts which you can download in the Tutorial Assets section. You can press Enter to break the line of the text. It will automatically create a new layer the word you type in.

Step 11
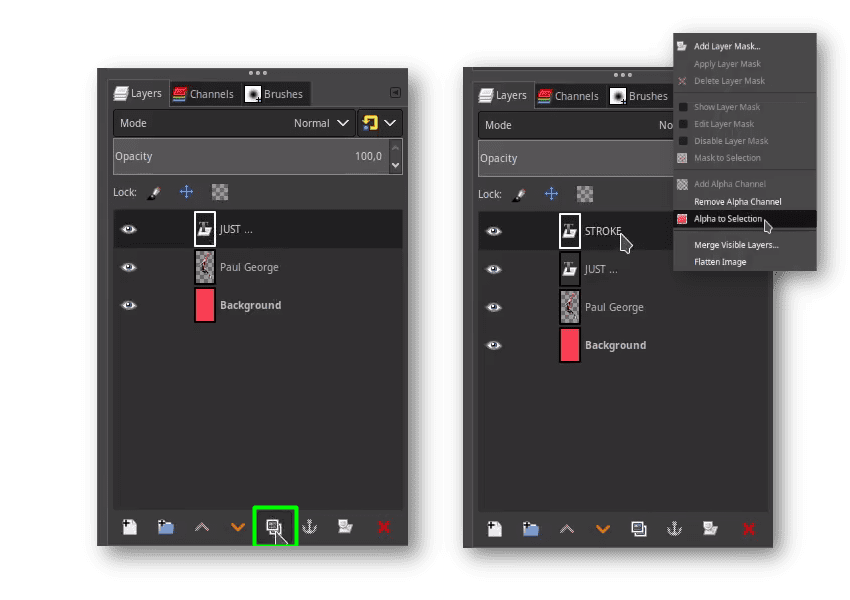
Now here we go to create the stroked text effect. Duplicate the text layer by clicking the duplicate icon. then rename it into “Stroke“.On the Stroke layer, Right Click > Alpha to Selection.
Step 12
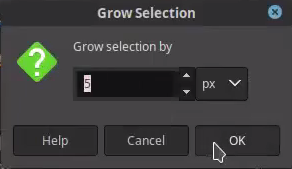
While the text is selected (the moving dots), Choose Select > Grow to expand the selection. Make it by 5px or input the number you wanted.

Step 13
After that, fill with Background color by going to Edit > Fill with BG Color (Ctrl+.). Make sure the background color in the same color as text. In this case is white.
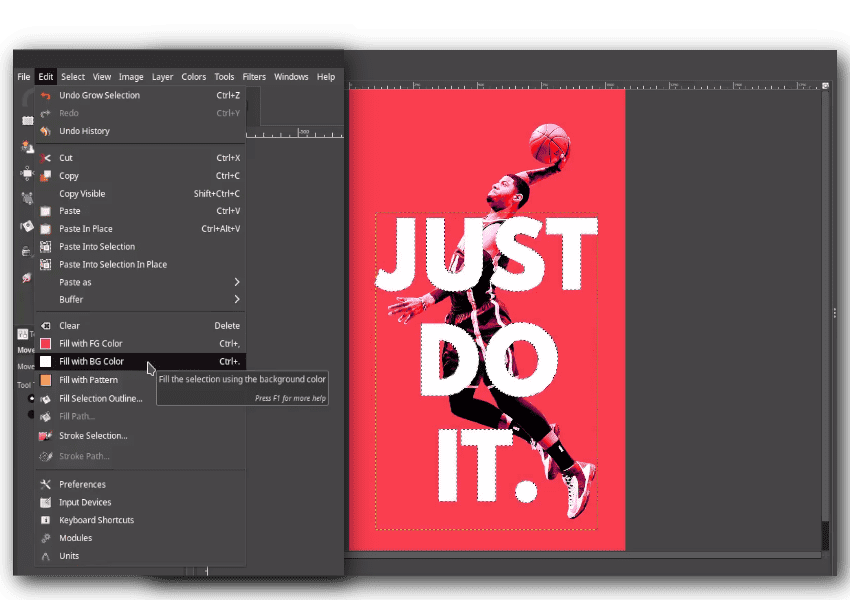
Step 14
Important thing, after you fill with background color, Right click on the text layer > Alpha to Selection, and while in selected, click the Stroke Layer and press Delete button. It will create the Stroke effect from the original text. Deselect it by going to Select > None.


Step 15
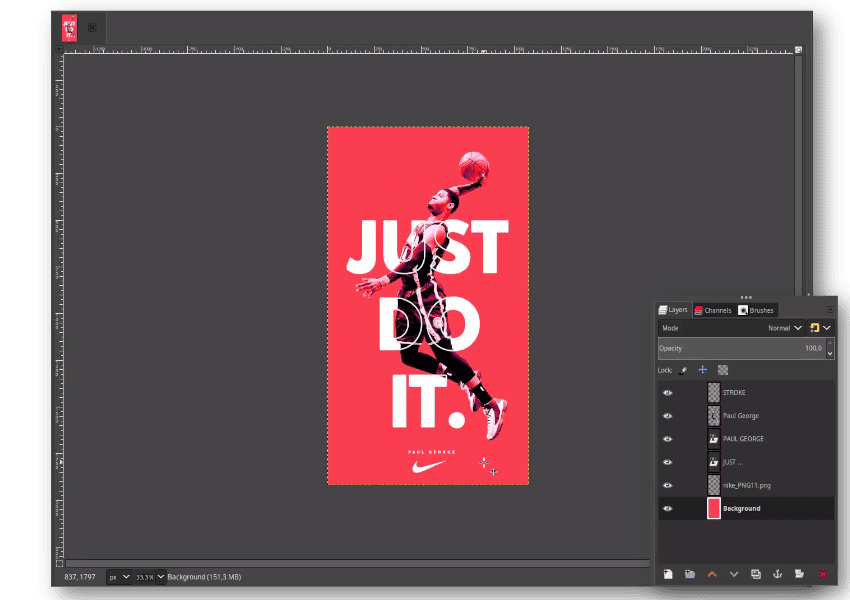
Move the Text layer by click and drag, below the Paul George layer, and Stroke Layer is on the top. should be like this :

Step 16
You can add the Text element (T) and Nike swoosh png by going to File > Open as Layer and choose the Nike Swoosh.
Step 17
Add the texture by going to File > Open as Layers and choose the texture images. Change Layer Mode into HSV Value. Click and drag to place it one step above the Background Layer.
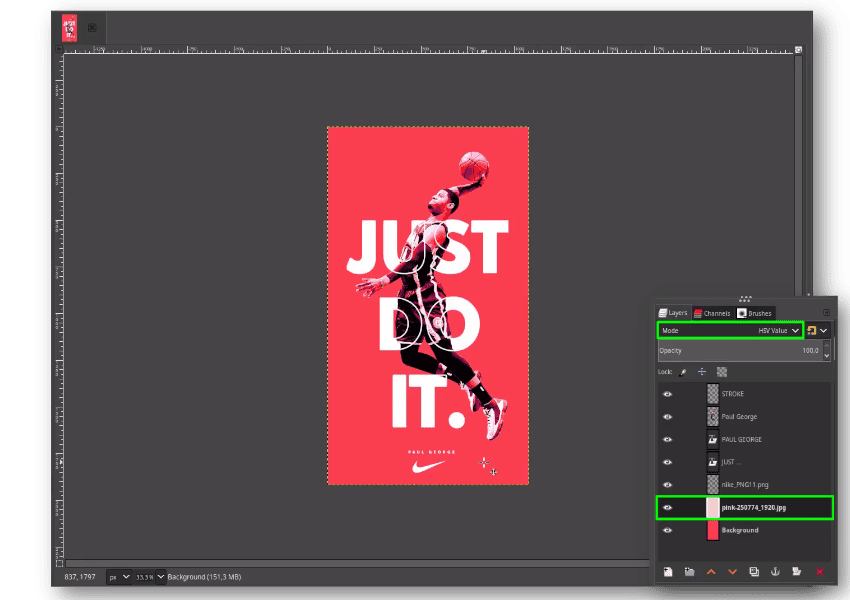
Your Design is Done!
In this tutorial, you’ve learned how to create Sport poster design with GIMP, especially for the Typography parts which the stroke overlapping with the picture and the original one in the back. Congratulations!


