In this tutorial I will show you how to create basketball poster design with GIMP with NBA Air Mail Concept originally by Jason Drumheller.
What you will learn
- Moving, Scaling and Rotating Object
- Changing Object color for default black color
- Using Texture
- Adding Grain Texture
- Making Stroke Only Text
Step 1
Create a new document for instagram stories with 1920 x 1080px.

Step 2
Create new layer for yellow background (#ffc800) and fill with Bucket Fill Tool (Shift+B).

Step 3
Type some text with Text Tool (T) and rotate it with Shift+R. You can hold Ctrl+Shift while rotating to make a 15-degree angle.
Note: To keep the object not lose the quality, only scale or rotates once. Press Ctrl+Z to undo it to default position, and try again.

Step 4
Create new layer for Blue Line then select with Rectangle Select Tool (R) and fill with Edit > Fill with FG Color (#196dad). Deselect it in Select > None (Ctrl+Shift+A).

Step 5
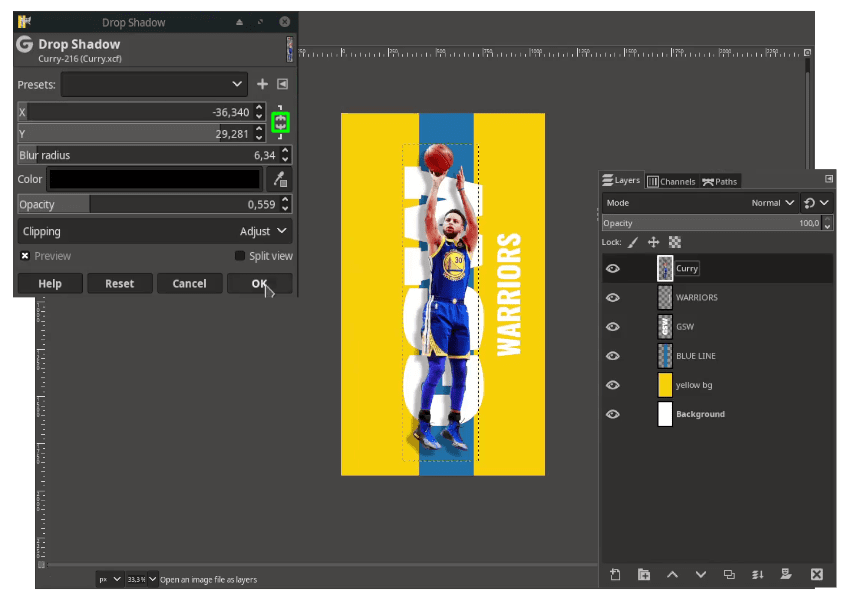
Open the Curry png in File > Open as Layers then give drop shadow in Filters > Light and Shadow > Drop Shadow. Click the Chain icon to Unlink the X & Y, so you free to move the shadow.
Step 6
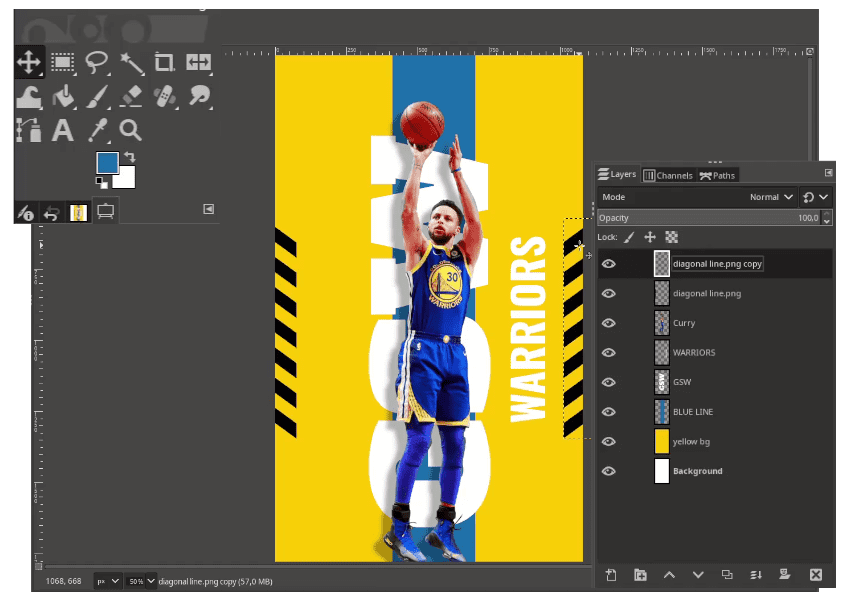
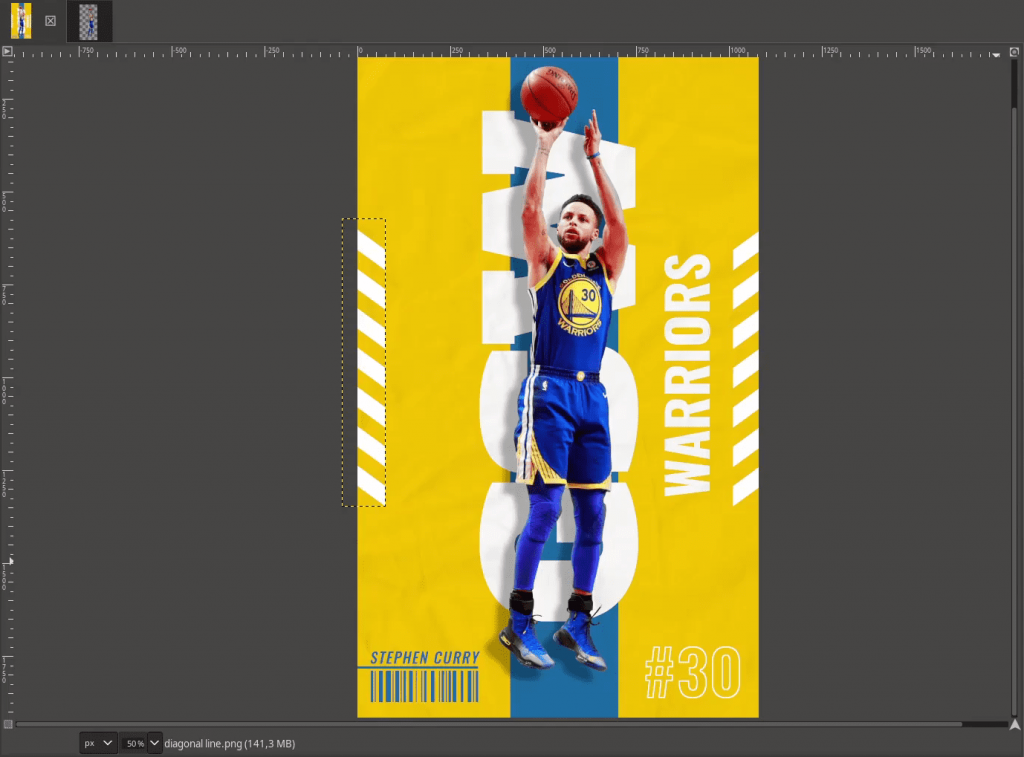
Add the diagonal line png in File > Open as Layers then place it on the right. Duplicate another one, and press Shift+F then Click to flip and place it to the left.
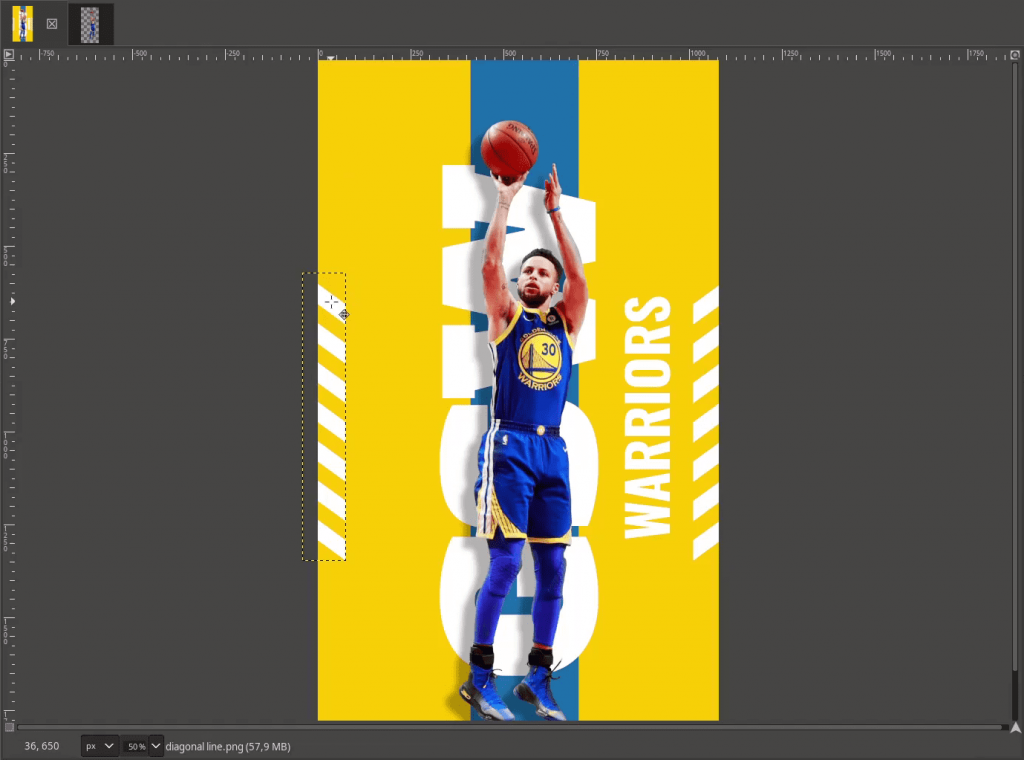
Change it to white color by inverting it in Colors > Invert.
Step 7
Type the number with Text Tool (T) and change it to white color.
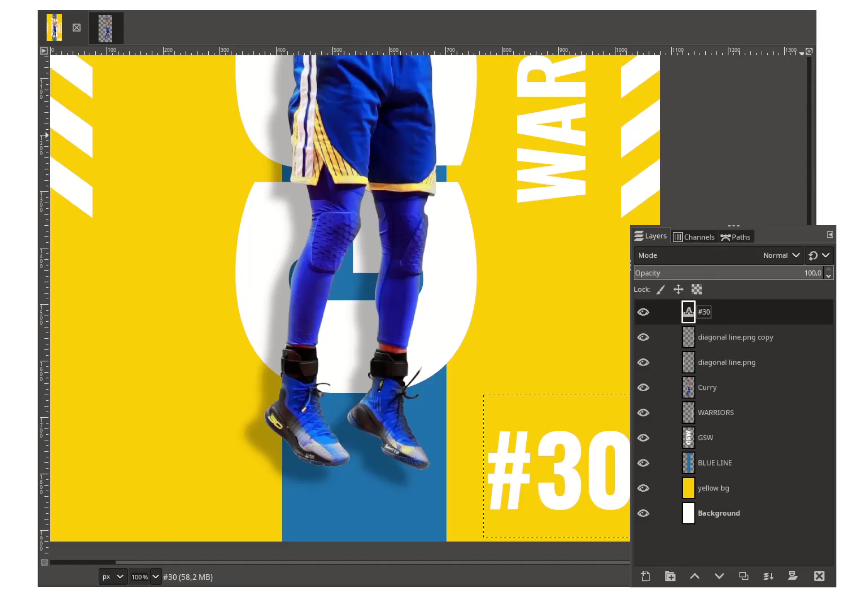
Then make the text number to stroke only by right-clicking in the text layer > Alpha to Selection. While in selection, Select > Shrink, make it by 3px and press Delete button.


Step 8
Type a text again with Text Tool (T) and you can adjust the text spacing in Font Options.
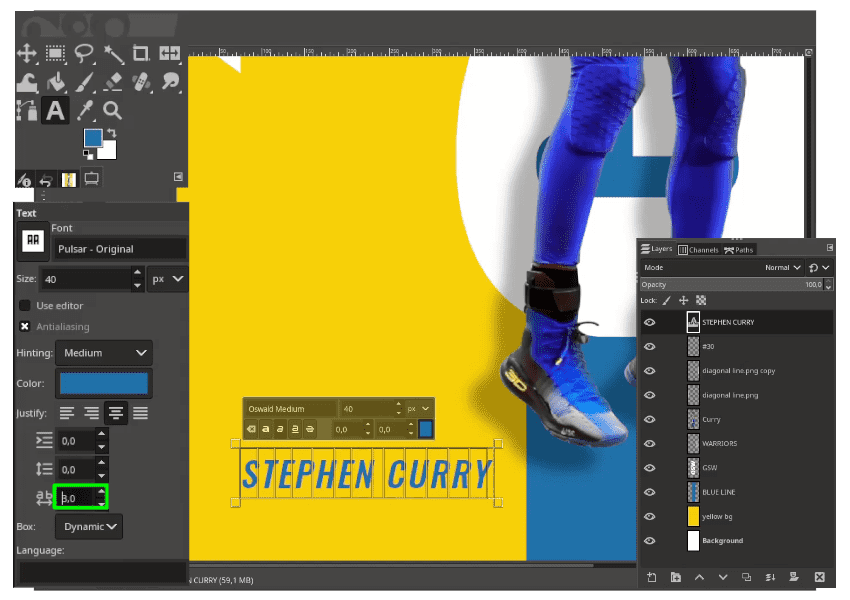
Step 9
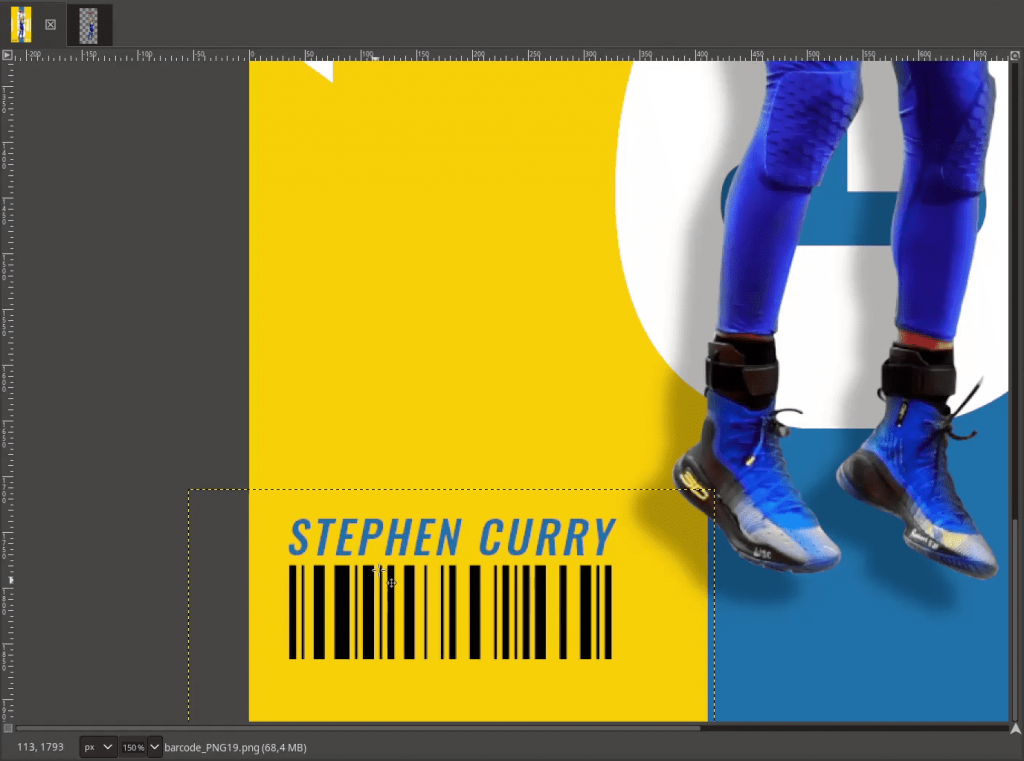
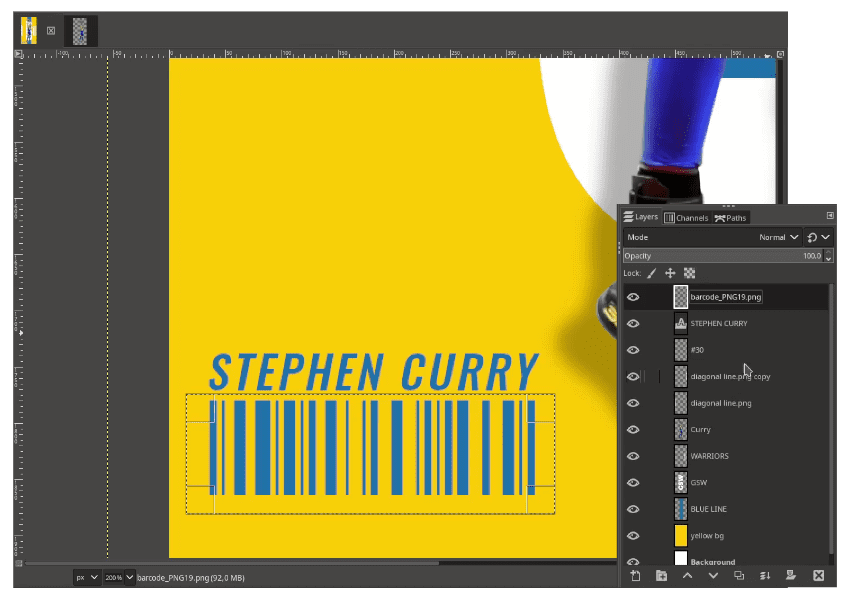
Add the barcode png in File > Open as Layers place it below the text. Cut a half the barcode with Rectangle Select (R) then press the Delete button.

Step 10
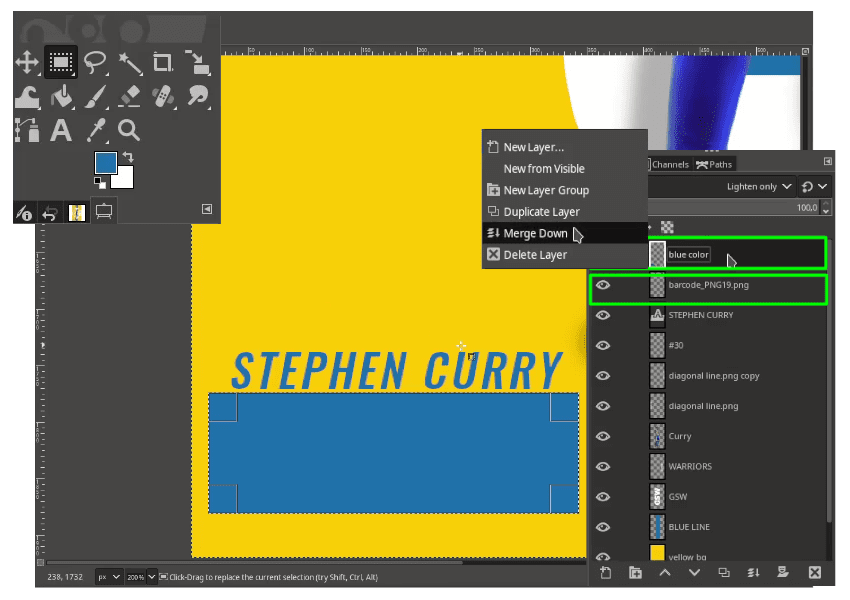
Change the barcode into blue color by selecting the barcode with Rectangle Select (R) then in Edit > Fill with FG Color (make sure foreground color in blue) then change the Layer Mode to Lighten Only. And merge the layer with Right Click > Merge Down (Make sure the blue color in the top and barcode below the blue color layer).
Step 11
Create a new layer for the line and with Rectangle Select (R), Edit > Fill with FG Color.

Step 12
Add the texture in File > Open as Layers and place it above the Background Layer then change the Layer Mode to Multiply.

Too dark, let’s increase the Curves in Colors > Curves.

Step 13
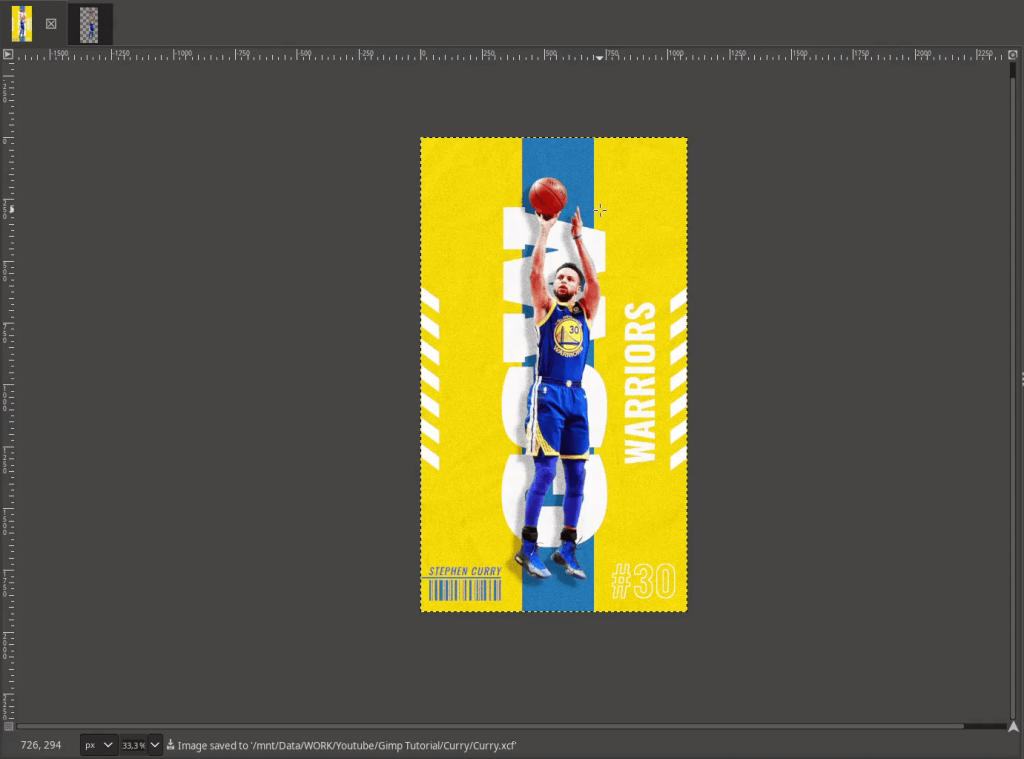
Next, we are going to create the grain effect by creating new layer for the grain and fill with White Color with Bucket Fill Tool (Shift+B).

Add the noise in Filters > Noise > HSV Noise then change the layer mode to Divide and reduce the opacity. But you see some color like pink, green, blue in the noise, right? Neutralize it by changing it to black and white color in Colors > Desaturate > Desaturate again then click OK.

Step 14
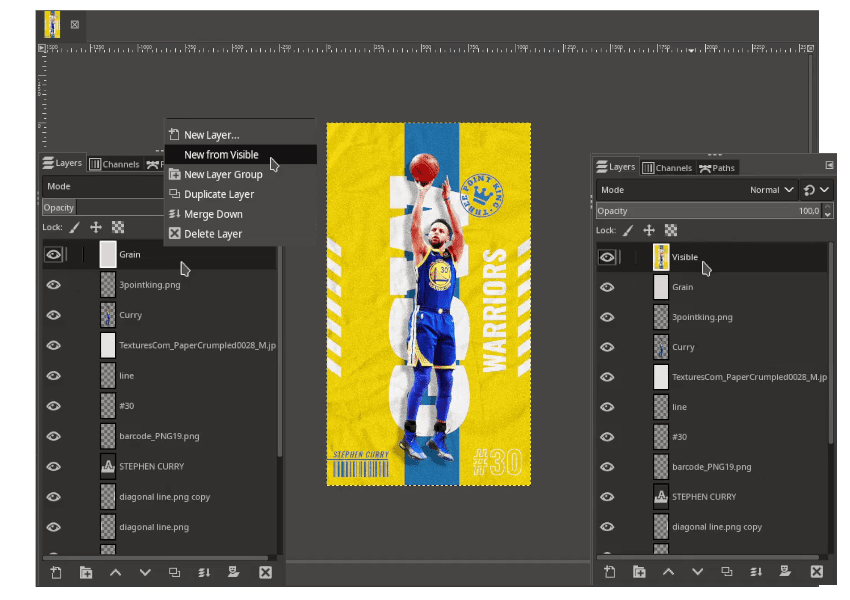
Add the Stamp png in File > Open as Layers then change the color like Step 10. The Last, you can adjust your final image by Right Click on the top of Layer > New from Visible. Adjust the Color Balance, Hue and Saturation, Levels/Curves in Colors Menu, or anything you like to improve for the final result then export it.
It’s Nicely Done!
Hope you learn how to create this Stunning Basketball Poster Design with NBA Air Mail Concept by Jason Drumheller. I think adding more element like text, and the signature would be great for the finishing concept like the Original NBA Air Mail Posts.

Tutorial Assets
- Stephen Curry
- Stacked Diagonal Line
- Three Point King Stamp
- Paper Crumpled Texture
- Barcode
- Oswald Fonts
- Alfa Slab One Fonts
Credits
Inspired by : Nba Air Mail by Jason Drumheller

