Create an urban cover art design with GIMP inspired by the streetwear design concept. In this tutorial, we are going to put some elements like text, texture, and torn effect.
What you will learn
- Moving, Scaling and Rotating Object
- Adding Texture
- Creating Stroked Text Effect
- Create Linked Layer
- Create Grain Effect
- Make Circle Text Effect
- Create a Torn Paper Effect
How to Install Brushes in Gimp
Linux
Locate to home folder, and show hidden files. and you see .config folders. place the brushes to this location folders :
.config/GIMP/2.10/brushes
Windows
Local Disk (C:)/Program Files/GIMP 2/share/gimp/2.0/brushes/
Restart GIMP to load the New Brushes.
Tutorial Steps
Step 1
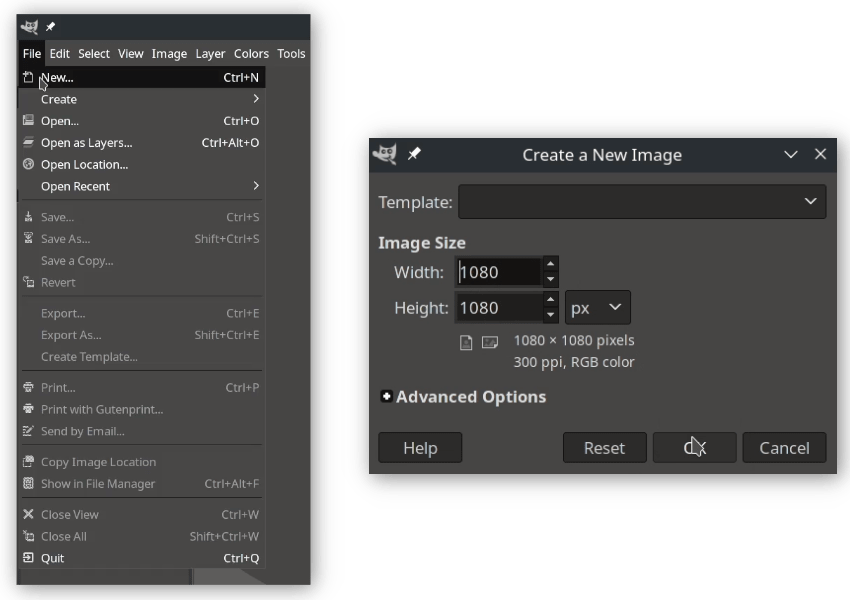
Create a new document size for standard social media post template design in File > New and type the width and height 1080 x 1080px.
Step 2
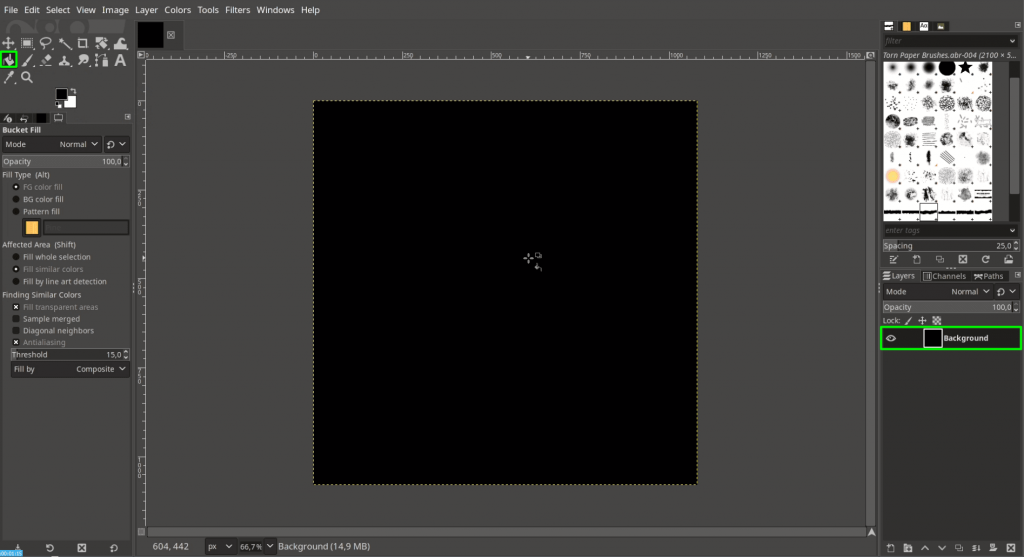
Fill the background with black color, click Bucket Fill Tool (Shift+B) and choose the swatch to black for the foreground, then click on the canvas.
Step 3
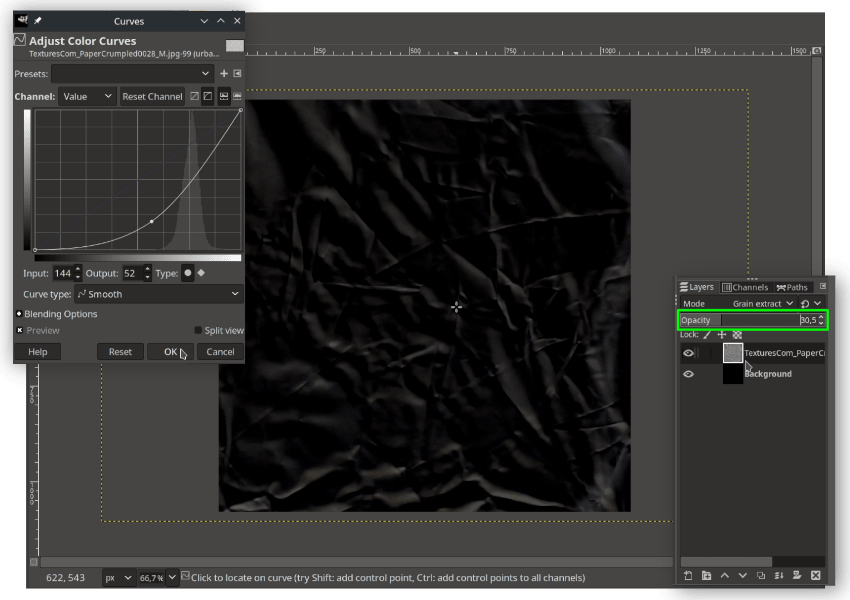
Open the texture file in File > Open as Layers and choose the texture—Press Shift+S to scale. Change the Layer Mode to Grain Extract and turn down the opacity and adjust the curves with Colors > Curves.
Step 4
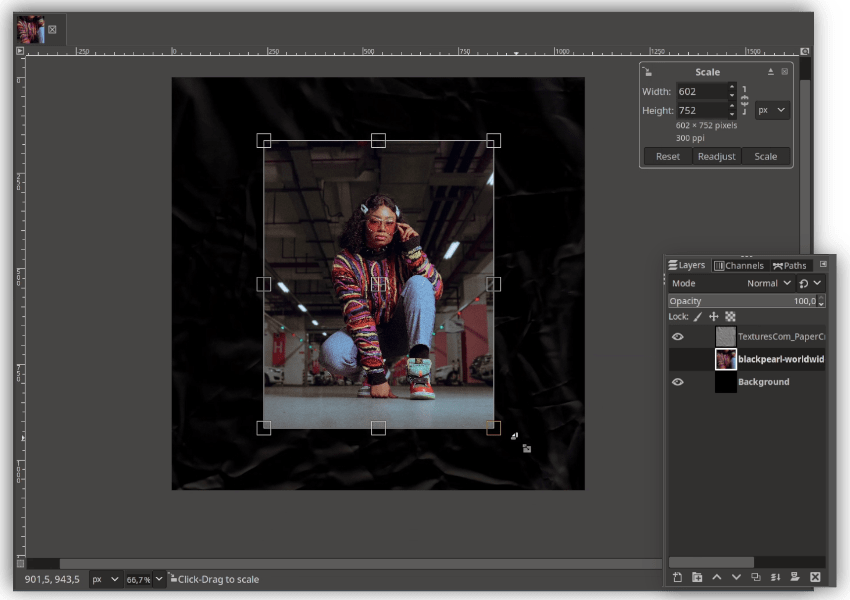
Next open the picture with File > Open as Layers and choose the picture, place the layer below the textures.
Step 5
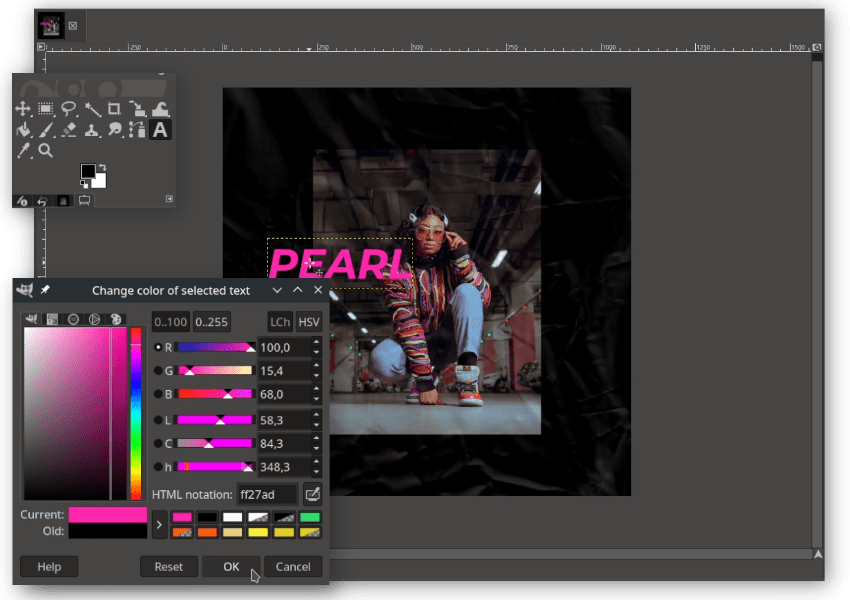
Type some text with Text Tool (T) using Montserrat Bold Italic, and Give some Pink color #ff27ad.
Step 6
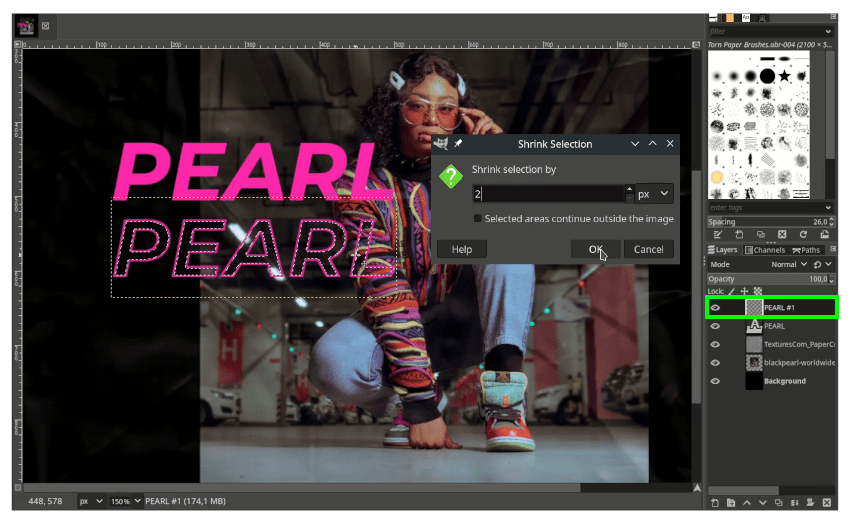
Now we are going to make the stroked text effect, first duplicate the text layer and move it down with Move Tool (M) then in Select > Shrink input number by 2px. While in selection, press Delete button.

Step 7
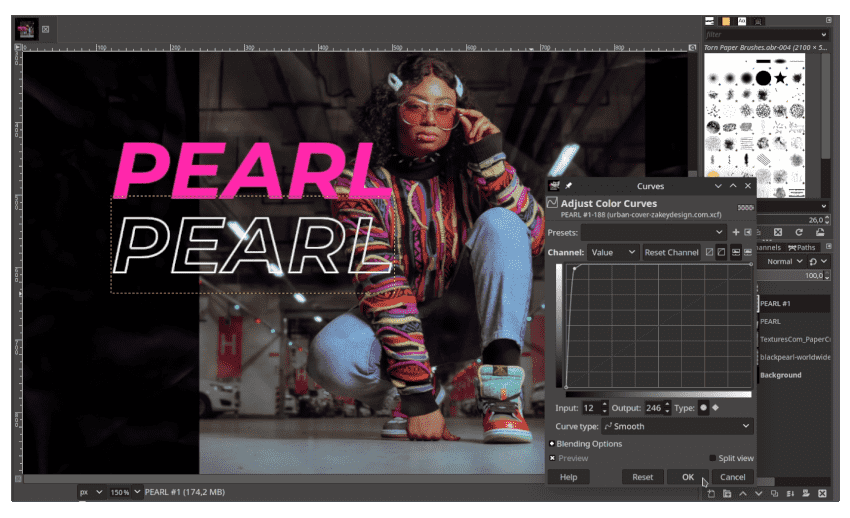
Make it become with color with Colors > Curves make it until it becomes white. And do the same one more time.
Step 8
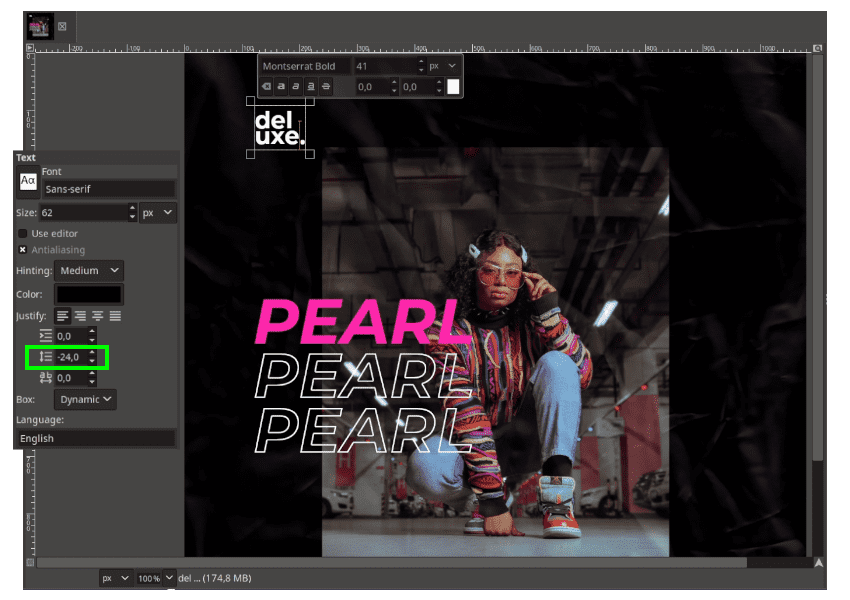
Add text in the left corner of the canvas press Enter to break the line. You can adjust the line spacing too.
Step 9
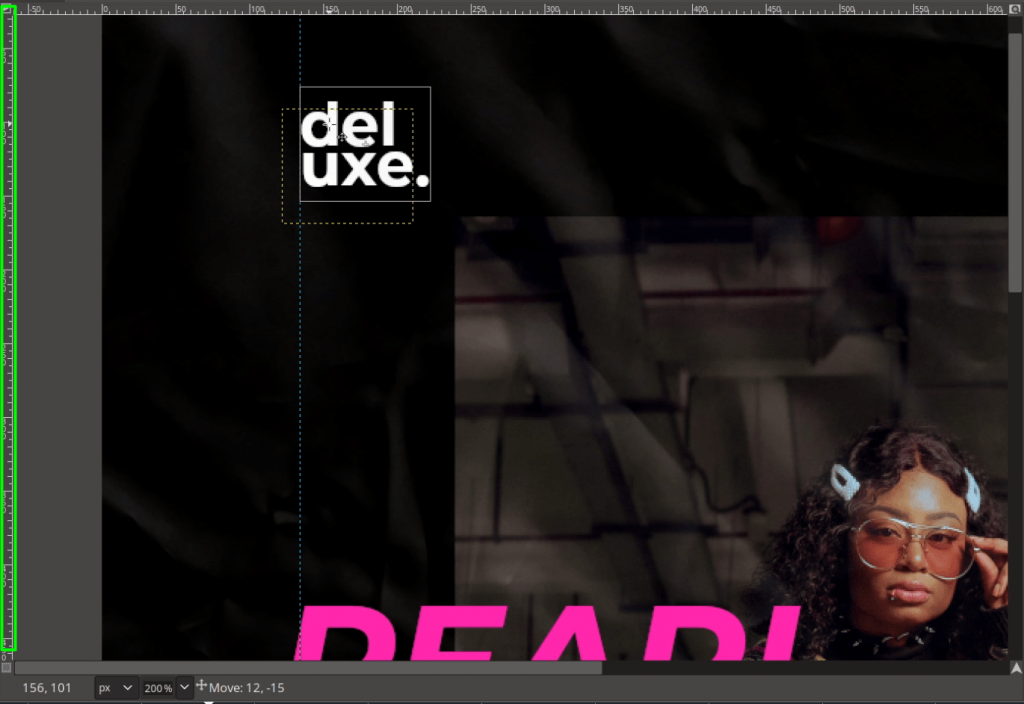
Add the ruler by dragging it from the Side Left to make it same line with previous text and drag it with Move Tool (M) it will automatically snap. Turn off the guides line in Views > Show Guides.
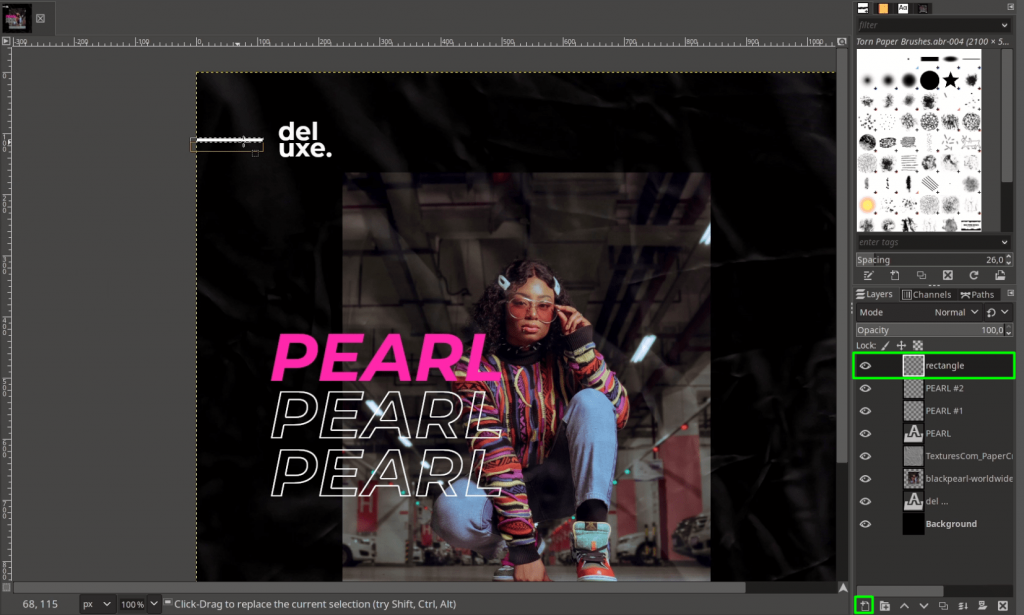
Create a rectangle shape but first create a new layer for Rectangle, with Rectangle Select Tool (R) and fill the color in Edit > Fill with BG Color (make sure background color in white).
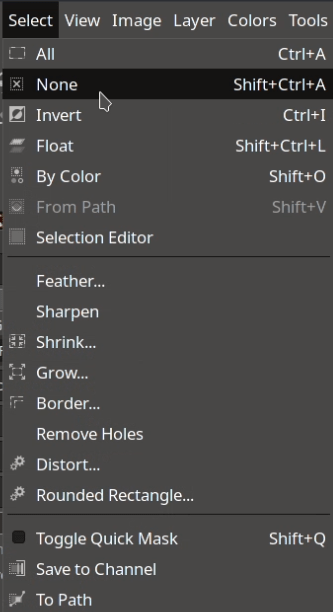
Don’t forget to deselect in Select > None.
Step 10
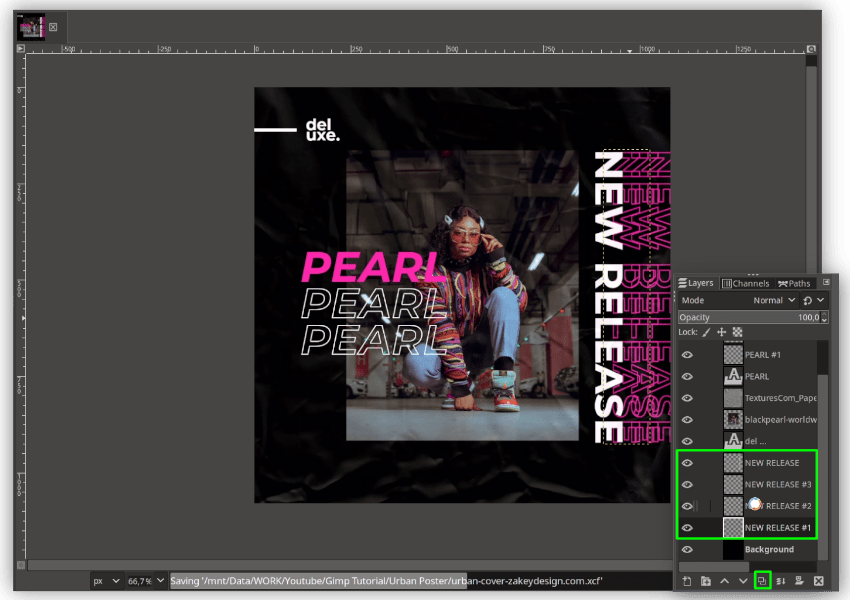
Create a new text and rotate it by pressing Shift+R you can hold Ctrl+Shift while rotating to make 15-degree increment. And duplicate the text into four layers. Do the same method in Step 6-7.
Step 11
Move the “New Release” text to the right a little by linking all text and with Move Tool (M) just drag it.
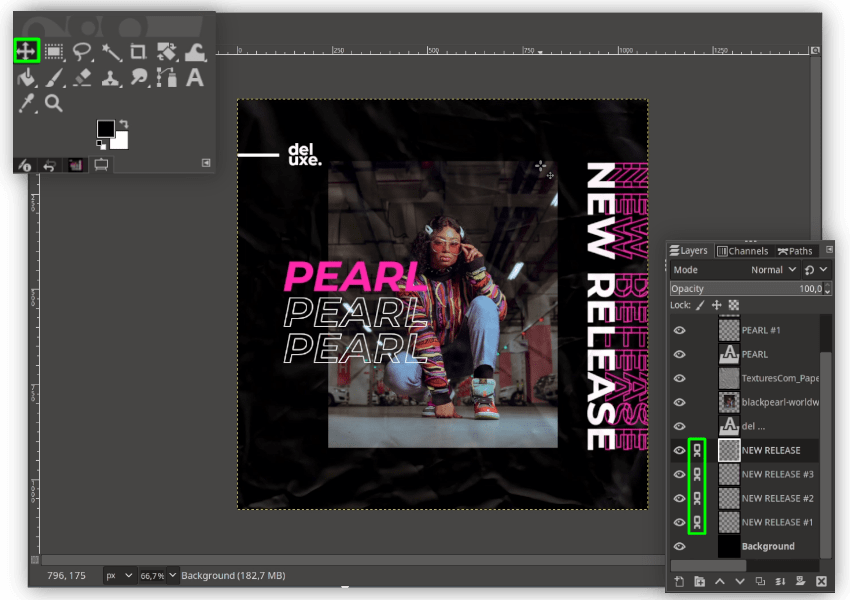
Step 12
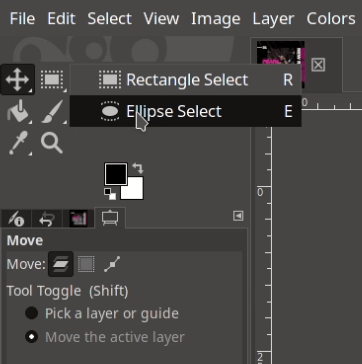
Create a circle text with the Ellipse Select Tool (E) press Ctrl+Shift while dragging to make a proportional circle.
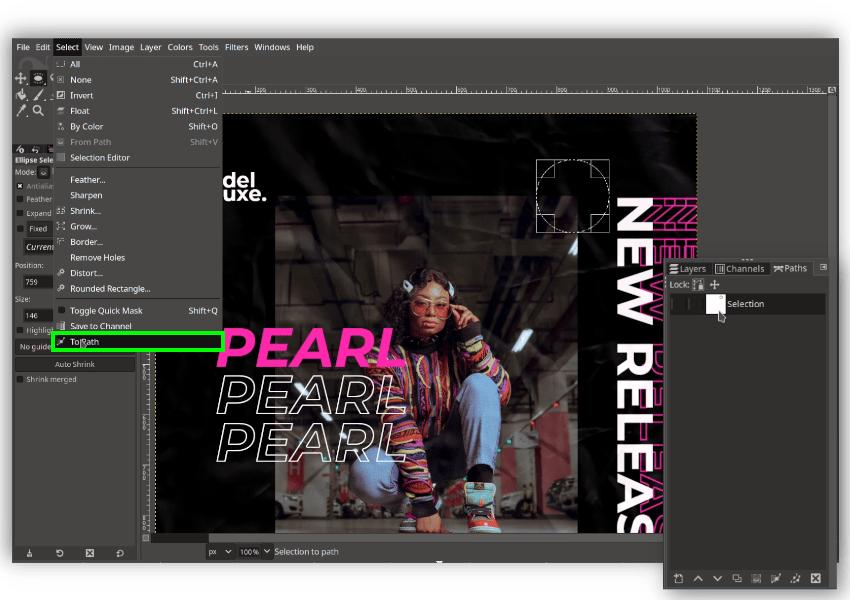
Go to Select > To Path. On the Paths tab, you will see the new selection created. Deselect it in Select > None (Shift+Ctrl+A).
Step 13
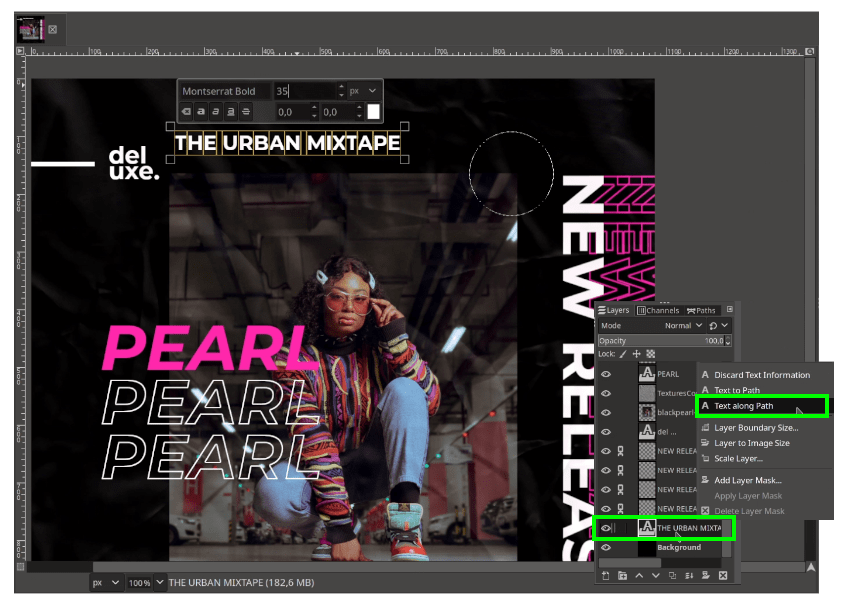
Type a text for the circle text later with Text Tool (T) and on the Text layer, Right-click > Text Along Path.
Note: If the text overlapping from the circle, you can undo it (Ctrl+Z) and try to resize the text again.
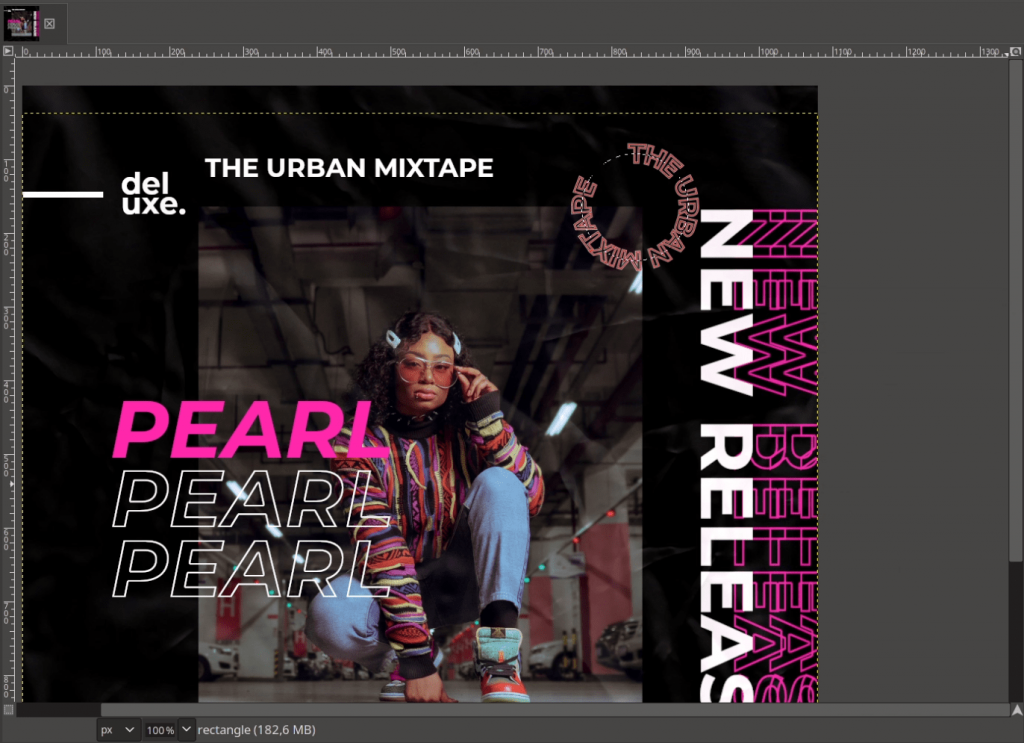
Step 14
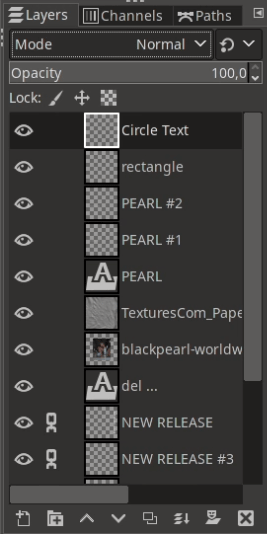
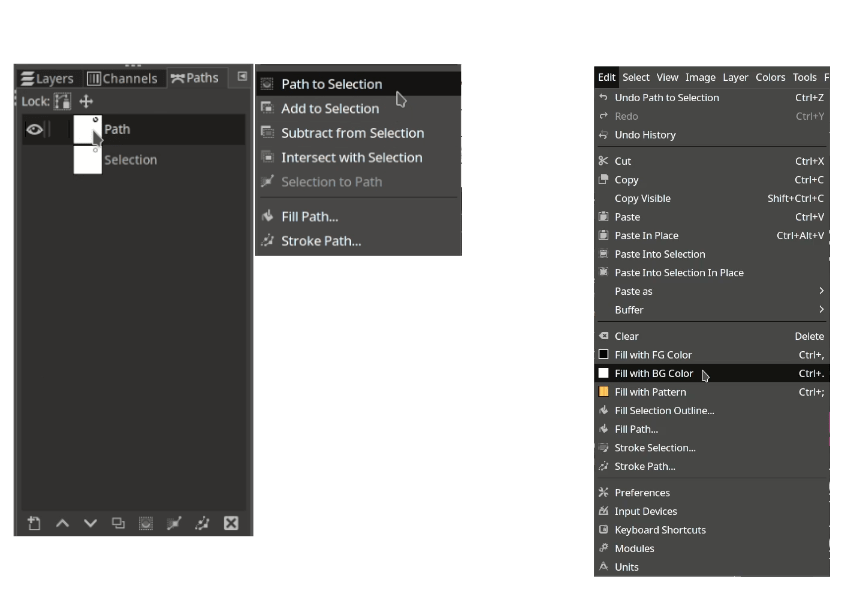
Create new layer and name it “Circle Text”. On the Circle Text layer, move to the Paths Tab, Right Click > Path to Selection then Edit > Fill with BG Color.
Step 15
Create new layer name it “Circle Stroke”.

Step 16
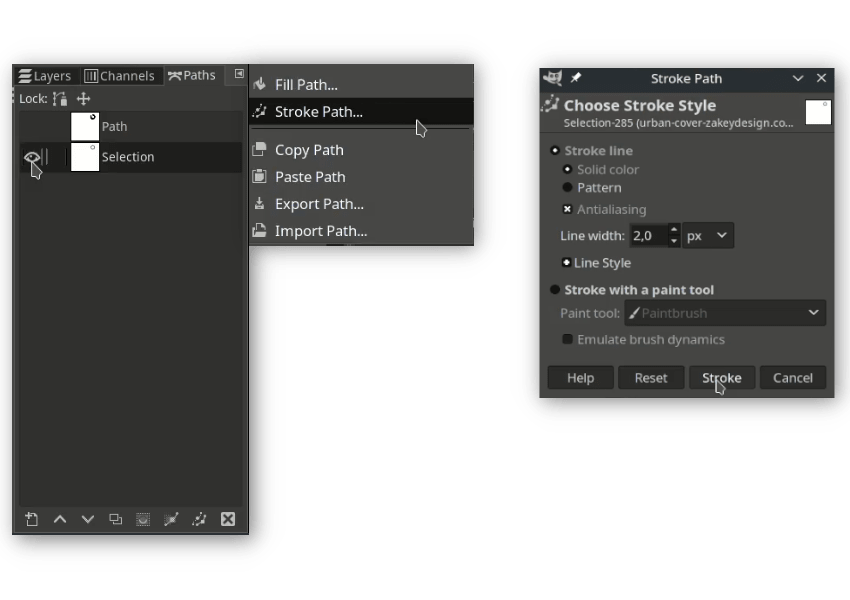
On the Circle Stroke layer, move to the Paths Tab, Right Click > Stroke to Path then choose Solid color and make the line width by 2px, then click stroke (make sure foreground color in white).
Step 17
Erase the overlapping circle with Eraser Tool (Shift+E).

Step 18
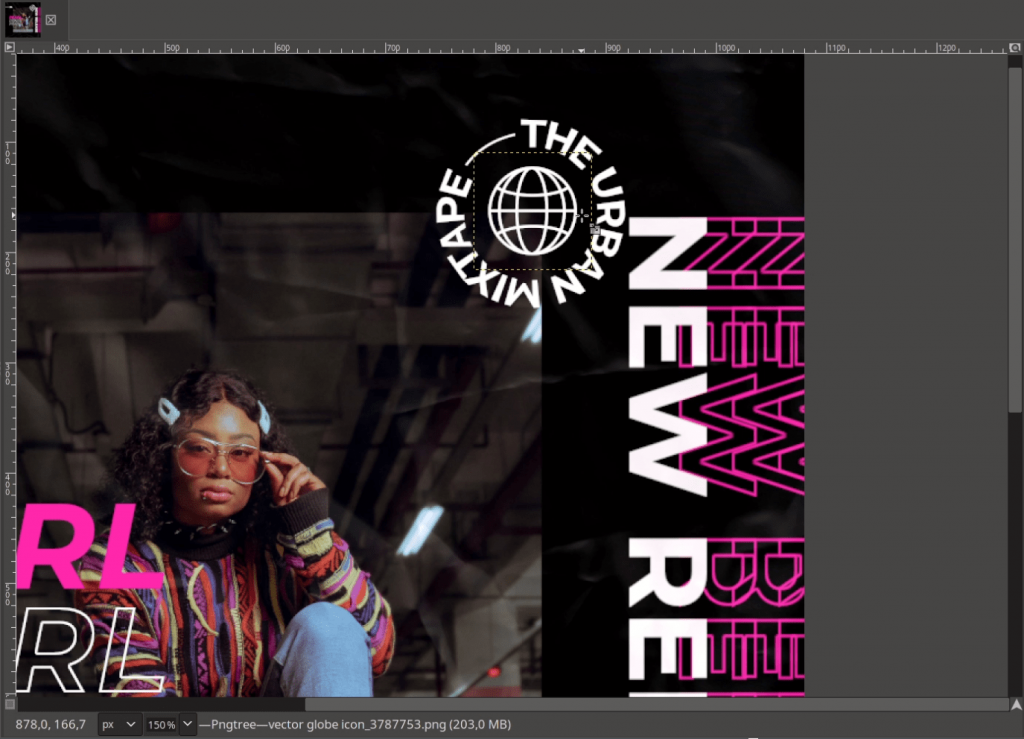
Add the Globe png File > Open as Layers and place it to the center of the circle text, press Shift+S to scale and you can change the color to white in Colors > Invert.
Step 19
Add the duct tape png File > Open as Layers, scale it down with Shift+S and change the layer mode to Pin Light.

Step 20
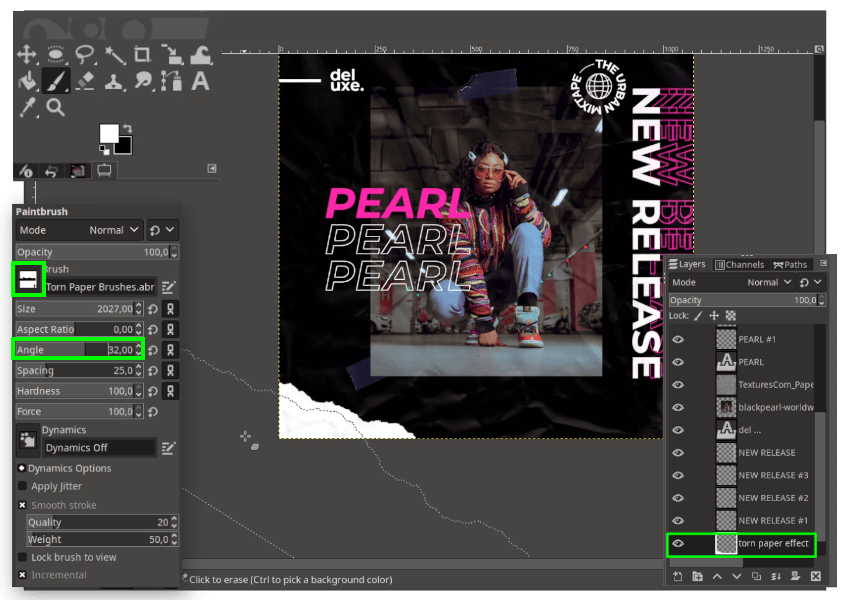
Next, we will give the torn paper brush effect with Paintbrush Tool (P) Create a new layer for the torn paper and change the brush to Torn Paper, Change the Angel as well to rotate the brush.
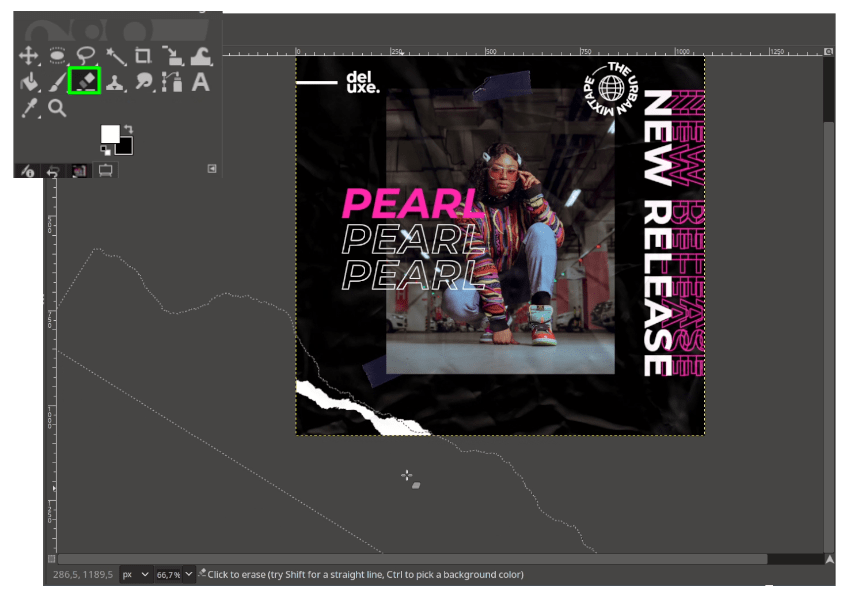
Use Eraser Tool (Shift+E) to create variations.
Step 21
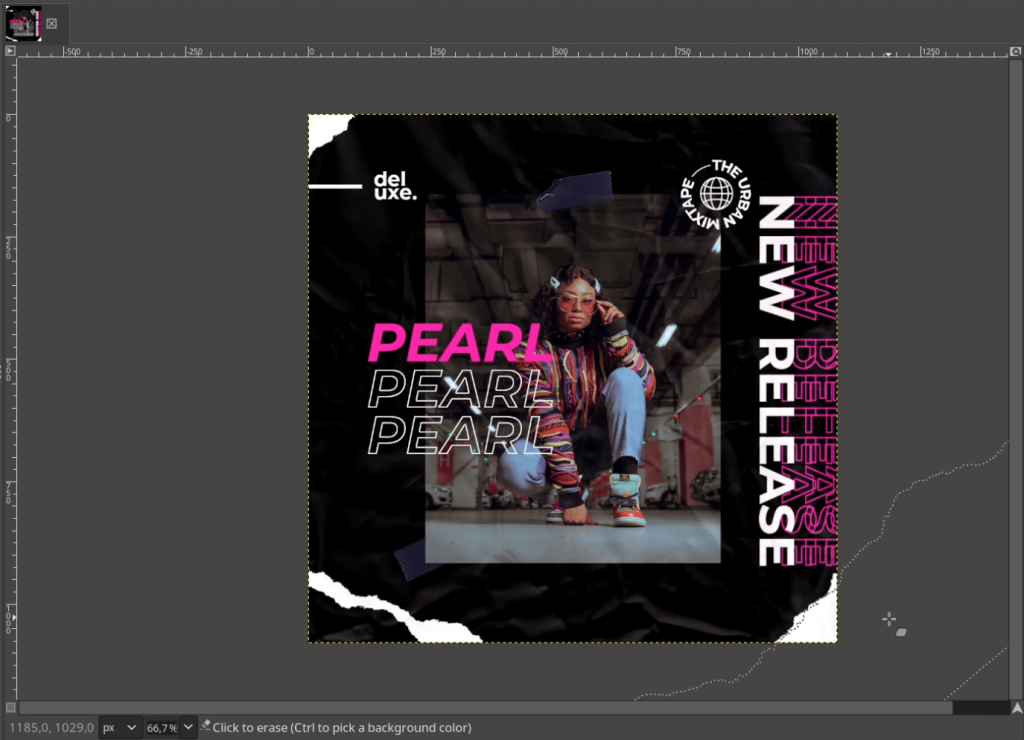
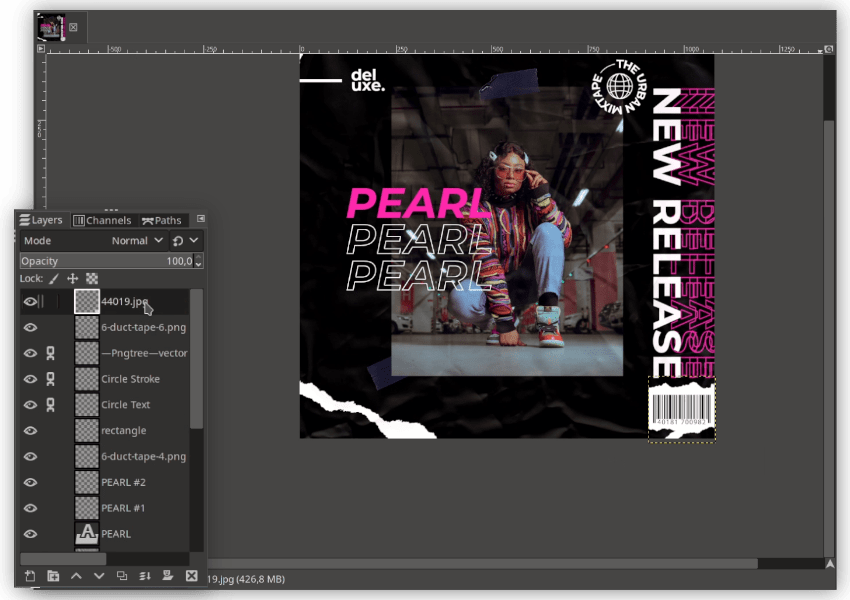
Add the barcode png in File > Open as Layers then scale it down Shift+S use Eraser Tool (Shift+E) to create torn effect. You can rotate the brush angle to create something like this:
Step 22
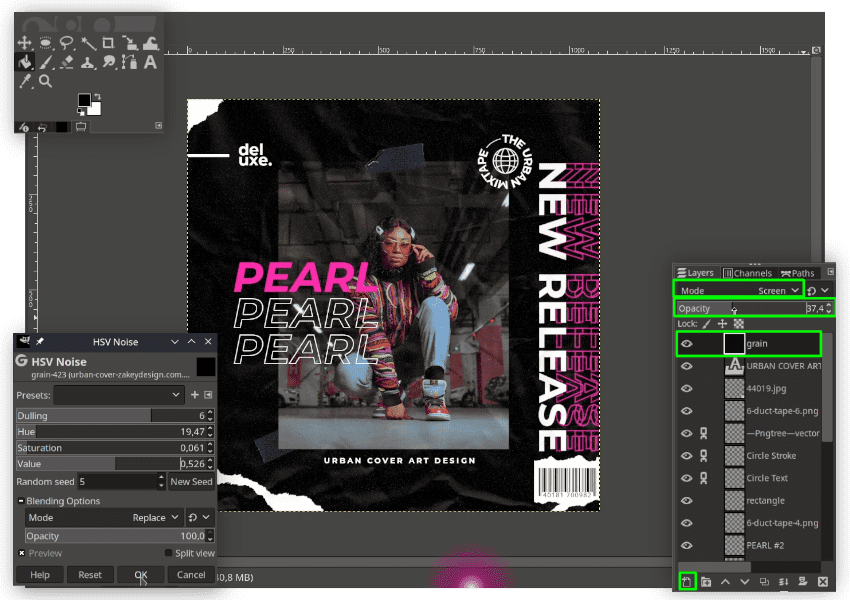
Last thing, add the grain effect create new layer for the grain. Change the layer mode to screen, then with Bucket Fill (Shift+B) fill with black color then in Filter > Noise > HSV Noise. If it too much, you can reduce the opacity.
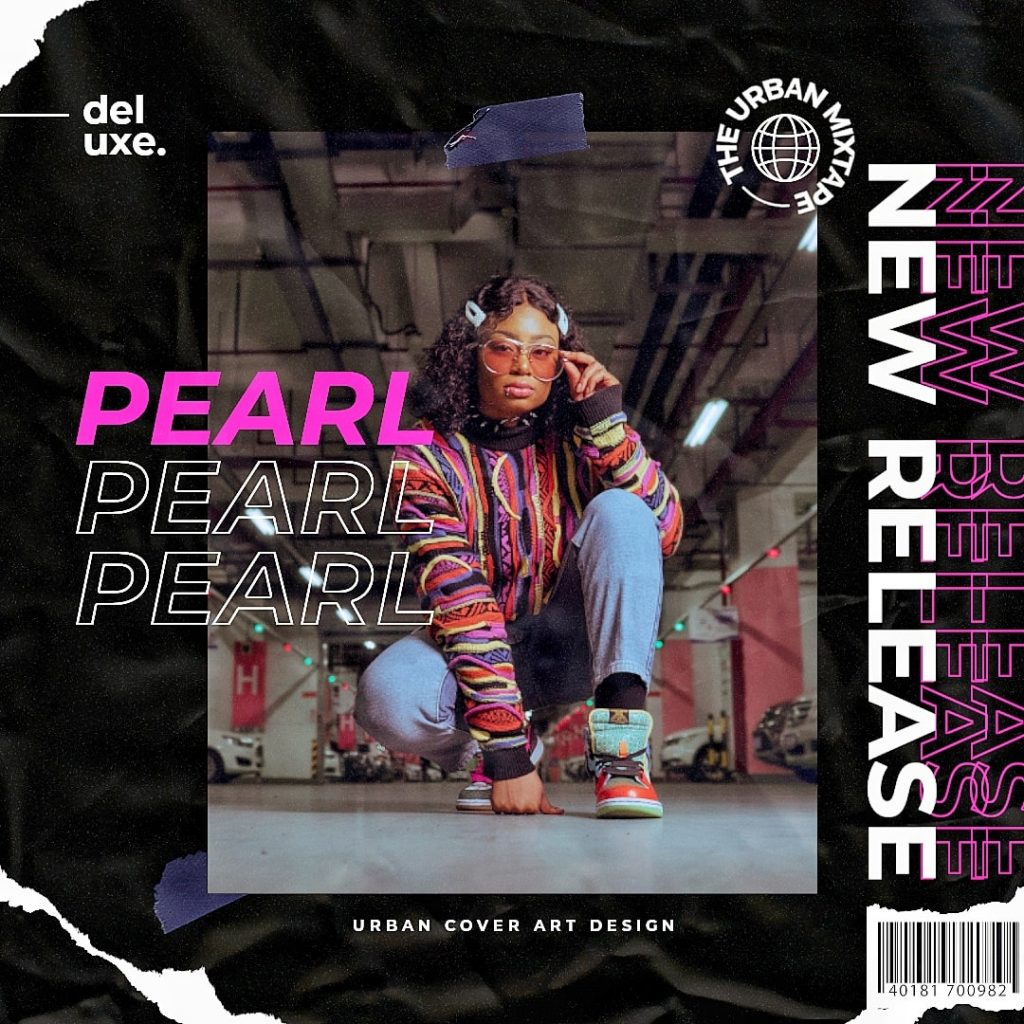
Urban Cover Art is Ready!
That’s it! I hope you learn how to create this Urban looking poster concept with GIMP. In my opinion, this art is focus using many elements, like text, the duct tape, barcode, texture, grain effect and torn paper effect. You can add parental advisory sticker and hologram sticker png to increase the dopeness!
Tutorial Assets
- Woman in Red and Black Striped Sleeve Shirt
- Crumpled Paper Texture
- Duct Tape
- Globe
- Barcode
- Torn Paper Brushes
- Montserrat Fonts
Credits
- Inspired by Neon Instagram Posts & Stories – Marie T
- Inspired by URBAN STYLE INSTAGRAM TEMPLATE #002 – Arya Alfin
- Inspired by Outside V1 I Album Cover Artwork – Simo’x Hir-i
- Inspired by Fashion Instagram Templates – Azruca


