This tutorial will guide you through the process of creating vector portrait illustrations from reference images, using the bezier tool and a step-by-step approach. You will learn how to create the face shape, eyes, lips, and hair, and how to add shading to enhance realism.
What you will learn
- Importing Images
- Locking the Layer
- Rounding the corners with path effect
- Using Bezier Tool
- Locking the Corner with Bezier tool
- Make a Clipping Mask
- Making the Outline
The Basic
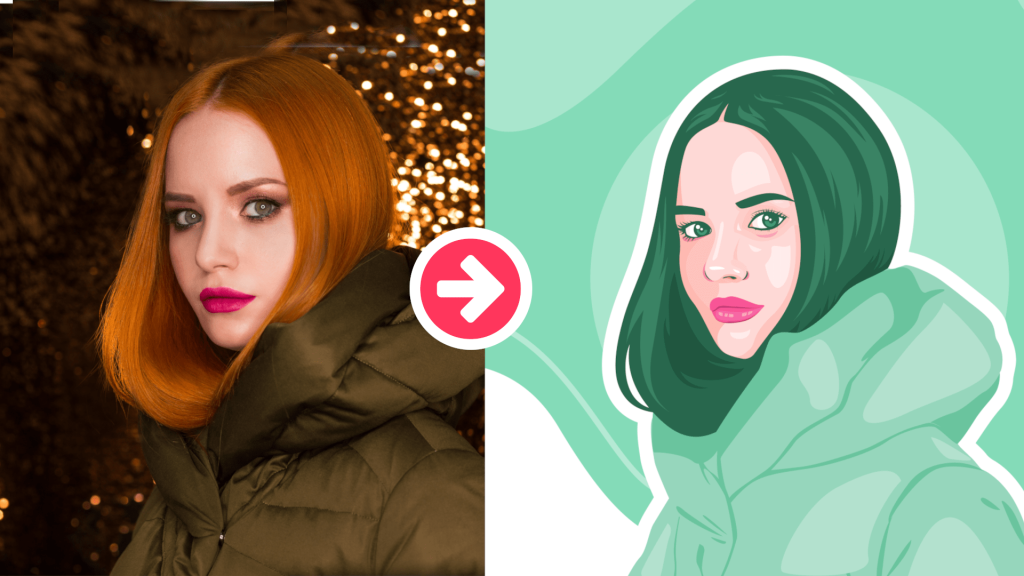
When creating a vector portrait illustration, it is important to take note of certain colors, namely the base color and the shading for each specific part of the body reference from the picture. in this tutorial i created each part of the body from the picture and place it into seperate layers. start from the hair, face, nose, lips, eyes, jacket.
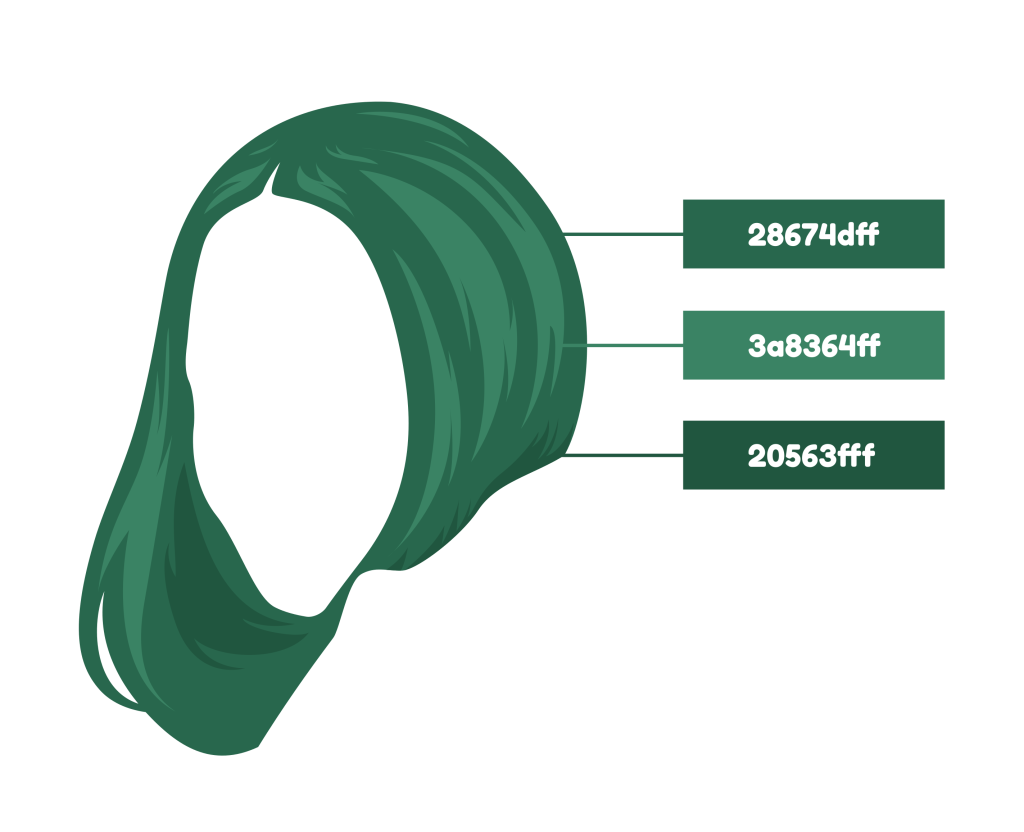
In this tutorial, the selected base color is #28674dff, which is intended for use on the eyes and nose layers. Additionally, the light shade color is #3a8364ff and the dark shade color is #20563fff. The hair layers contain three distinct colors.
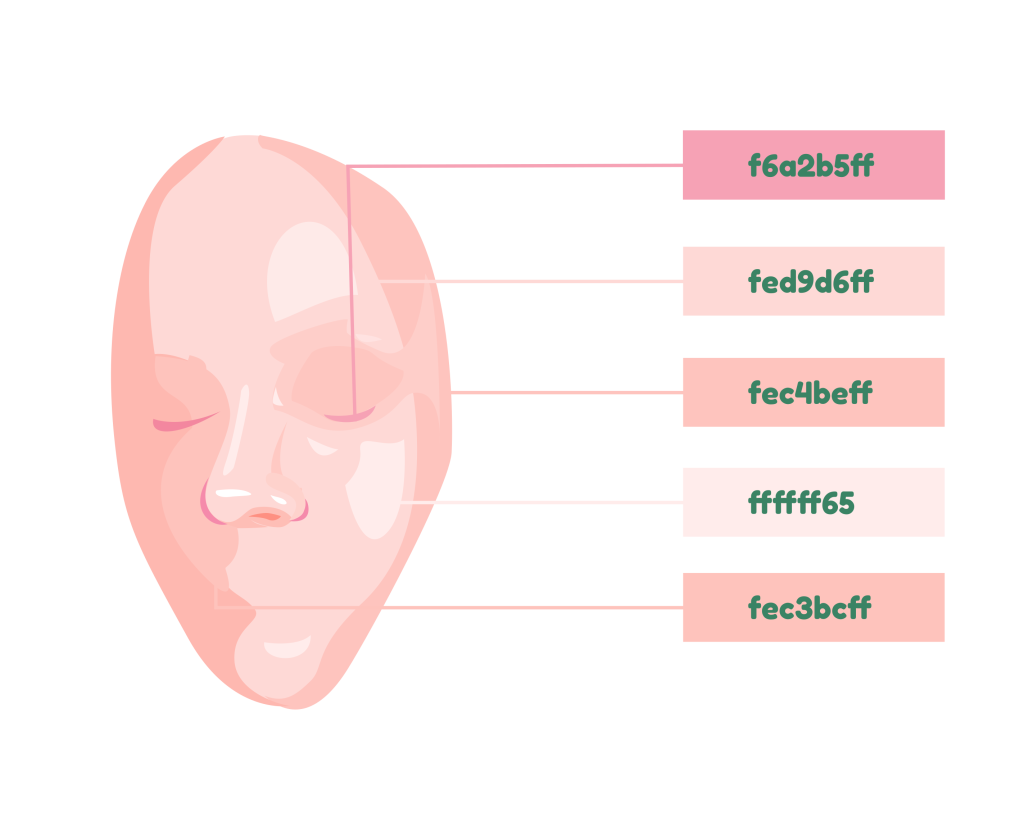
The Face layer contain 5 colors. the base color for the face is:
1. Base Color: #fed9d6ff
2. Light Shade: #fffff65
3. Dark shade: #fec3bcff
4. Darker shade: #fec4beff
5. Darkest shade: #f6a2b5ff
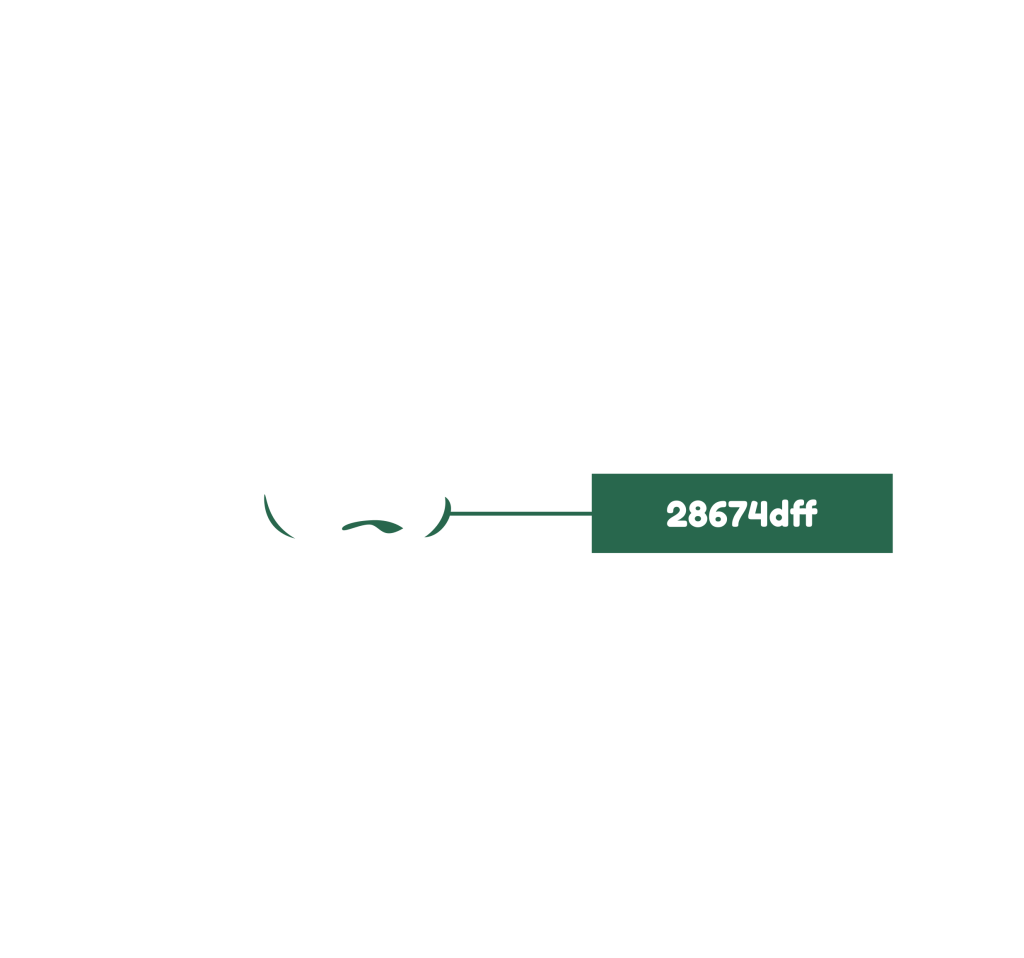
For the nose layer, it only contain the base color #28674dff.

The eyes layer consists of 5 colors:
- Base Color: #28674dff (applied to eyebrows, eyelashes, eyelids, and pupils)
- Light Shade: #3ef77ff
- Lighter Shade: #ffffff (White)
- Lighter Shade for Tear Duct: #ffecebff
- Darker Shade for Tear Duct: #fea9a0ff

The lips layer comprises of four colors: #f85596ff as the base color, #3a8364ff as the lighter shade for the lips, #fffff65 as the lightest shade for the lips, and #bd3273ff as the darker shade for the lips.
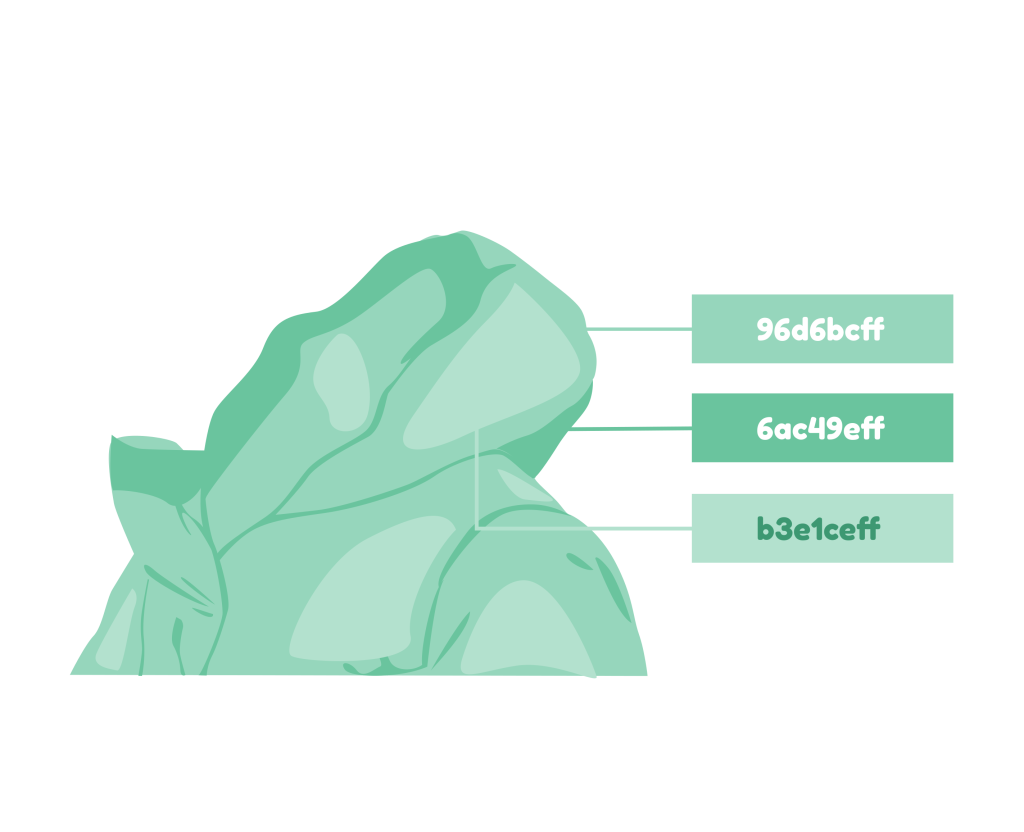
Finally, regarding the jacket colors, the base color is #96d6bcff, whereas the dark shade of the jacket is #6ac49eff, and the lighter shade is #b3e1ceff.
Note: you can adjust the shade colors by altering the lightness, which is demonstrated in this tutorial.
Step 1
To begin, import the image by going to File > Import. Resize the image to fit the canvas by selecting the image, and then holding down Ctrl+Shift to lock the scale. Next, create a new layer for the hair and start tracing the hair first.

Lock the image layer to focus on the hair layer.
Result:
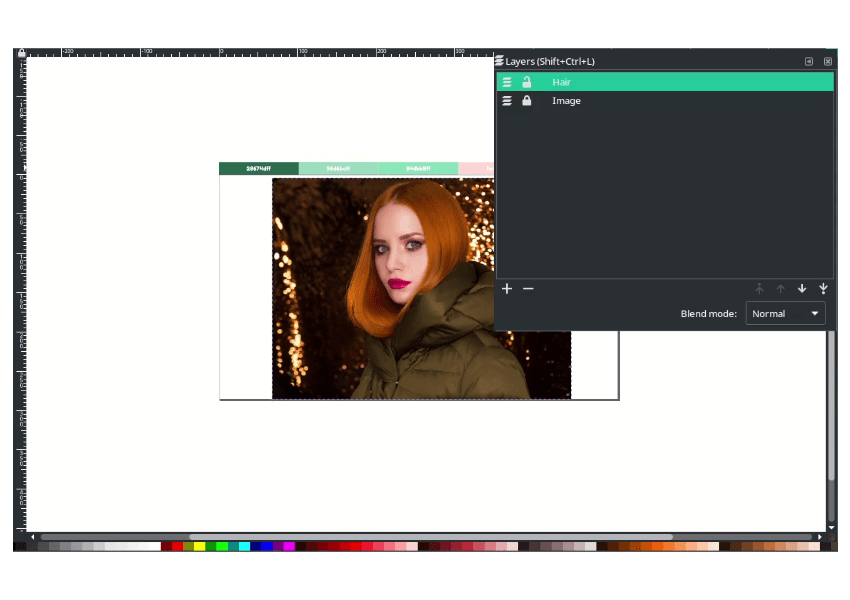
Start tracing the hair using the Bezier tool (shortcut: B) and follow the shape of the hair. Then, change the color to #28674dff (Dartmouth green).
Tips: Hold down Shift to lock the corners and then release it.
Step 2
Create a new layer for the face, then lock the hair and image layer.
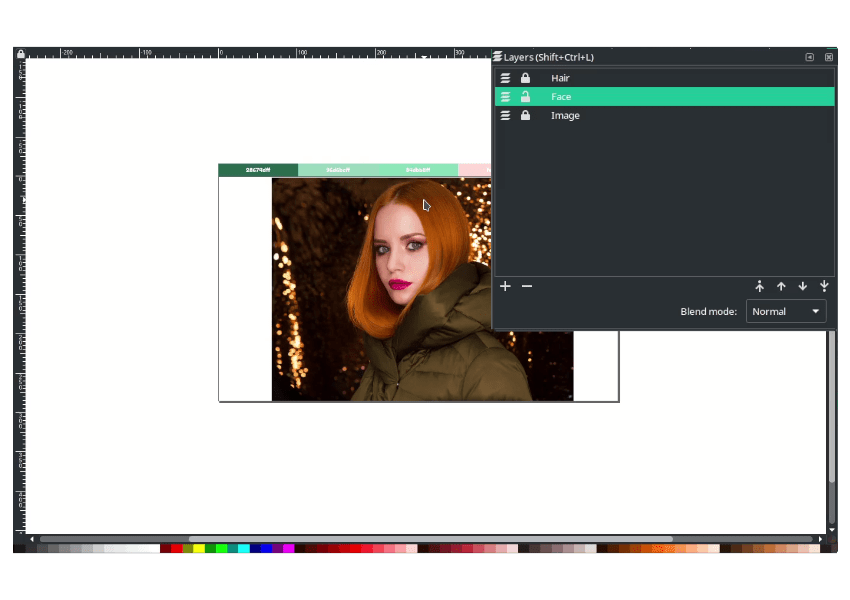
Using the Bezier tool (shortcut: B), follow the shape of the face. Then, change the color to #fed9dff (Mimi pink).
Step 3
Next, for the jacket, create a new layer and lock all layers except for the jacket layers.
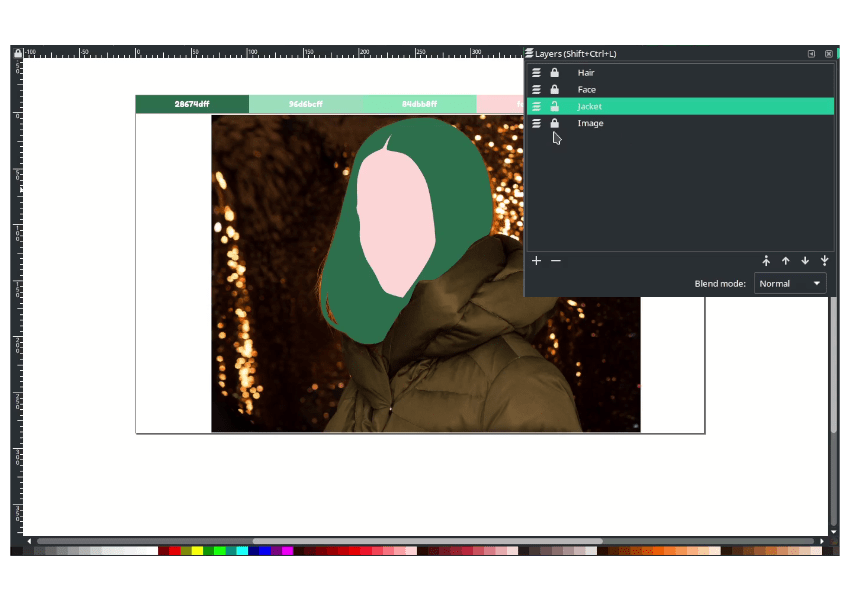
Follow the shape of the jacket with bezier tool (B).
Step 4
Next, create a layer for the eyes, hide the face layer, and lock all the other layers.

Follow the shape of the eyes, and use the ellipse tool (shortcut: E) to create the pupils. Then, create a clipping mask. Repeat these steps for the other eye.
Result:

Step 5
Create a new layer for the nose, and lock all the other layers.

Follow the shape of the nostrils, using the Bezier tool. Hold down Shift to lock the corners as needed.
Step 6
Create a new layer for the lips, and lock all the other layers.

Follow the shape of the lips and divide it into two parts: the upper and bottom lips.
Step 7
Now it’s time to create shading for the face. Change the blend mode of the face layer to Darken.

Using the Bezier tool, change the lightness to 85 in order to create shading.
Use the Bezier tool to continue drawing on the other side of the face.
Use the Bezier tool to create shading on the eye parts as well.
Step 8
While still on the face layer with the Darken blend mode, create lighter parts of the shading.
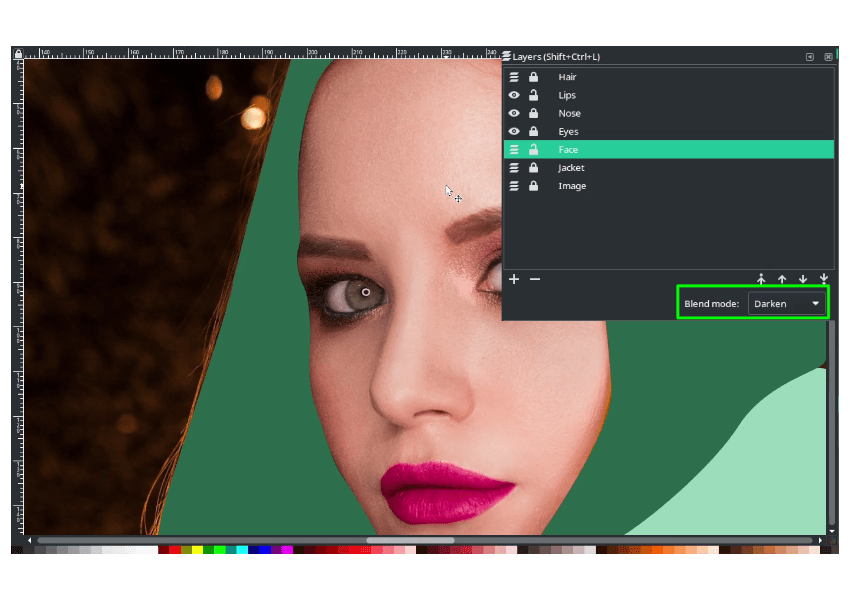
Using the Bezier tool, create a shape around the lighter parts of the face. Change the color to white, and reduce the opacity as needed.
To create a darker shade in the nose and eye areas of the face, use the Bezier tool to create shapes around those parts. Adjust the color and opacity as needed to achieve the desired effect.
Step 9
To create shading for the lips, change the blend mode of the lips layer to Soft Light.

Using the Bezier tool, draw the dark part of the lips and then create a clipping mask for it.
To create a lighter part of the shading on the lips, use the Bezier tool to create a shape around the desired area. Adjust the color and opacity as needed to achieve the desired effect.
Step 10
To create shading for the eyes, use the Bezier tool to draw shapes around the desired areas. No need to change the blend mode of the layer.

To create a half-circle shape in the eyes, use the Ellipse tool to draw a circle, and then use the Direct Selection tool to select and delete half of the circle.
Step 11
To create shading for the hair, first unlock the hair layer, and then lock all the other layers.

To create the lighter parts of the hair shading, use the Bezier tool to draw shapes around the desired areas. Adjust the color and opacity as needed to achieve the desired effect.
To create the darker parts of the hair shading, use the Bezier tool to draw shapes around the desired areas. Adjust the color and opacity as needed to achieve the desired effect. You can experiment with different colors and opacity levels until you find the shading that works best for your design.
Step 12
To create shading for the jacket, unlock the jacket layers and lock all the other layers and change the jacket layer blend mode to soft light. Use the Bezier tool to draw shapes around the areas where you want to add shading, then adjust the color and opacity to achieve the desired effect. You can experiment with different colors and opacity levels until you find the shading that works best for your design.

Using the Bezier tool, start by drawing the dark shade for the jacket.
After creating the dark shade for the jacket with the Bezier tool, continue adding more shading by drawing with the same tool in areas where the jacket folds and creases. Vary the shade by changing the lightness and opacity as necessary to achieve a realistic effect.
Using the Bezier tool, locate the lighter areas of the jacket and draw shapes to create the light shading. Adjust the opacity as needed to achieve the desired effect.
Finish
Great job! I hope you found the process helpful and enjoyable. If you have any further questions or need more assistance, feel free to ask.


