This tutorial will show you how to create text masking effect and some noise effect in GIMP. comment below if you have any question.
What you will learn
- How to add a layer mask
- How to change Layer Mode
- How to select with Bezier Tool
- How to use Curves
- How to create a noise effect
Tutorial Steps
Step 1
Create a new file in File > New with 1080 x 1920px. This size is for Instagram Stories post size.

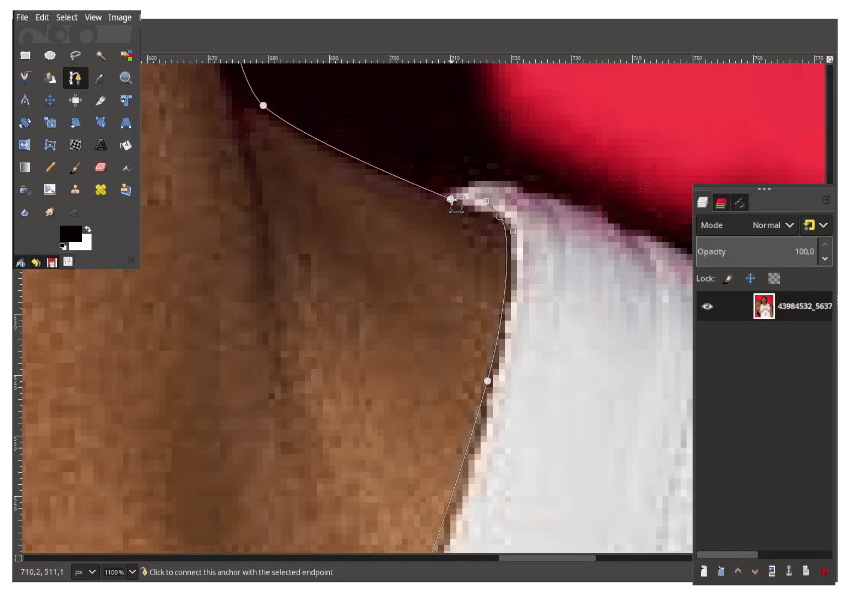
Step 2
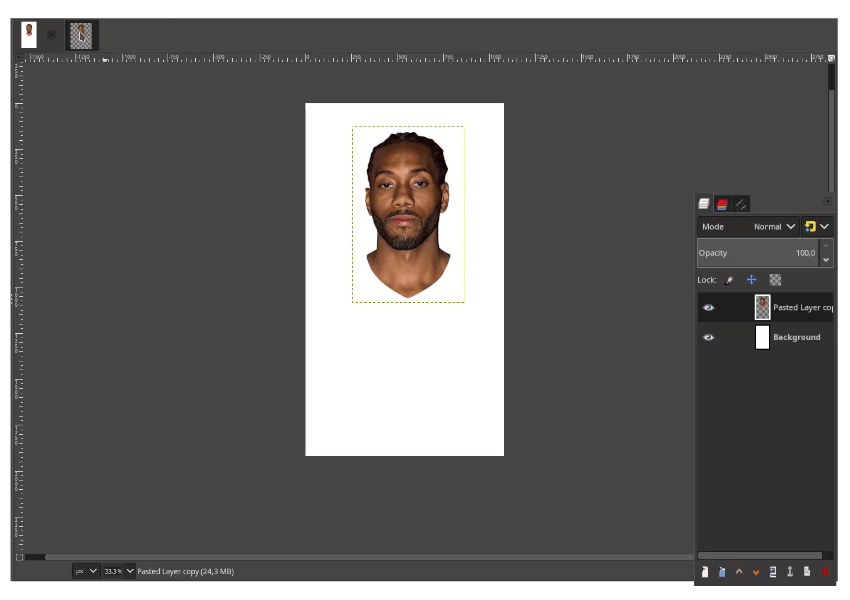
Select Kawhi images with Bezier Tool (B) and follow the shape of the head.
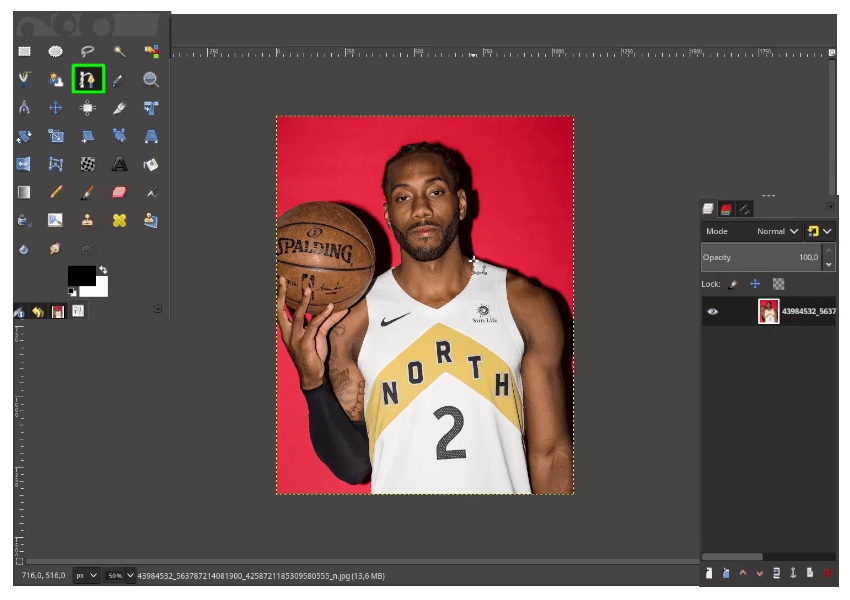
When almost finished, hold Ctrl then click to the first node then press enter.
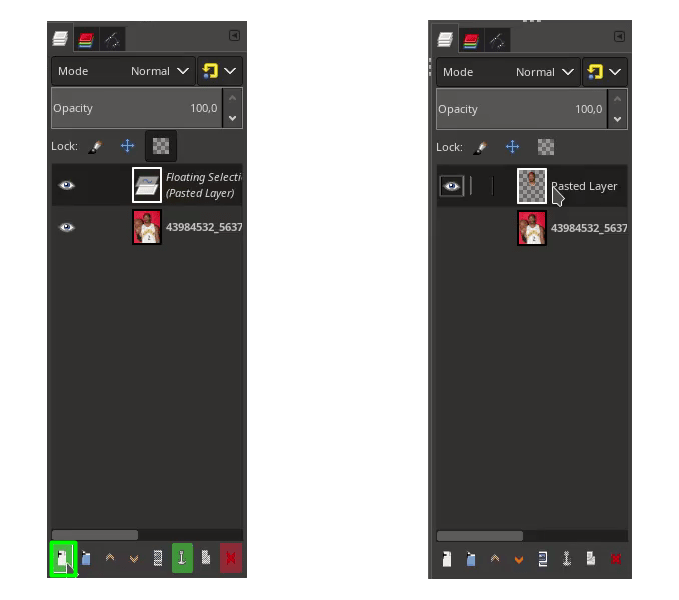
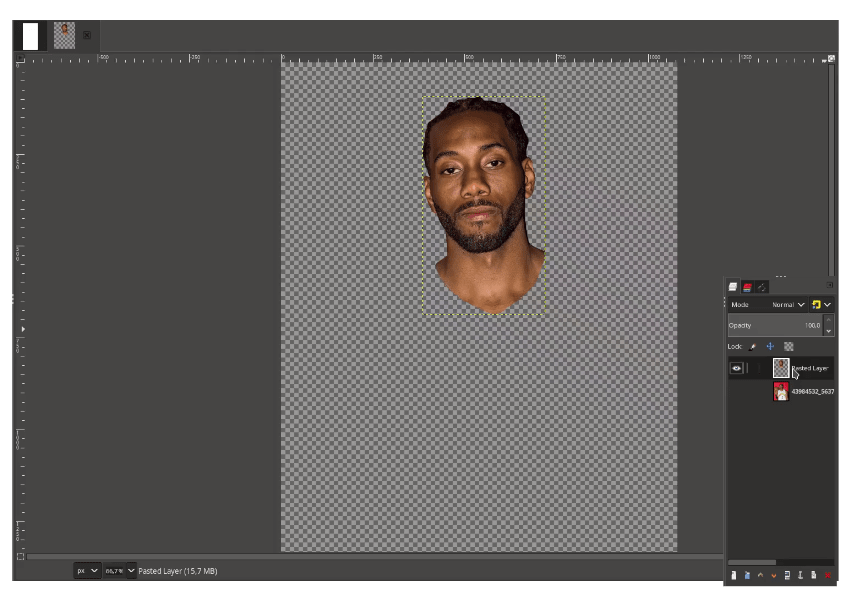
While in selected, Press Ctrl+C to copy, and Ctrl+V to paste, it will create a floating selection then click create a new layer. the selected object will appear as a new layer.
Result:
Step 3
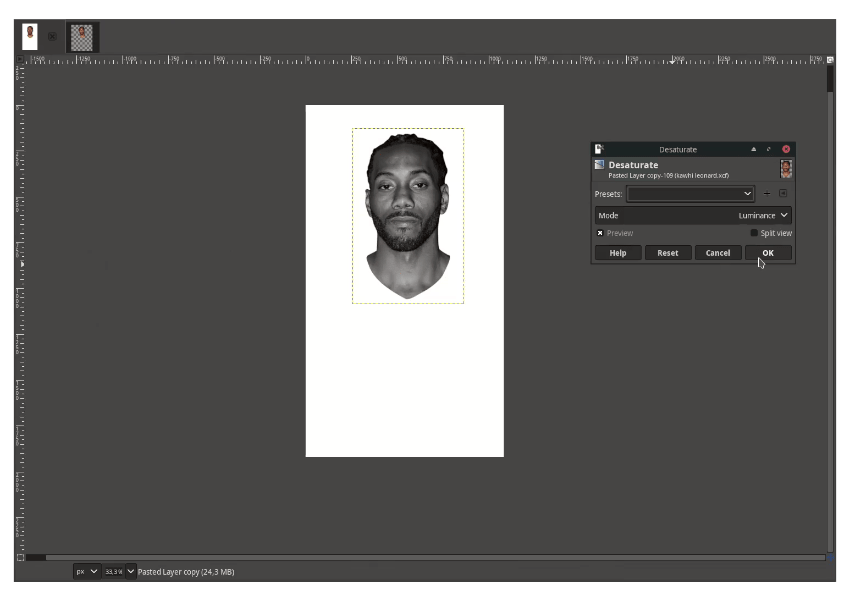
Bring to new Canvas, just drag it. you can scale with Shift+S and rotate it with Shift+R to make it straight.
Make it become black and white color in Colors > Desaturate > Desaturate.

Choose the mode to Luminance, Then click OK.
Step 4
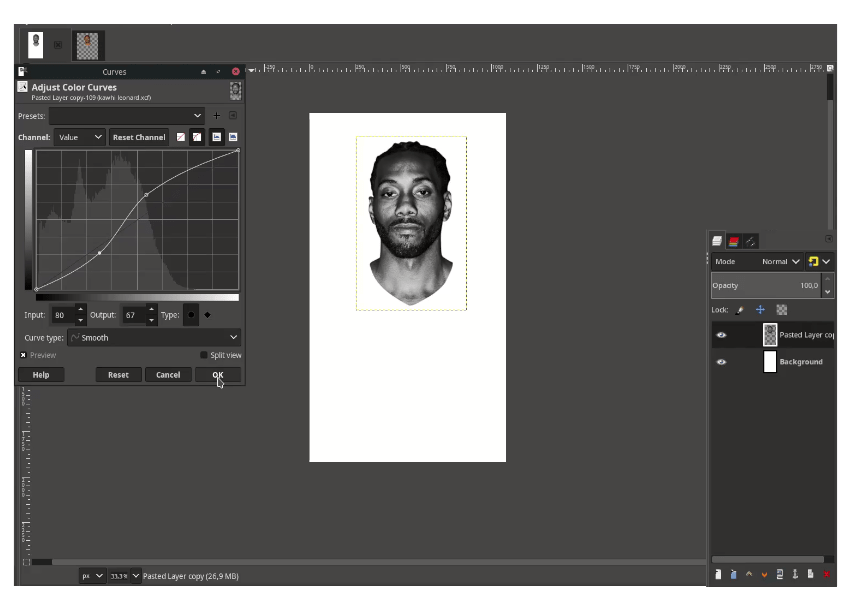
You can use curves to make it more contrast in Colors > Curves.
Step 5
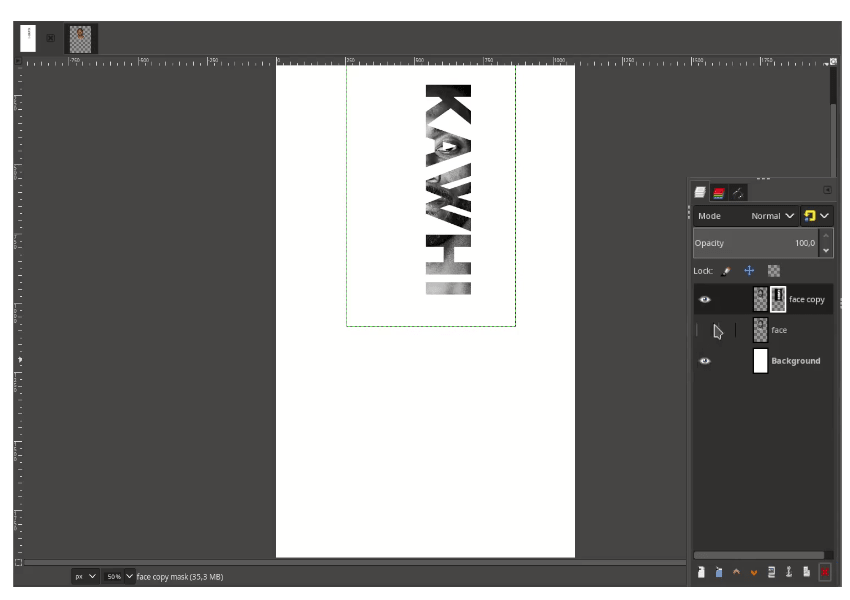
Add the text with Type Tool (T) then Rotate it with Shift+R and place it to the side faces.

Step 6
In the Text layer right click > Add Alpha to Selection.

Duplicate the face layer, then in the duplicated face layer, right click > Add Layer Mask > Selection.

Delete the text layer and you will get this result if you hide the face layer.
Step 7
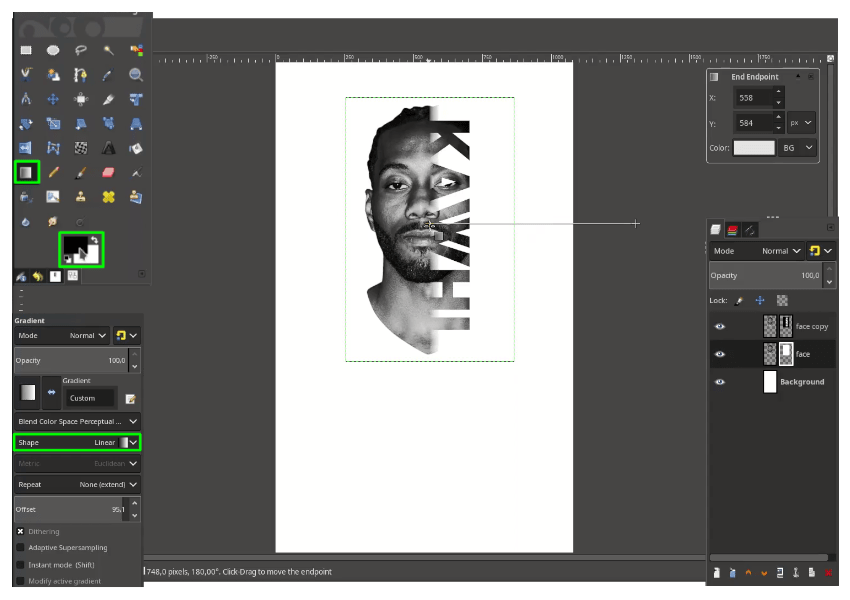
Create a layer mask in the face layer, right-click > Add Layer Mask > White (full opacity) > Add.
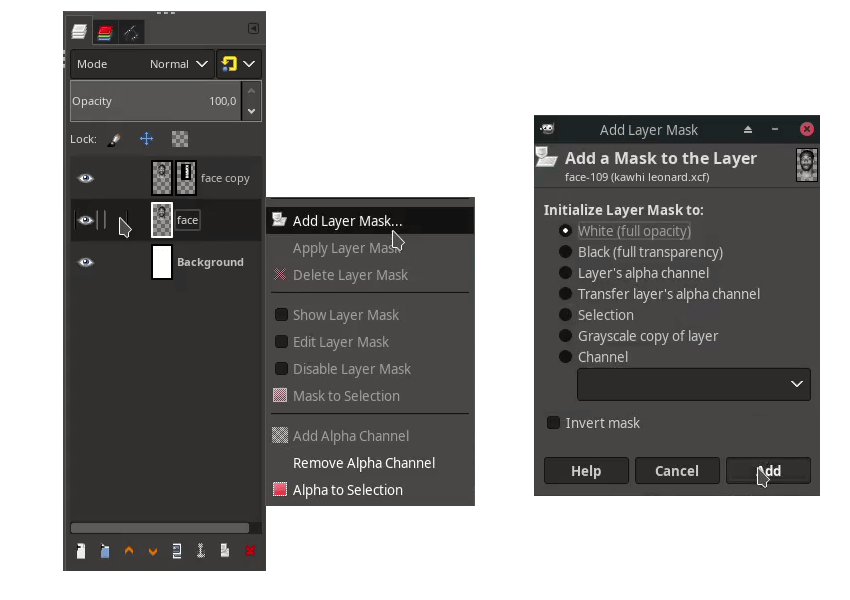
With Gradient tool (G) and the black color as foreground and Linear Shape, just drag to the right from in the face layer mask layer.
Step 8
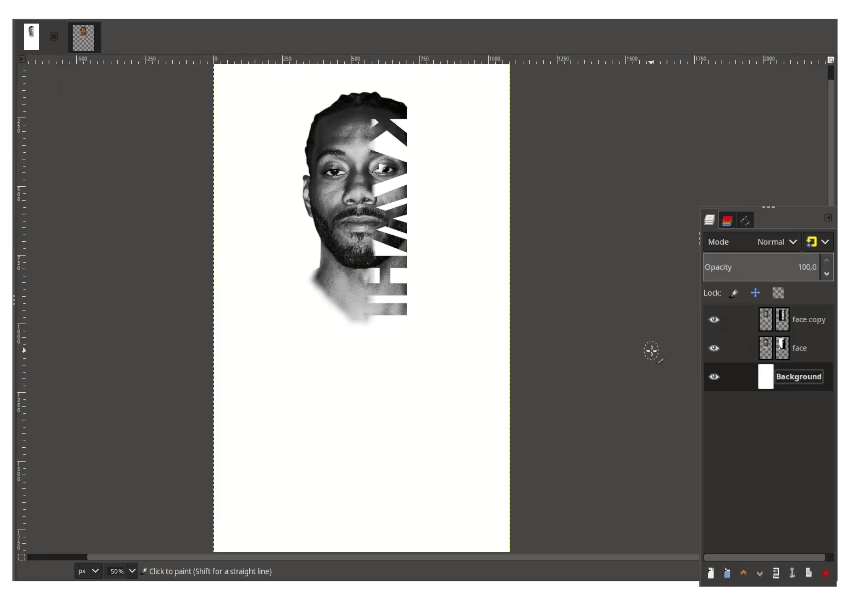
Reveal some parts with Paintbrush Tool (P) and white color as foreground, in the face layer mask, just brush it.

Step 9
Bring the Kawhi png file and adjust the curves in Colors > Curves.

Step 10
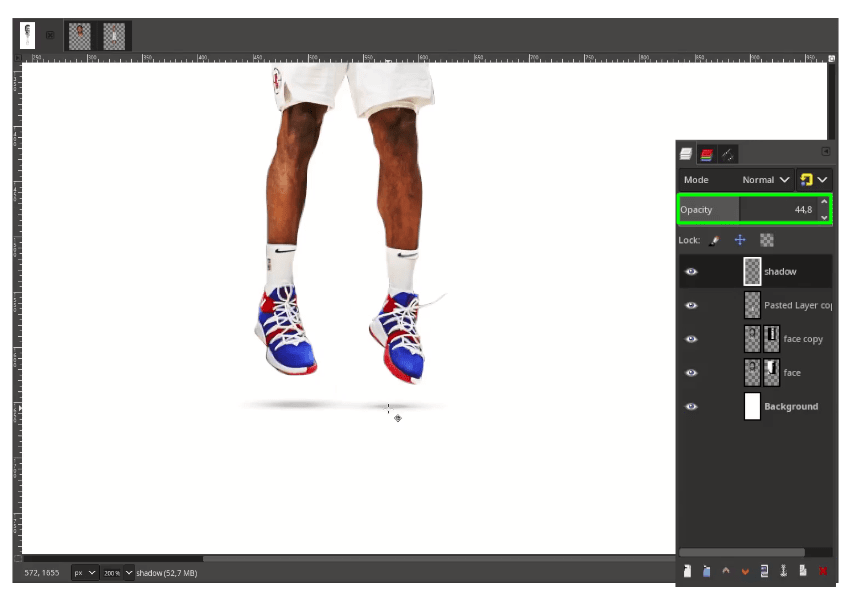
Create a new layer for the shadow, with the Paintbrush Tool (P) again you can increase the brush aspect ratio to make it squeeze.

Then reduce the opacity.
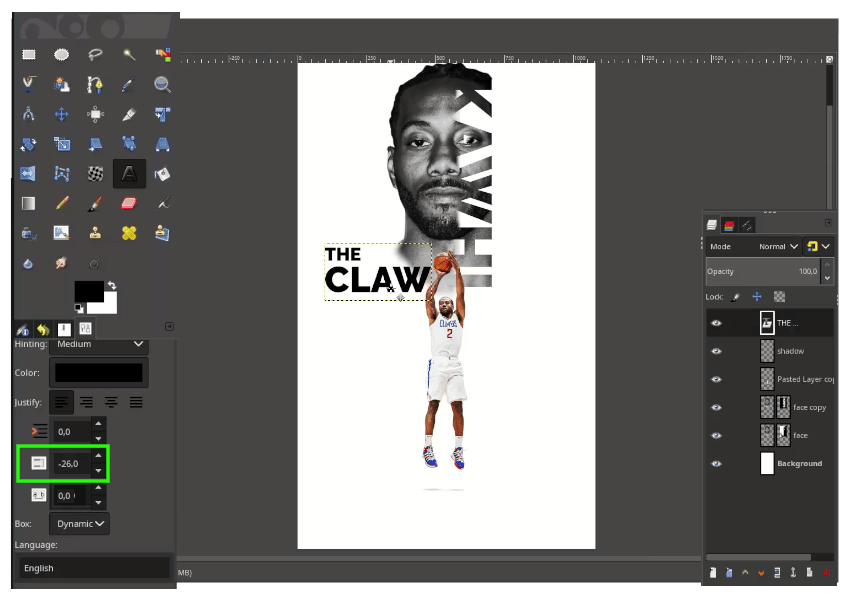
Step 11
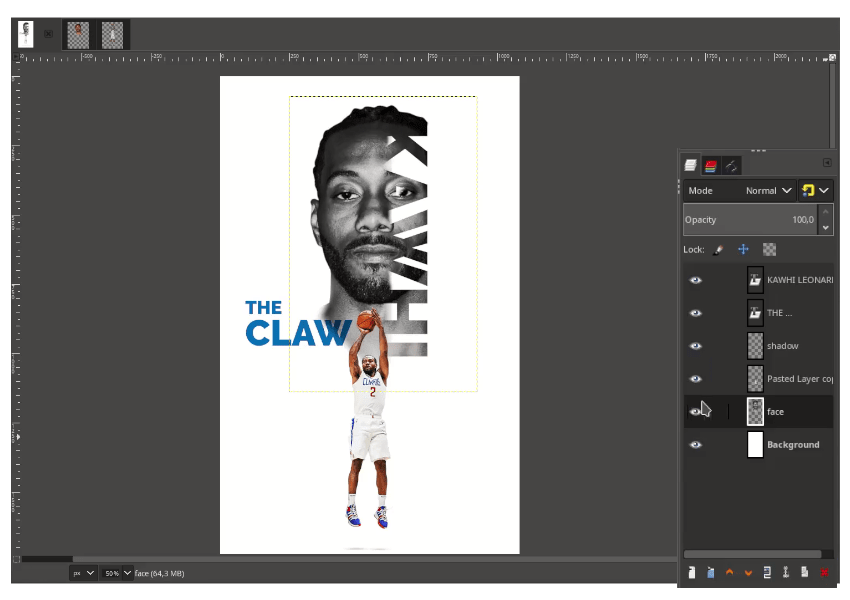
Add the text with the Text tool (T). you can reduce the spacing in the text option.
Change the text layer mode color to #006ab6 and layer mode to Multiply.
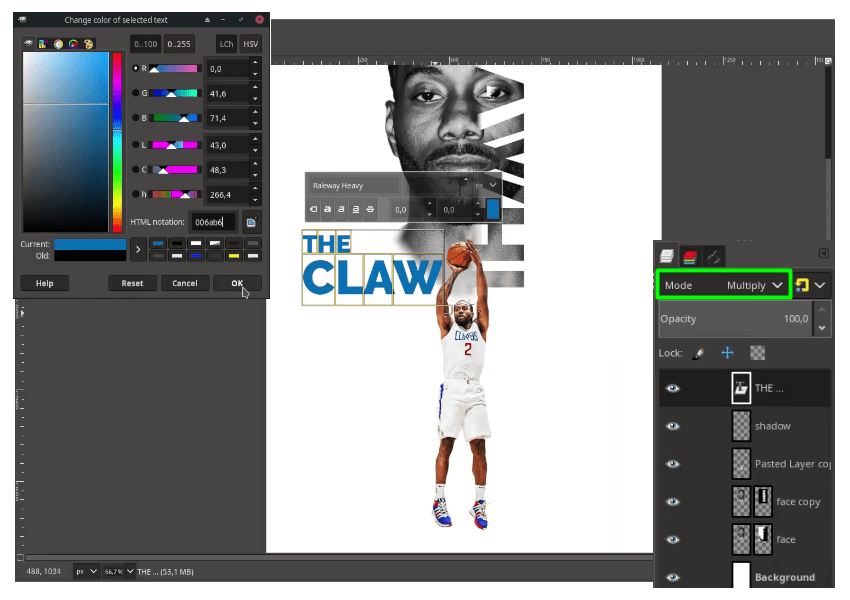
Step 12
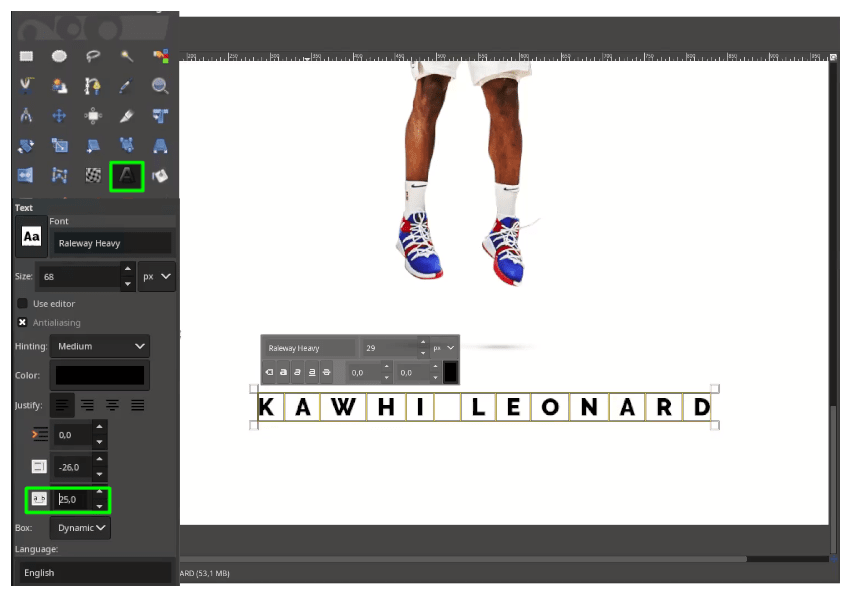
Add text again with the text tool, you can adjust the kerning in text option.
Step 13
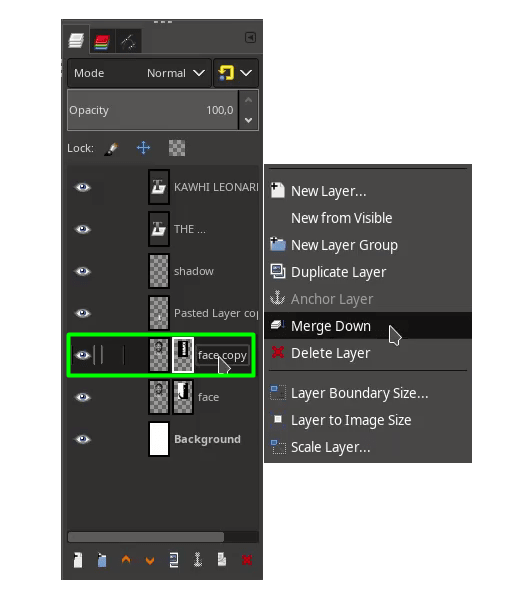
Merge all the face layer with merge down
Note: make sure the face one step above the duplicated.
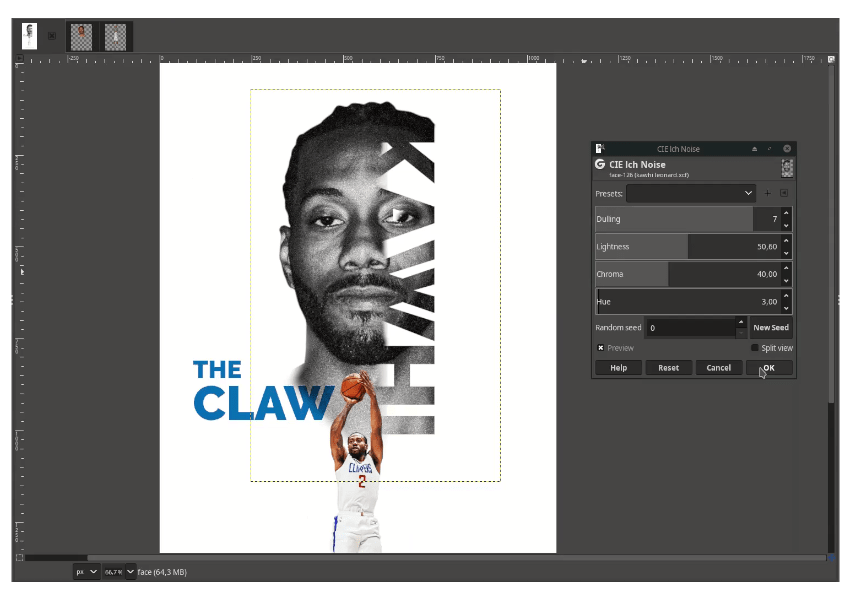
Step 14
Add some noise in Filters > Noise > CIE Ich Noise.

Adjust the setting then click OK.
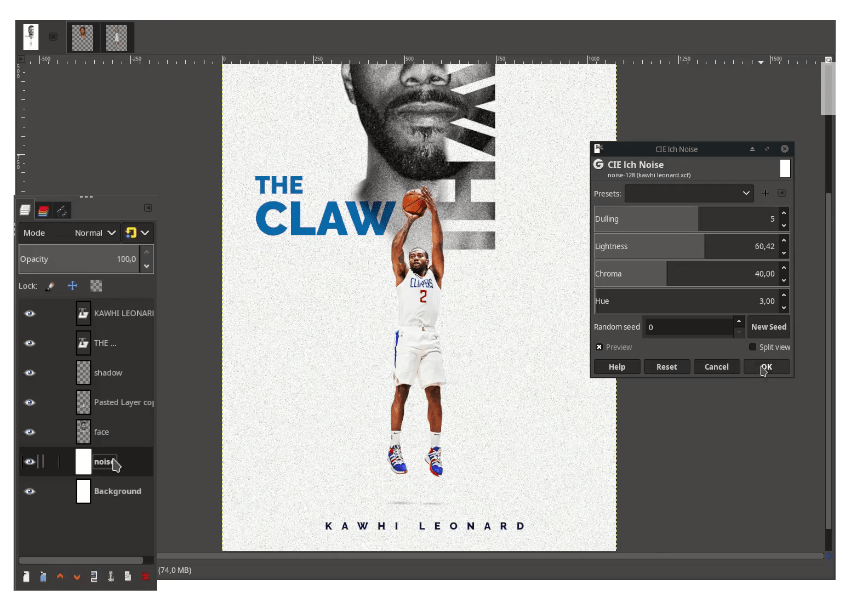
Step 15
Add noise to the background, by duplicating the background layer first.
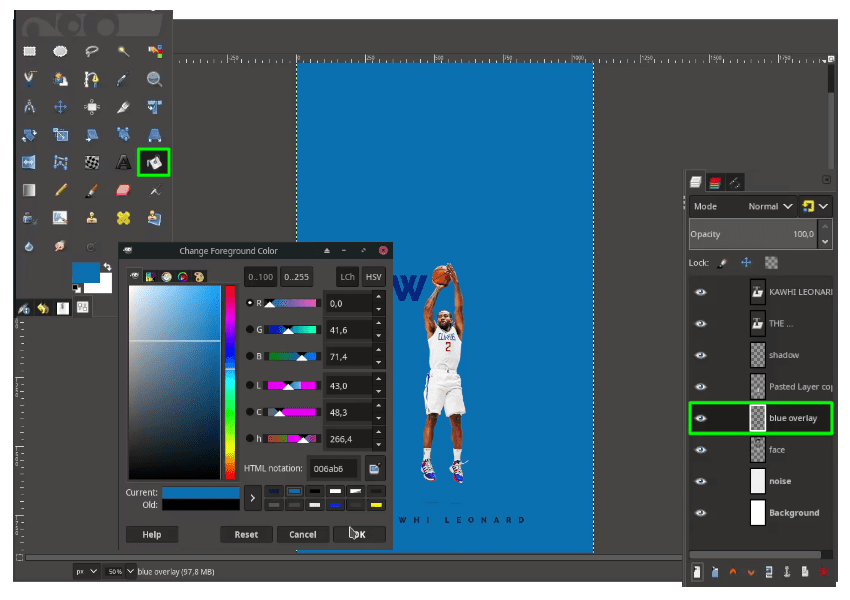
Change the color to blue (#006ab6) fill the canvas with Bucket Fill Tool (Shift+B)
Step 16
Then change the layer mode to Lighten Only and reduce the opacity.
All Set!
I hope you learn how to do this typography poster design in GIMP.
That’s one minute, see you tomorrow!


