In this tutorial, i will show you how to create simple poster ads using gimp and the blurry effect particles.
What you will learn
- How to select with bezier tool
- How to use zoom motion blur
- How to add layer mask
- How to create stroke line
- How to add text
Tutorial Steps
Step 1
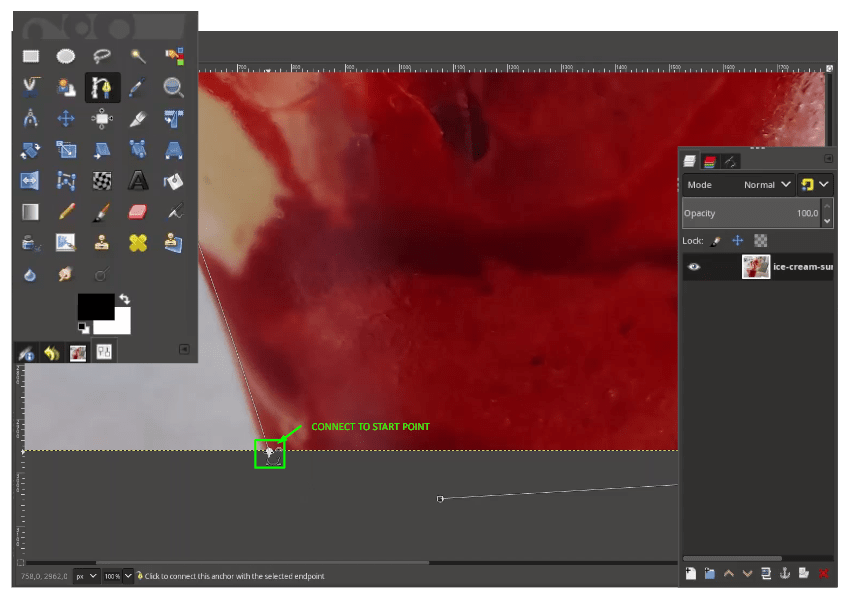
Let’s open the Sundae image in File > Open then choose the images. Select the sundae only with Bezier Tool (B).
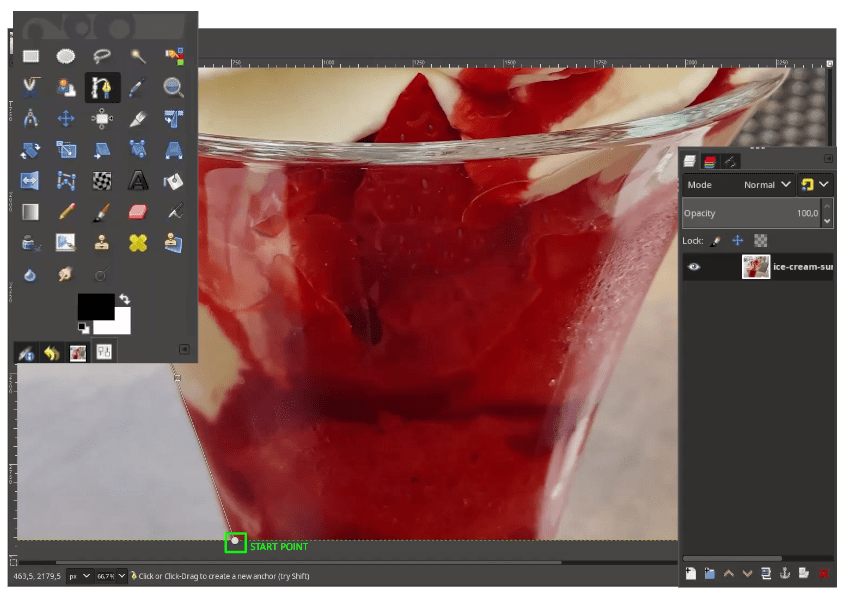
Continue selecting the sundae.
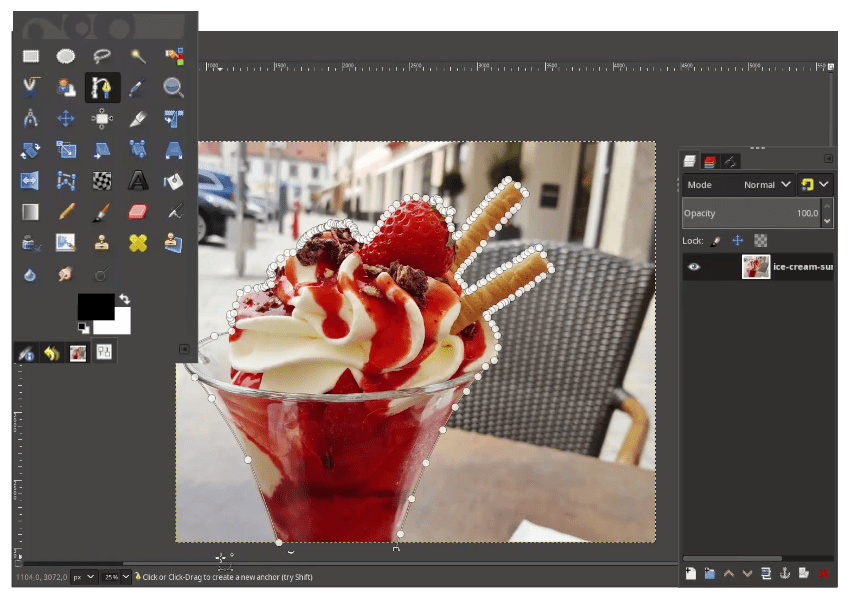
When almost finished, connect to the start point by holding Ctrl until you see the chain icon then click and press Enter.
While in the selection, press Ctrl+C to copy and Ctrl+V to paste, it will create a Floating selection just click create a new layer.
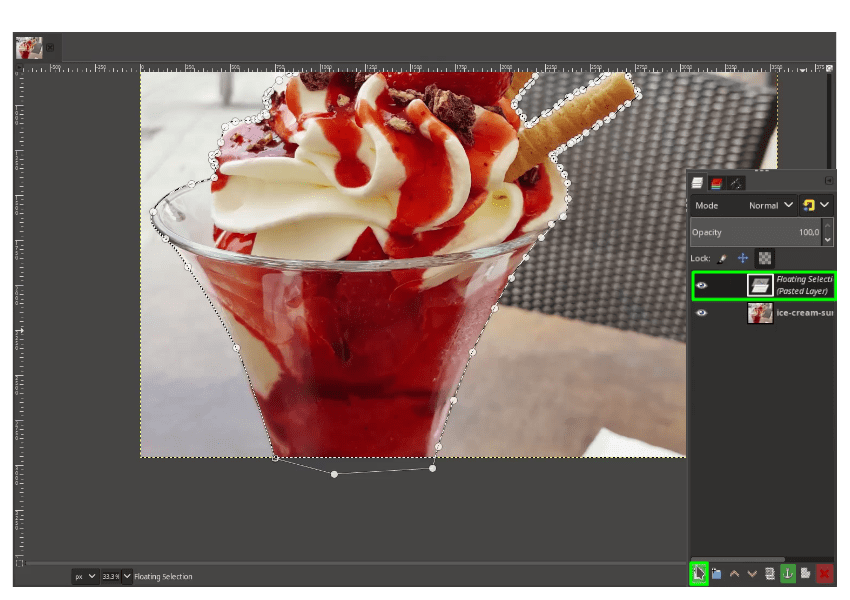
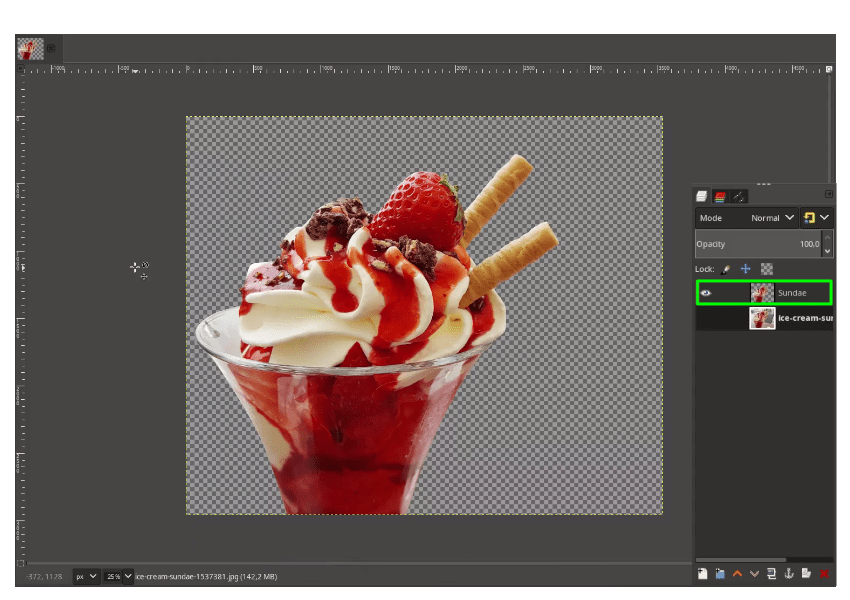
Hide the original sundae layer to see the result:
Step 2
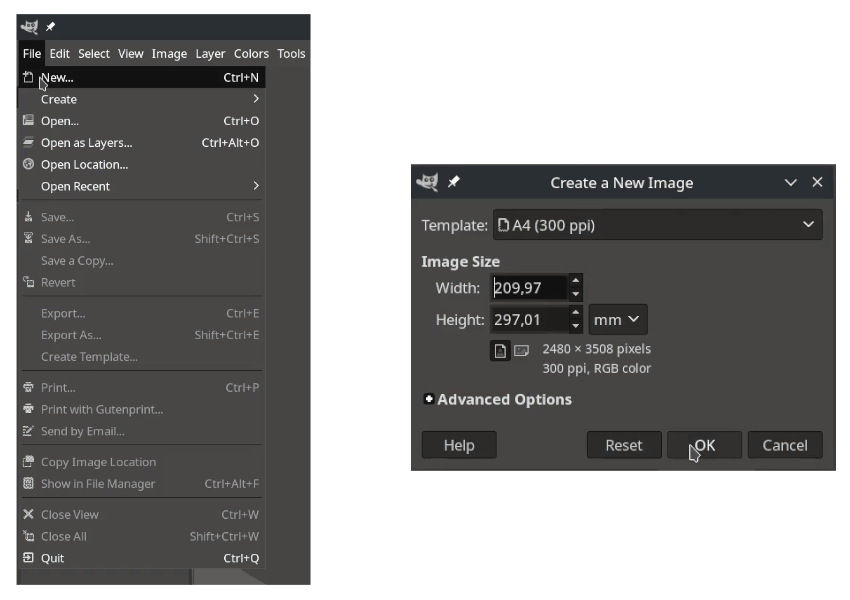
Create a new standart poster A4 template in File > New.
Step 3
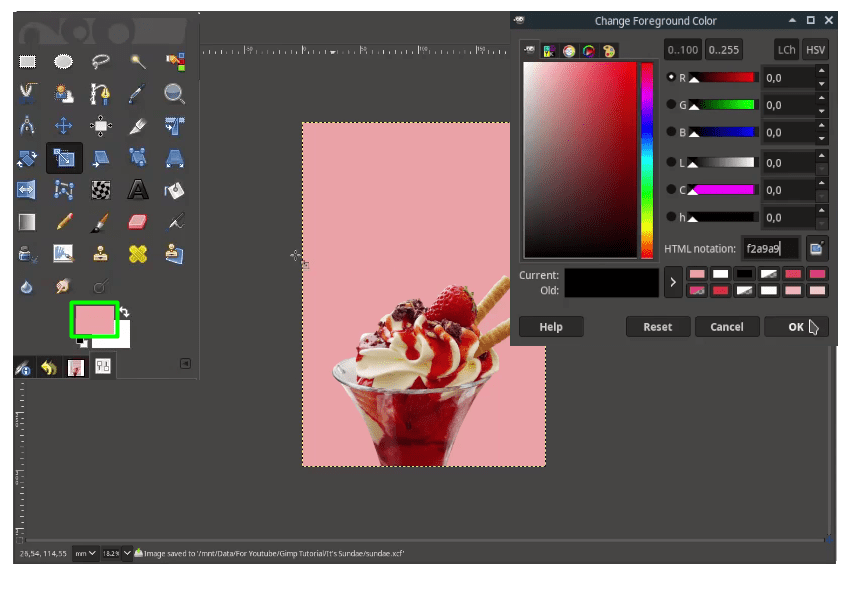
Bring the sundae layer to the new canvas by dragging the sundae layer to the new canvas. And change the color of the background to pink (#f2a9a9) in Edit > Fill with FG Color.
Note: Or you can click Bucket Fill Tool (Shift+B) to fill the background color.
Step 4
Add the milk png in File > Open as Layers then choose the images. Press Shift+S to scale it up and Shift+R to rotate.
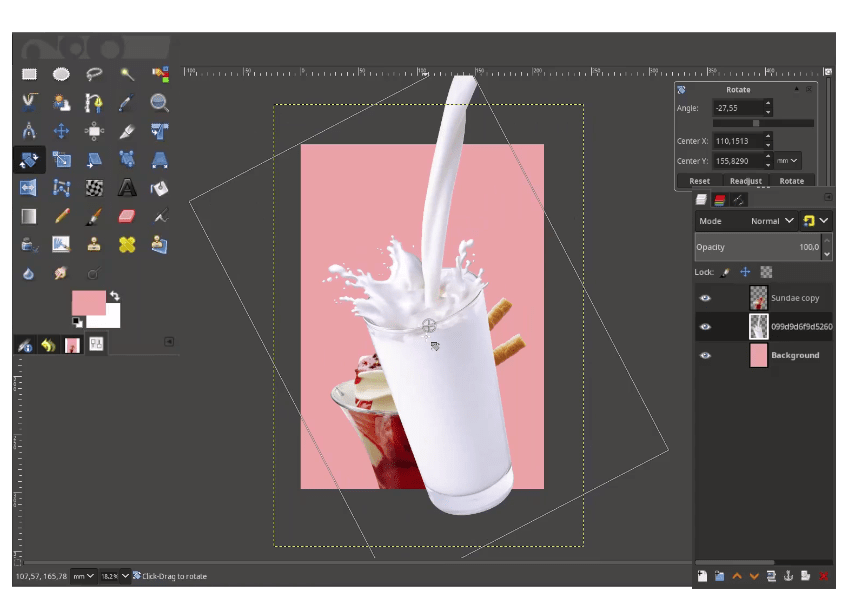
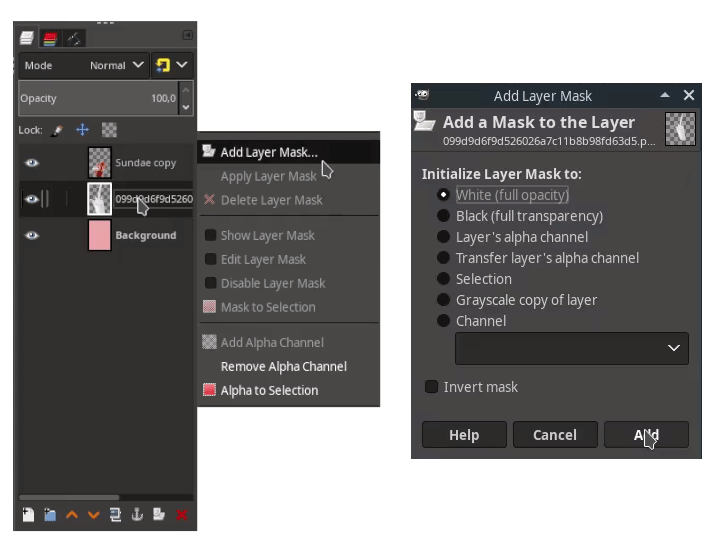
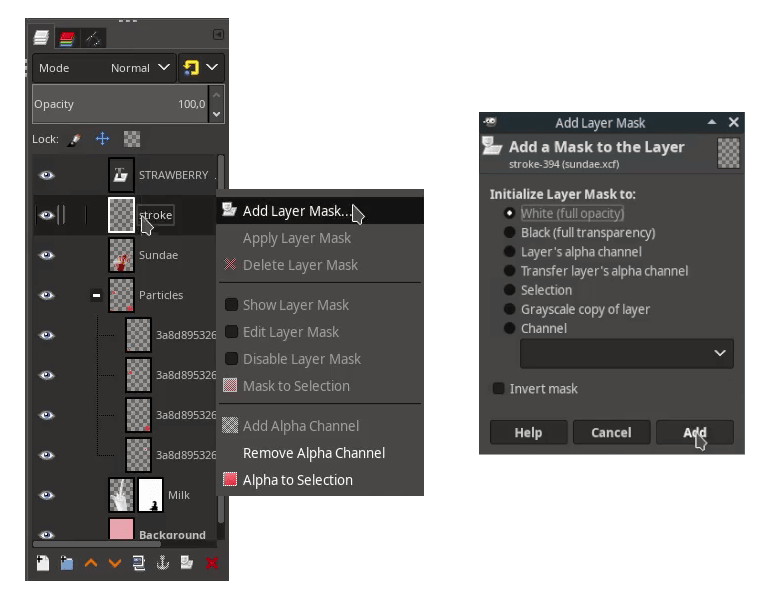
Add a layer mask to milk, by right click > Add Layer Mask > White (full opacity) > Add.
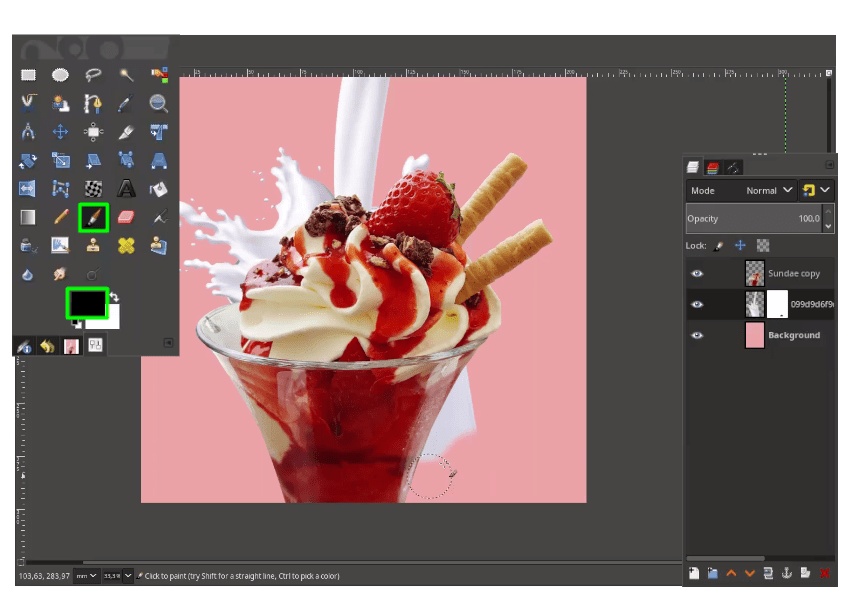
Hide the glass with Paintbrush Tool (P) and black color as the foreground color.
Step 5
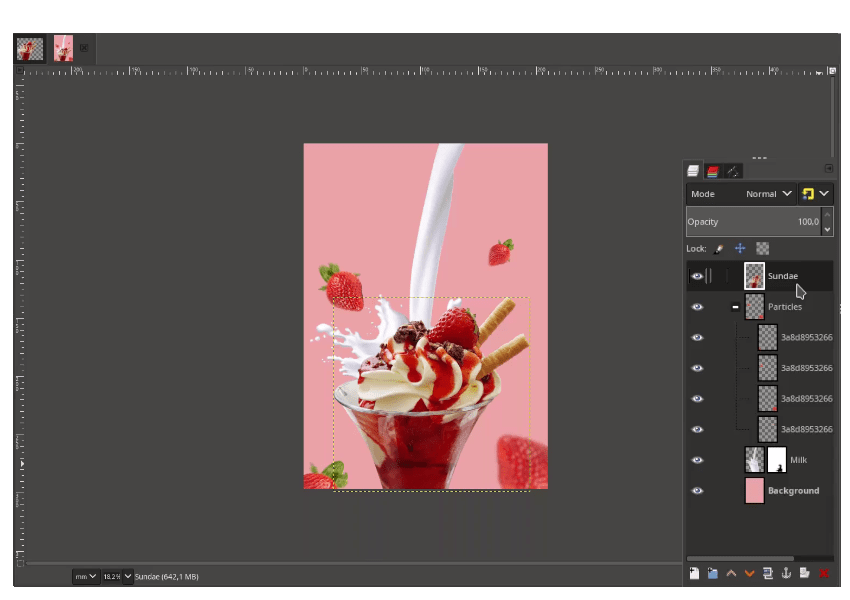
Create a strawberry particle, by creating a new layer group then name it “Particles”.
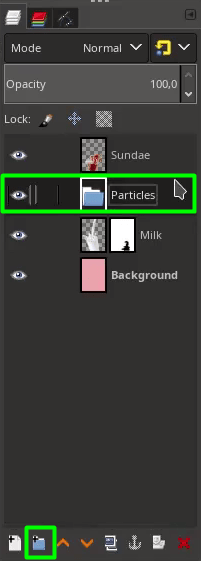
Open the strawberry png and place the layer inside the Particles. Add a zoom motion blur filter in Filter > Blur > Zoom motion blur.
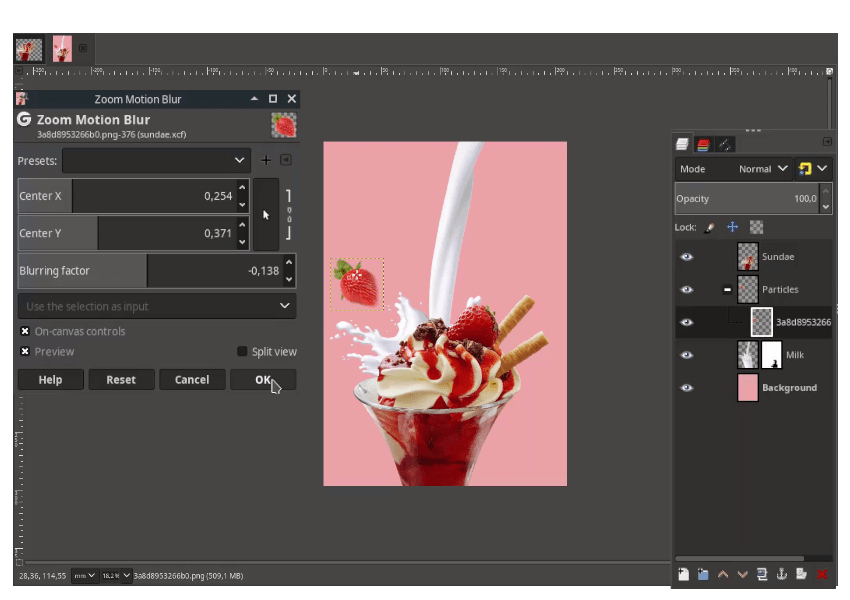
Add more strawberry png and you can use any blur filter.
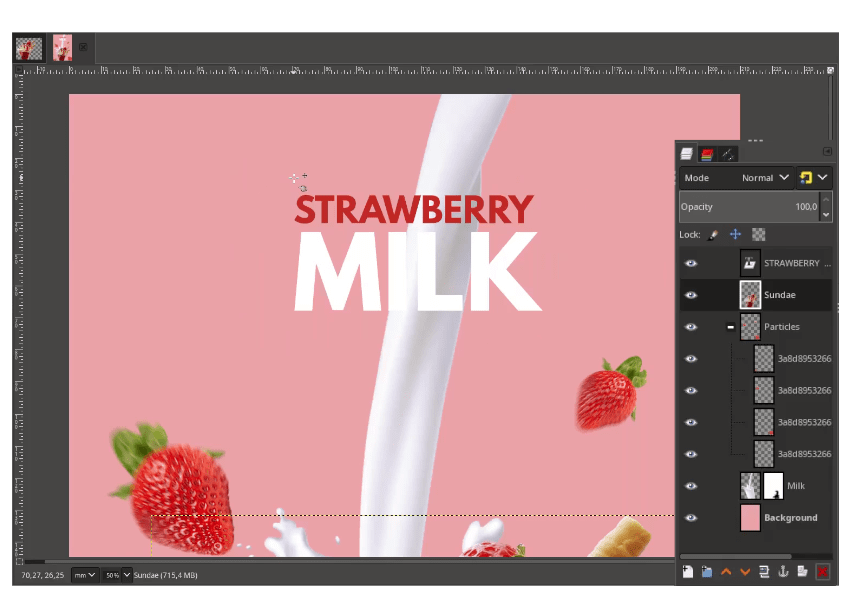
Step 6
Add a text with Text Tool (T) and you can reduce the spacing in Text option.
Note: increase the text size by selecting 1 word and change the size number manually. don’t use scale, it will lose the quality of the font.
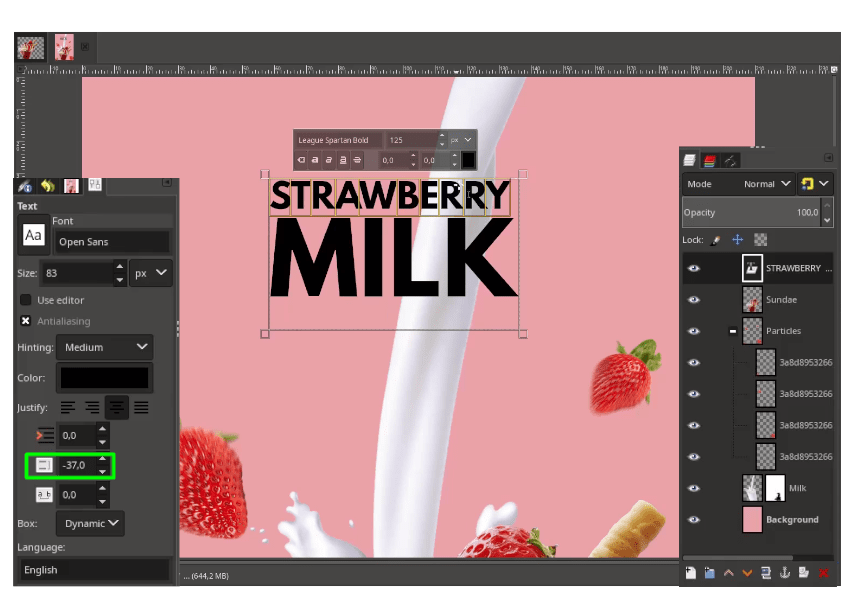
And change the text color by selecting 1 word then change the color (#cd3722).
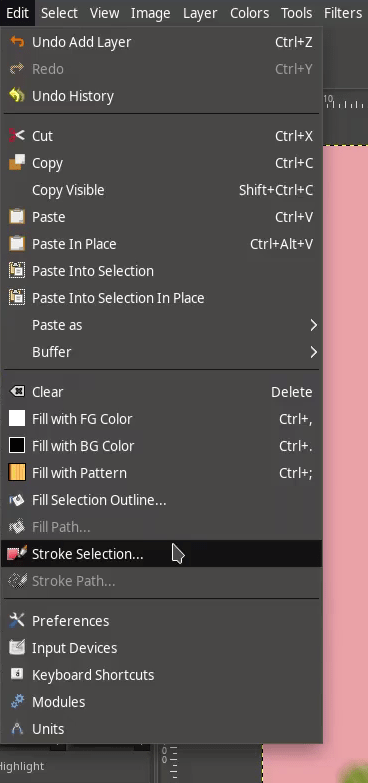
Step 7
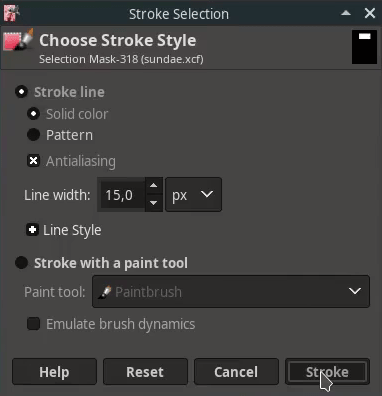
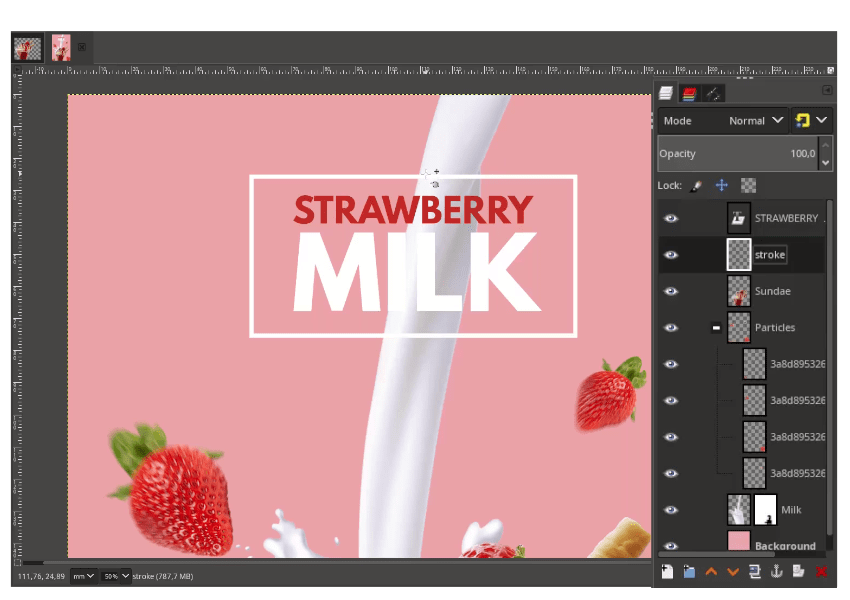
Next, create a stroke by creating a new layer and name it “Stroke”. With Rectangle Tool (R), make a square selection to the text.

Go to Edit > Stroke Selection > Line width: 15px > Stroke.
Result:
Step 8
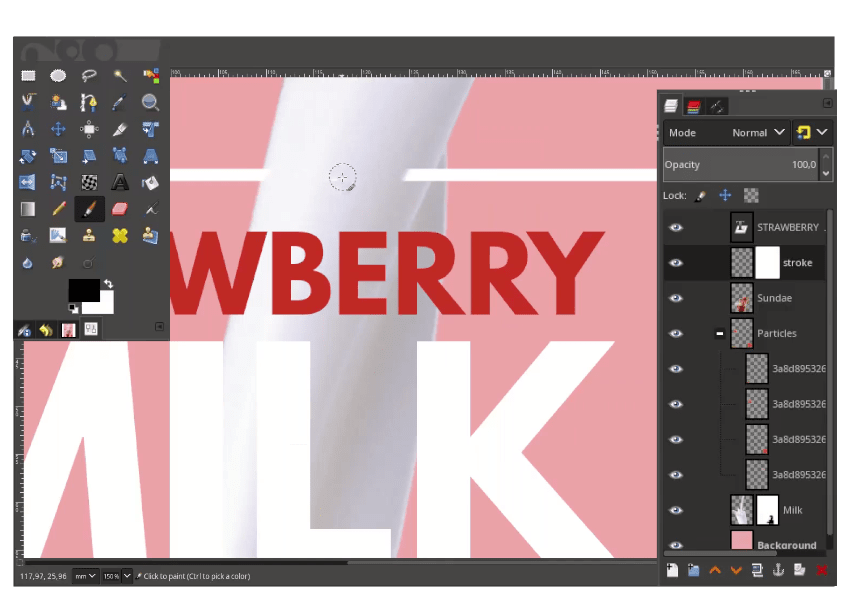
Add a layer mask in stroke layer by right click > Add Layer Mask > White (full opacity) > Add.
Brush some parts of the stroke with Paintbrush Tool (P).
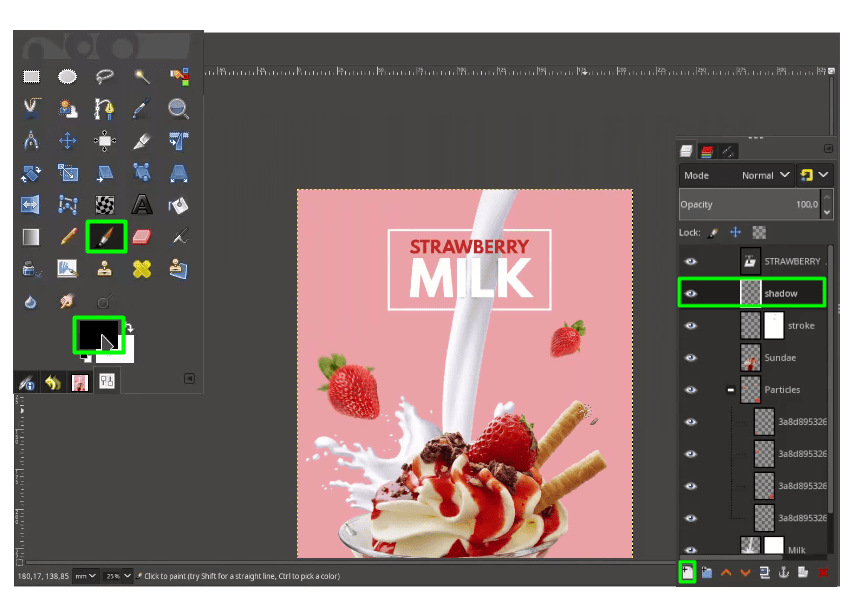
and create a new layer for shadow, with Paintbrush Tool (P) and black color as foreground, brush in the shadow layer. Result:
Step 9
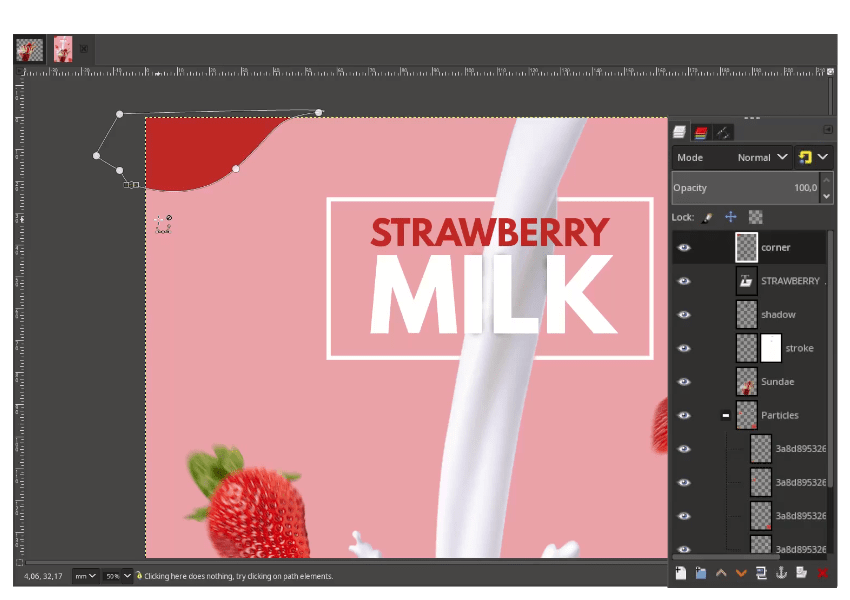
Create a new layer for the corner and with Bezier Tool (B) to create the shape.
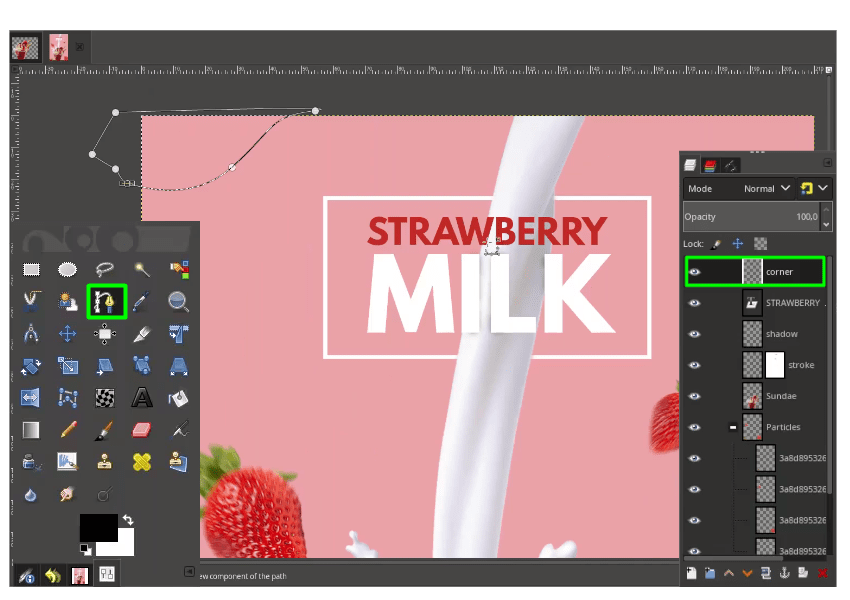
Fill it with color in Edit > Fill with FG Color (#cd3722).
Step 10
Add a text with Text tool (T) and adjust the spacing in text option.
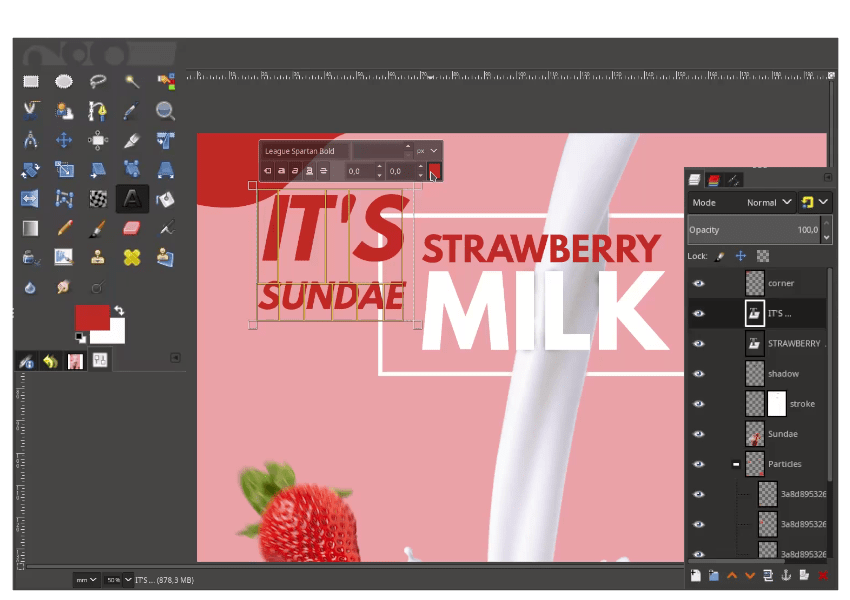
Resize the text size, make it fit to the shape.
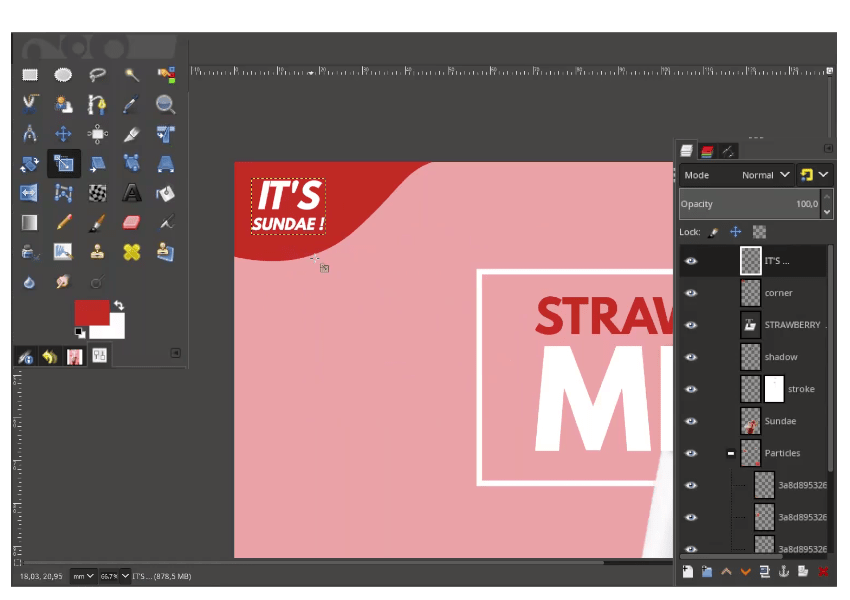
Result:
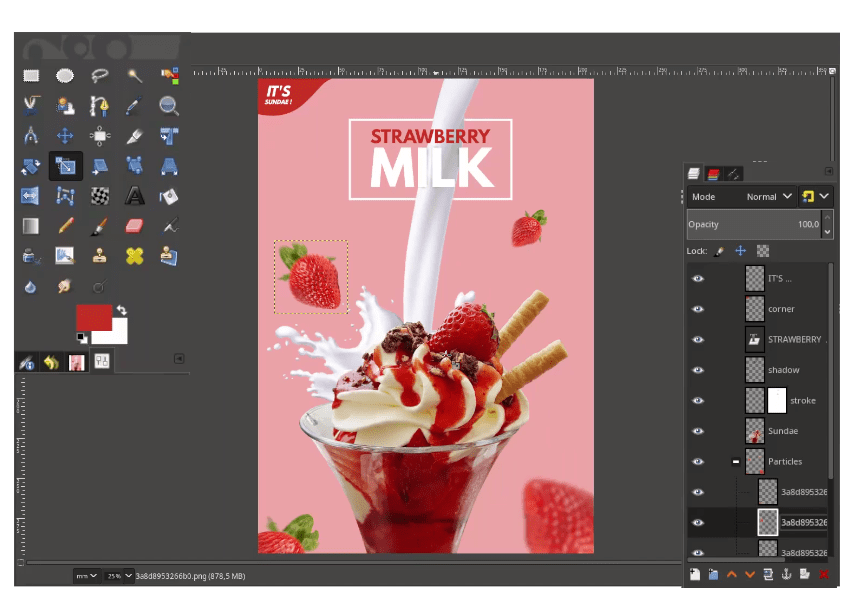
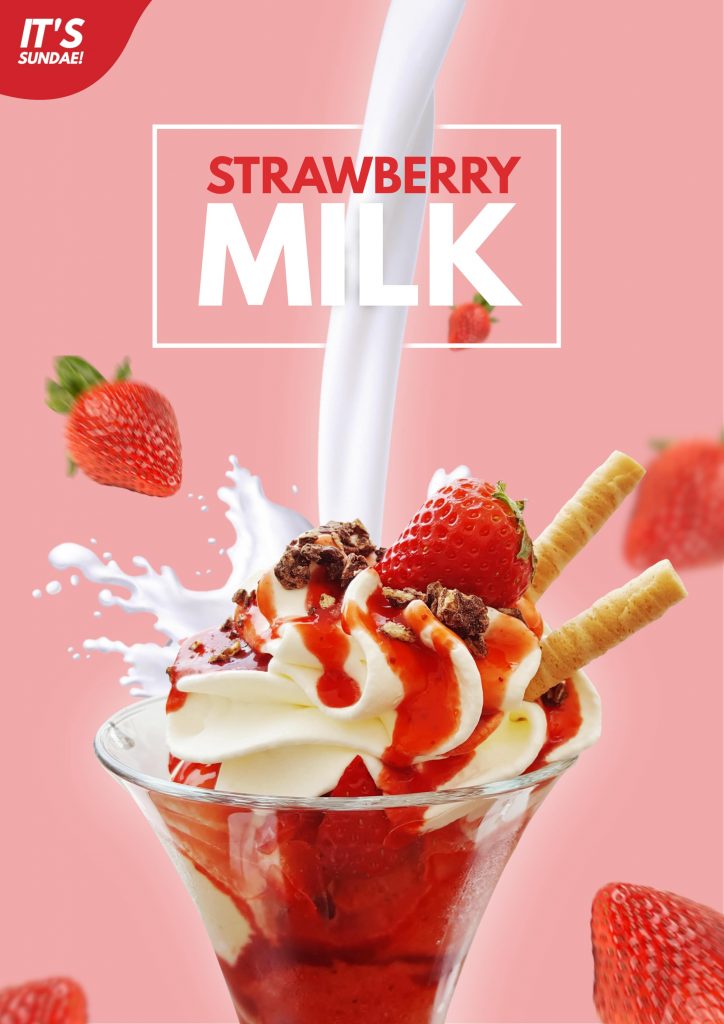
Your design is Ready!
I hope you learn something new about how to create a dessert poster design in GIMP.