Hello everyone! in this tutorial we’re going to create Abstract Geometric Website UI Design. Just create some basic shape and you can add some object in the front of it or Substract with the other shape.
What you will learn
- Enabling Snap
- Enabling Snap page to the border
- Adjusting page size
- Changing the color with dropper tool
- Divide object with Division
- Aligning object to the Center
- Generate Lorem Ipsum text with Inkscape Extension
- Using Grid Ruler
- Changing the color of pattern
- Make a Clipping mask
- Rounding rectangle corners
Tutorial Steps
Step 1
Create a new canvas with size of document 1920×1080 px then with rectangle tool give it a bCreate a new canvas with the size of document 1920×1080 px then with rectangle tool give it a background.

Step 2
Change the color to Trypan Blue (#3a0ca3ff), divide the width with six and change the height to the same size to create a square 320×320 px.

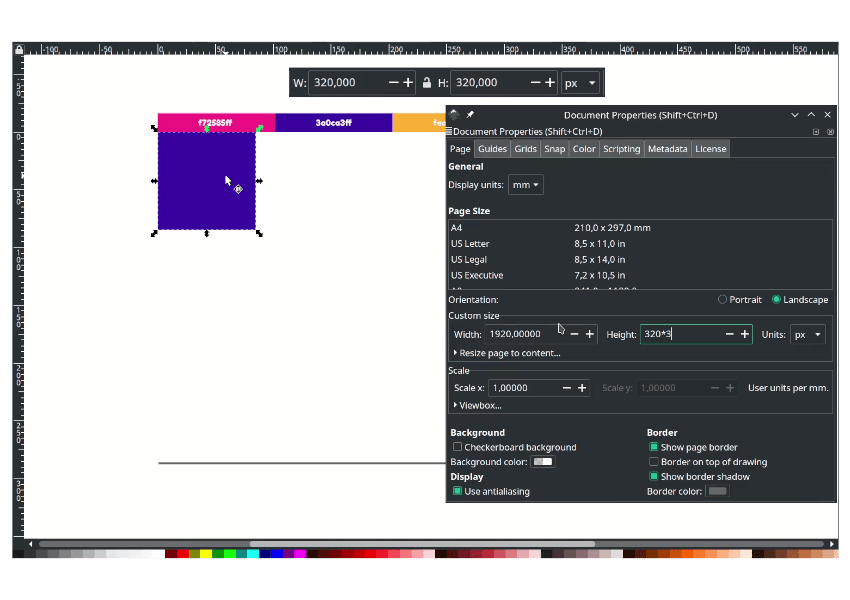
Change the document size height to 960px = (320*3 px) in Document Properties (Shift+Ctrl+D).

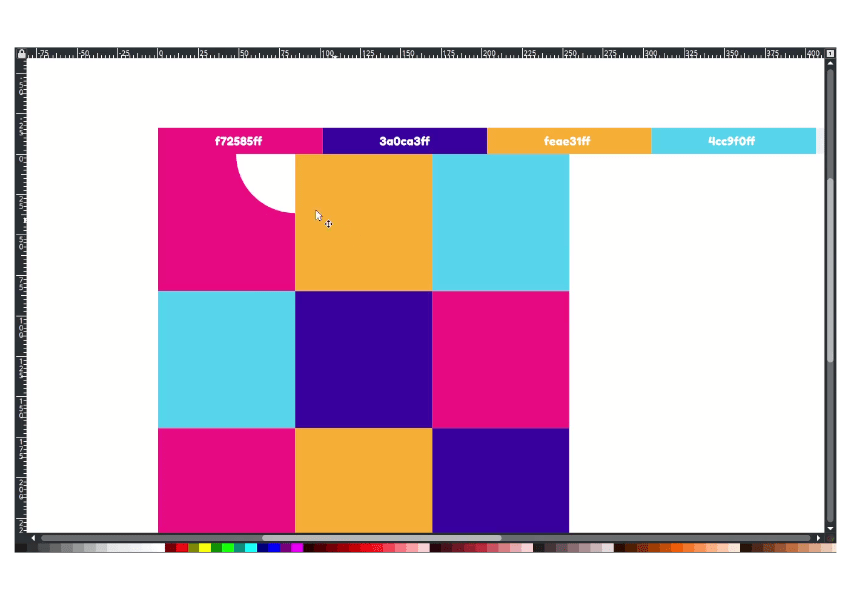
Duplicate the circle with CTRL+D to 9 squares.

Step 3
With dropper tool (D) change the color to as shown below:

Step 4
Create a circle and move it to the lower back. Then duplicate the rectangle and create a clipping mask by right click > set clip.

Result:

Step 5
Create a circle in the middle of the square with circle tool.

Step 6
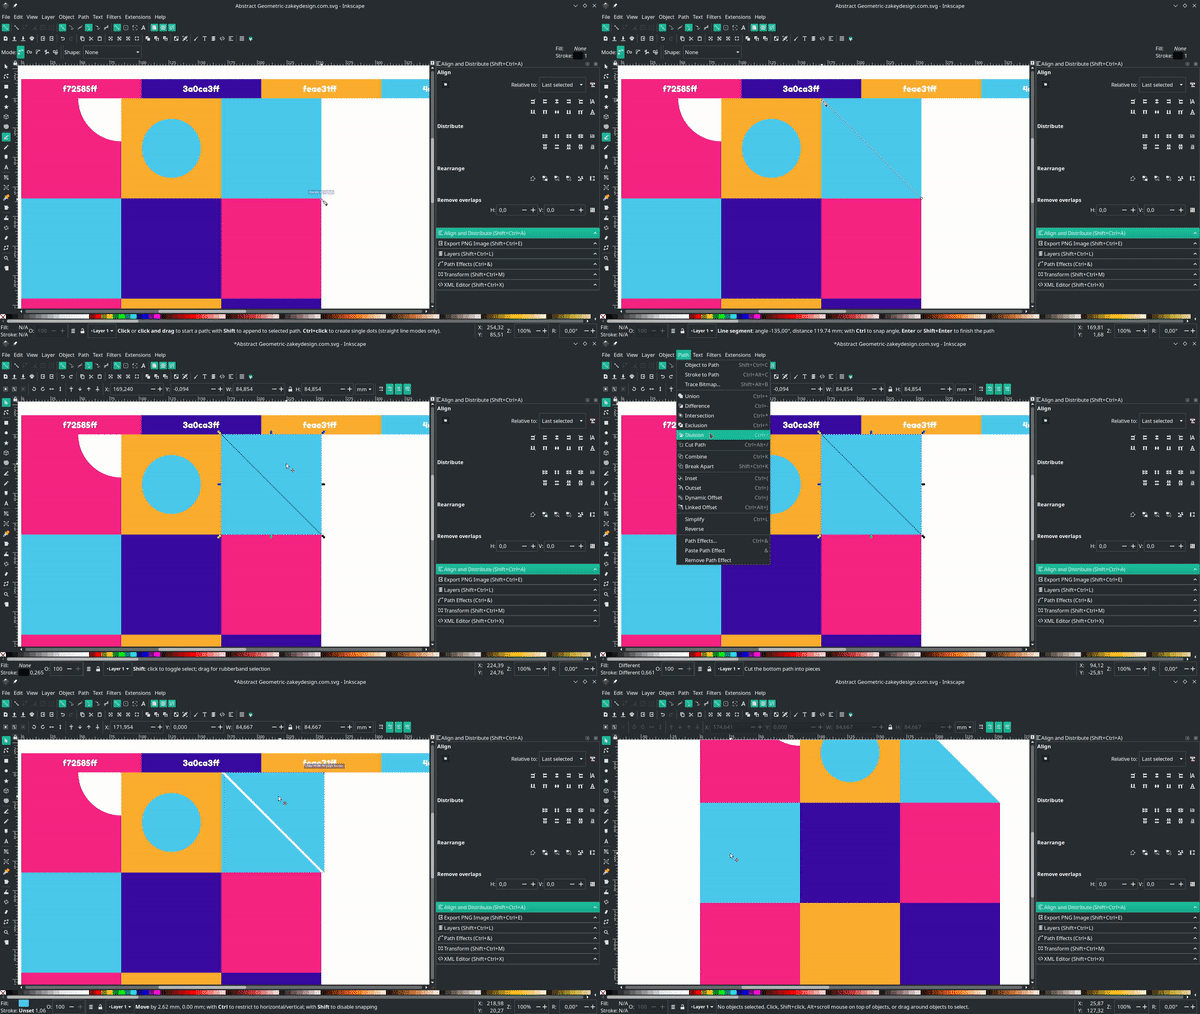
Now, cut in half the square with the bezier tool (B), then select the line and the rectangle. Create a slice with Path > Division. Delete other parts.

Step 7
Create a dotted circle with 3×3 with circle tool then duplicate with CTRL+D and arrange it.

Step 8
Slice the square with bezier tool (B) (see step number 6).

Change the color to Flicker Pink (#f72585ff) Flip the sliced square by pressing H to flip horizontally and move it to lower back.

Step 9
Create a square inside that square and change the color to Vivid Sky Blue (#4cc9f00ff).

Step 10
Cut the square diagonally with bezier tool (B).

Change the color to Trypan Blue (#3a0ca3ff) and fill with circle in the center of the two isoceles triangle.

Step 11
Create a circle with white color, then duplicate the rectangle with Ctrl+D. Then create a clipping mask by right click > set clip.

Create another small circle, duplicate the rectangle, and set a clipping mask.

Move to the clipped object to the lower then change the color with the dropper tool (D).

Step 12
Now the last thing, we are going to give pattern fill to the shape. duplicate the shape with Ctrl+D.

In Fill and Stroke menu (Shift+Ctrl+F), click the pattern icon then change the pattern fill to Wavy.

to change the pattern colors, in Object > Pattern to Objects.

Then you change the color as you want then drag the handle to enlarge the pattern. Change it to pattern again in Objects > Objects to Pattern.

Make a clipping mask with the shape by right click > set clip.

Add more patterns to other shapes and add text elements.

Ta-da, you made it!
It’s fun to play with the shapes and create a pattern effect as fill to the shapes. We learned how to change document size with math operation and change the pattern color. Thank you for reading, have a great day.

Tutorial Assets
Credits
- Inspired by Mike – Ray Brown Contemporary Abstract Art


